I like original as much as the next guy.. but the metal floor wreckers have to go.. They are all broken and one is missing. Nice they put a metal bar at the bottom rear for the 2-wheelers.
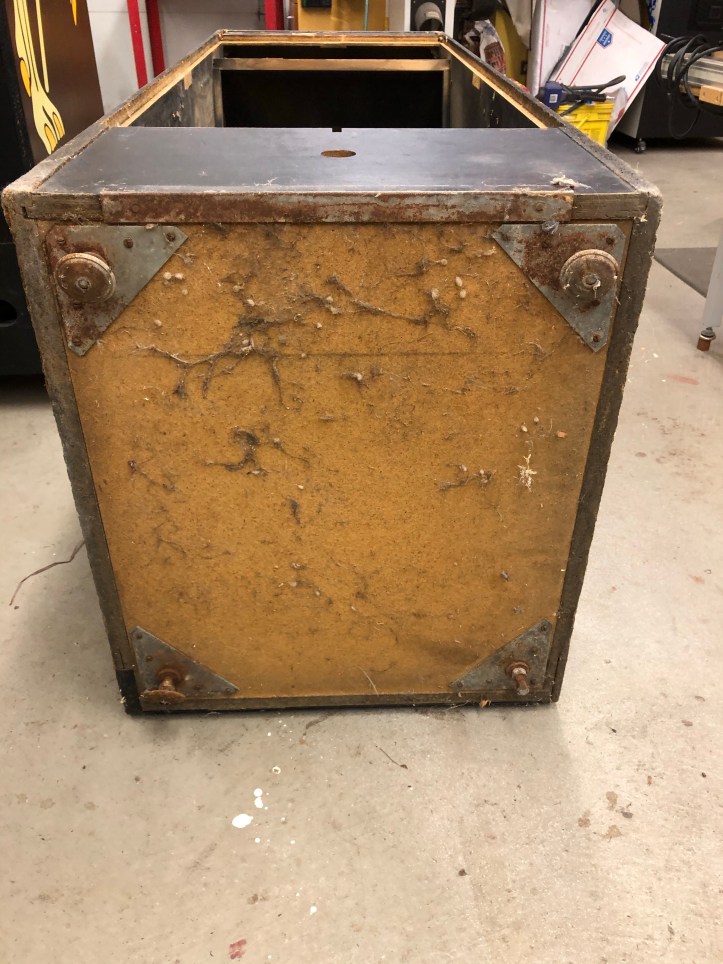

One of them was seized. The bolt snapped on both sides of the plate trying to remove it. I’m not cheap – but I did want to save the original plates. I drilled and re-tapped the hole because.. well why not.

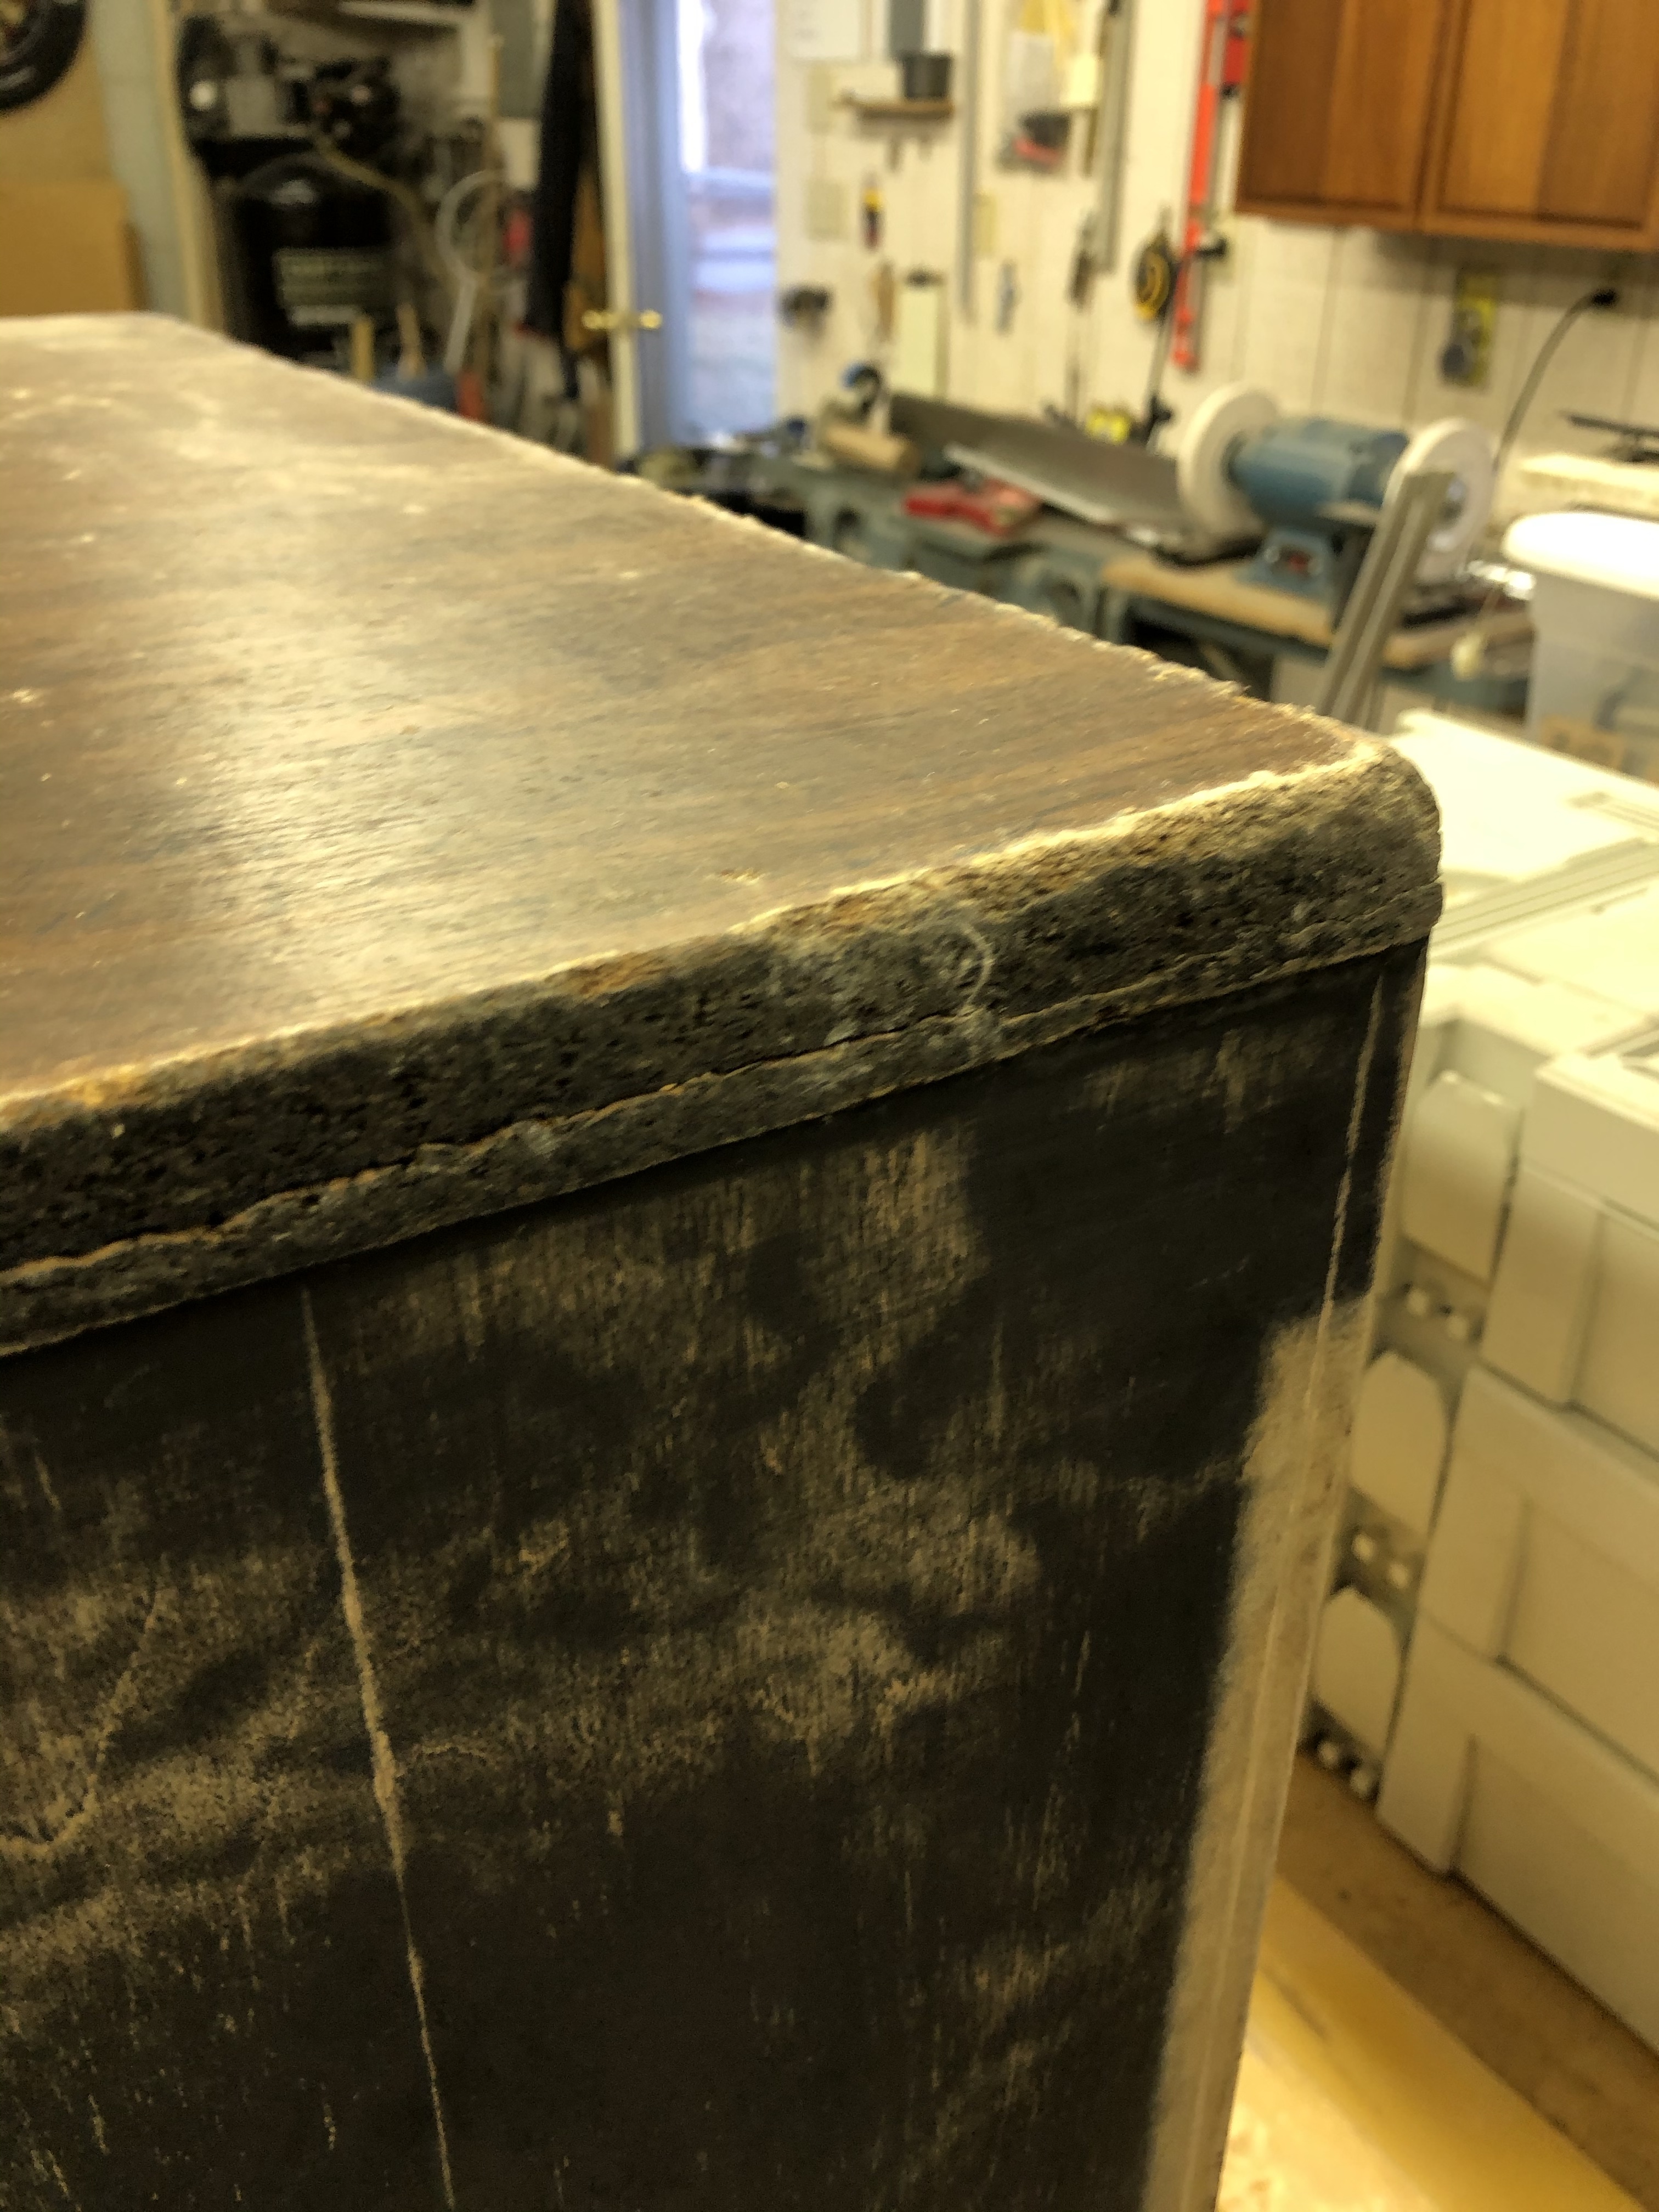
I tried a couple methods to get the vinyl off. Here is heat gun and putty knife.. It was way too slow – it would have taken hours just to get this side cleaned off..
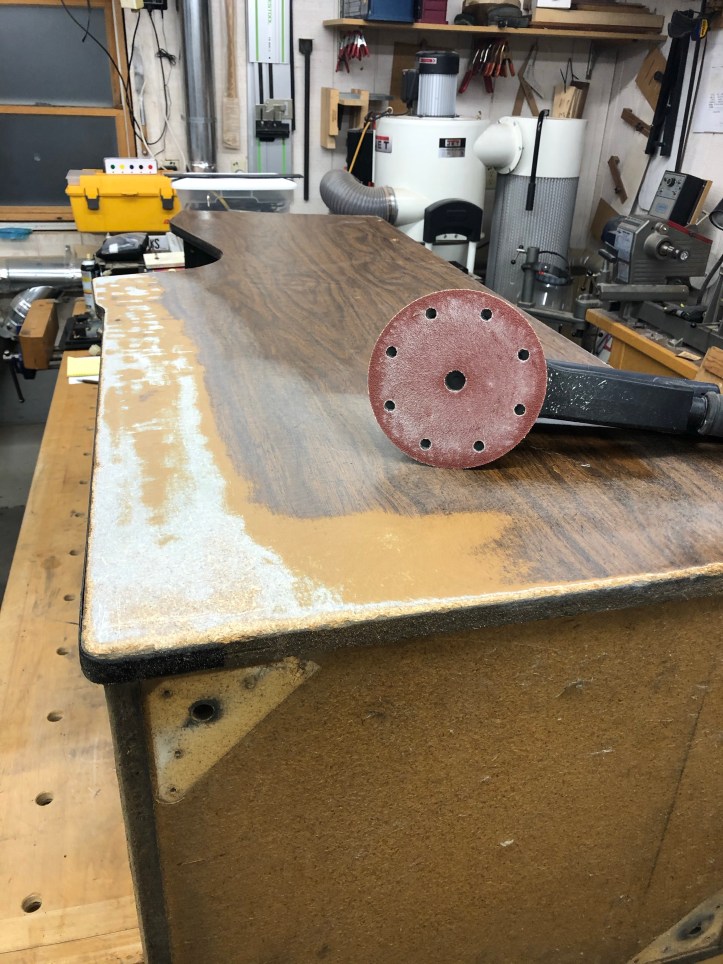
40 grit paper and an aggressive sander worked much better than expected. This stuff is so old it’s very hard and did not gum up the paper. When I use very aggressive paper – I never try to ‘finish the job’ with it. I get 70-80% of the material removed as evenly as I can and then switch to a higher grit to finish it off (I used 80g). Prevents me from cutting into the board too much and having to fill divots, etc.

When I’m fixing particle board expansion like this I always leave the T-molding in place. Particle board expands from the edge under the T-molding since its the easiest path for moisture penetrate. Paint, side art and vinyl pretty much keep the center flat areas of the sides from expanding. The most ‘swollen’ area is at the lower front and rear corners since they have the most edge exposure. When you look at the edges – the particle board will be wider than the T-molding. Here you can see where I sanded it back down to the T-molding. Check for flatness as much as you can. It will never be 100% perfect, but you can get it very close.

I made a long board years ago for boat work. If you sand and get uniform scratches across the cabinet – its flat! I sand diagonal one way, then come back the opposite way and look for the scratches to cross. You will easily find high spots and low spots.

Long boarding along the T-molding will take out any waviness along the edges. Easy to check this way. If you sand INTO the T-molding – you’ve gone to far – stop! Keep a brush handy and check frequently.

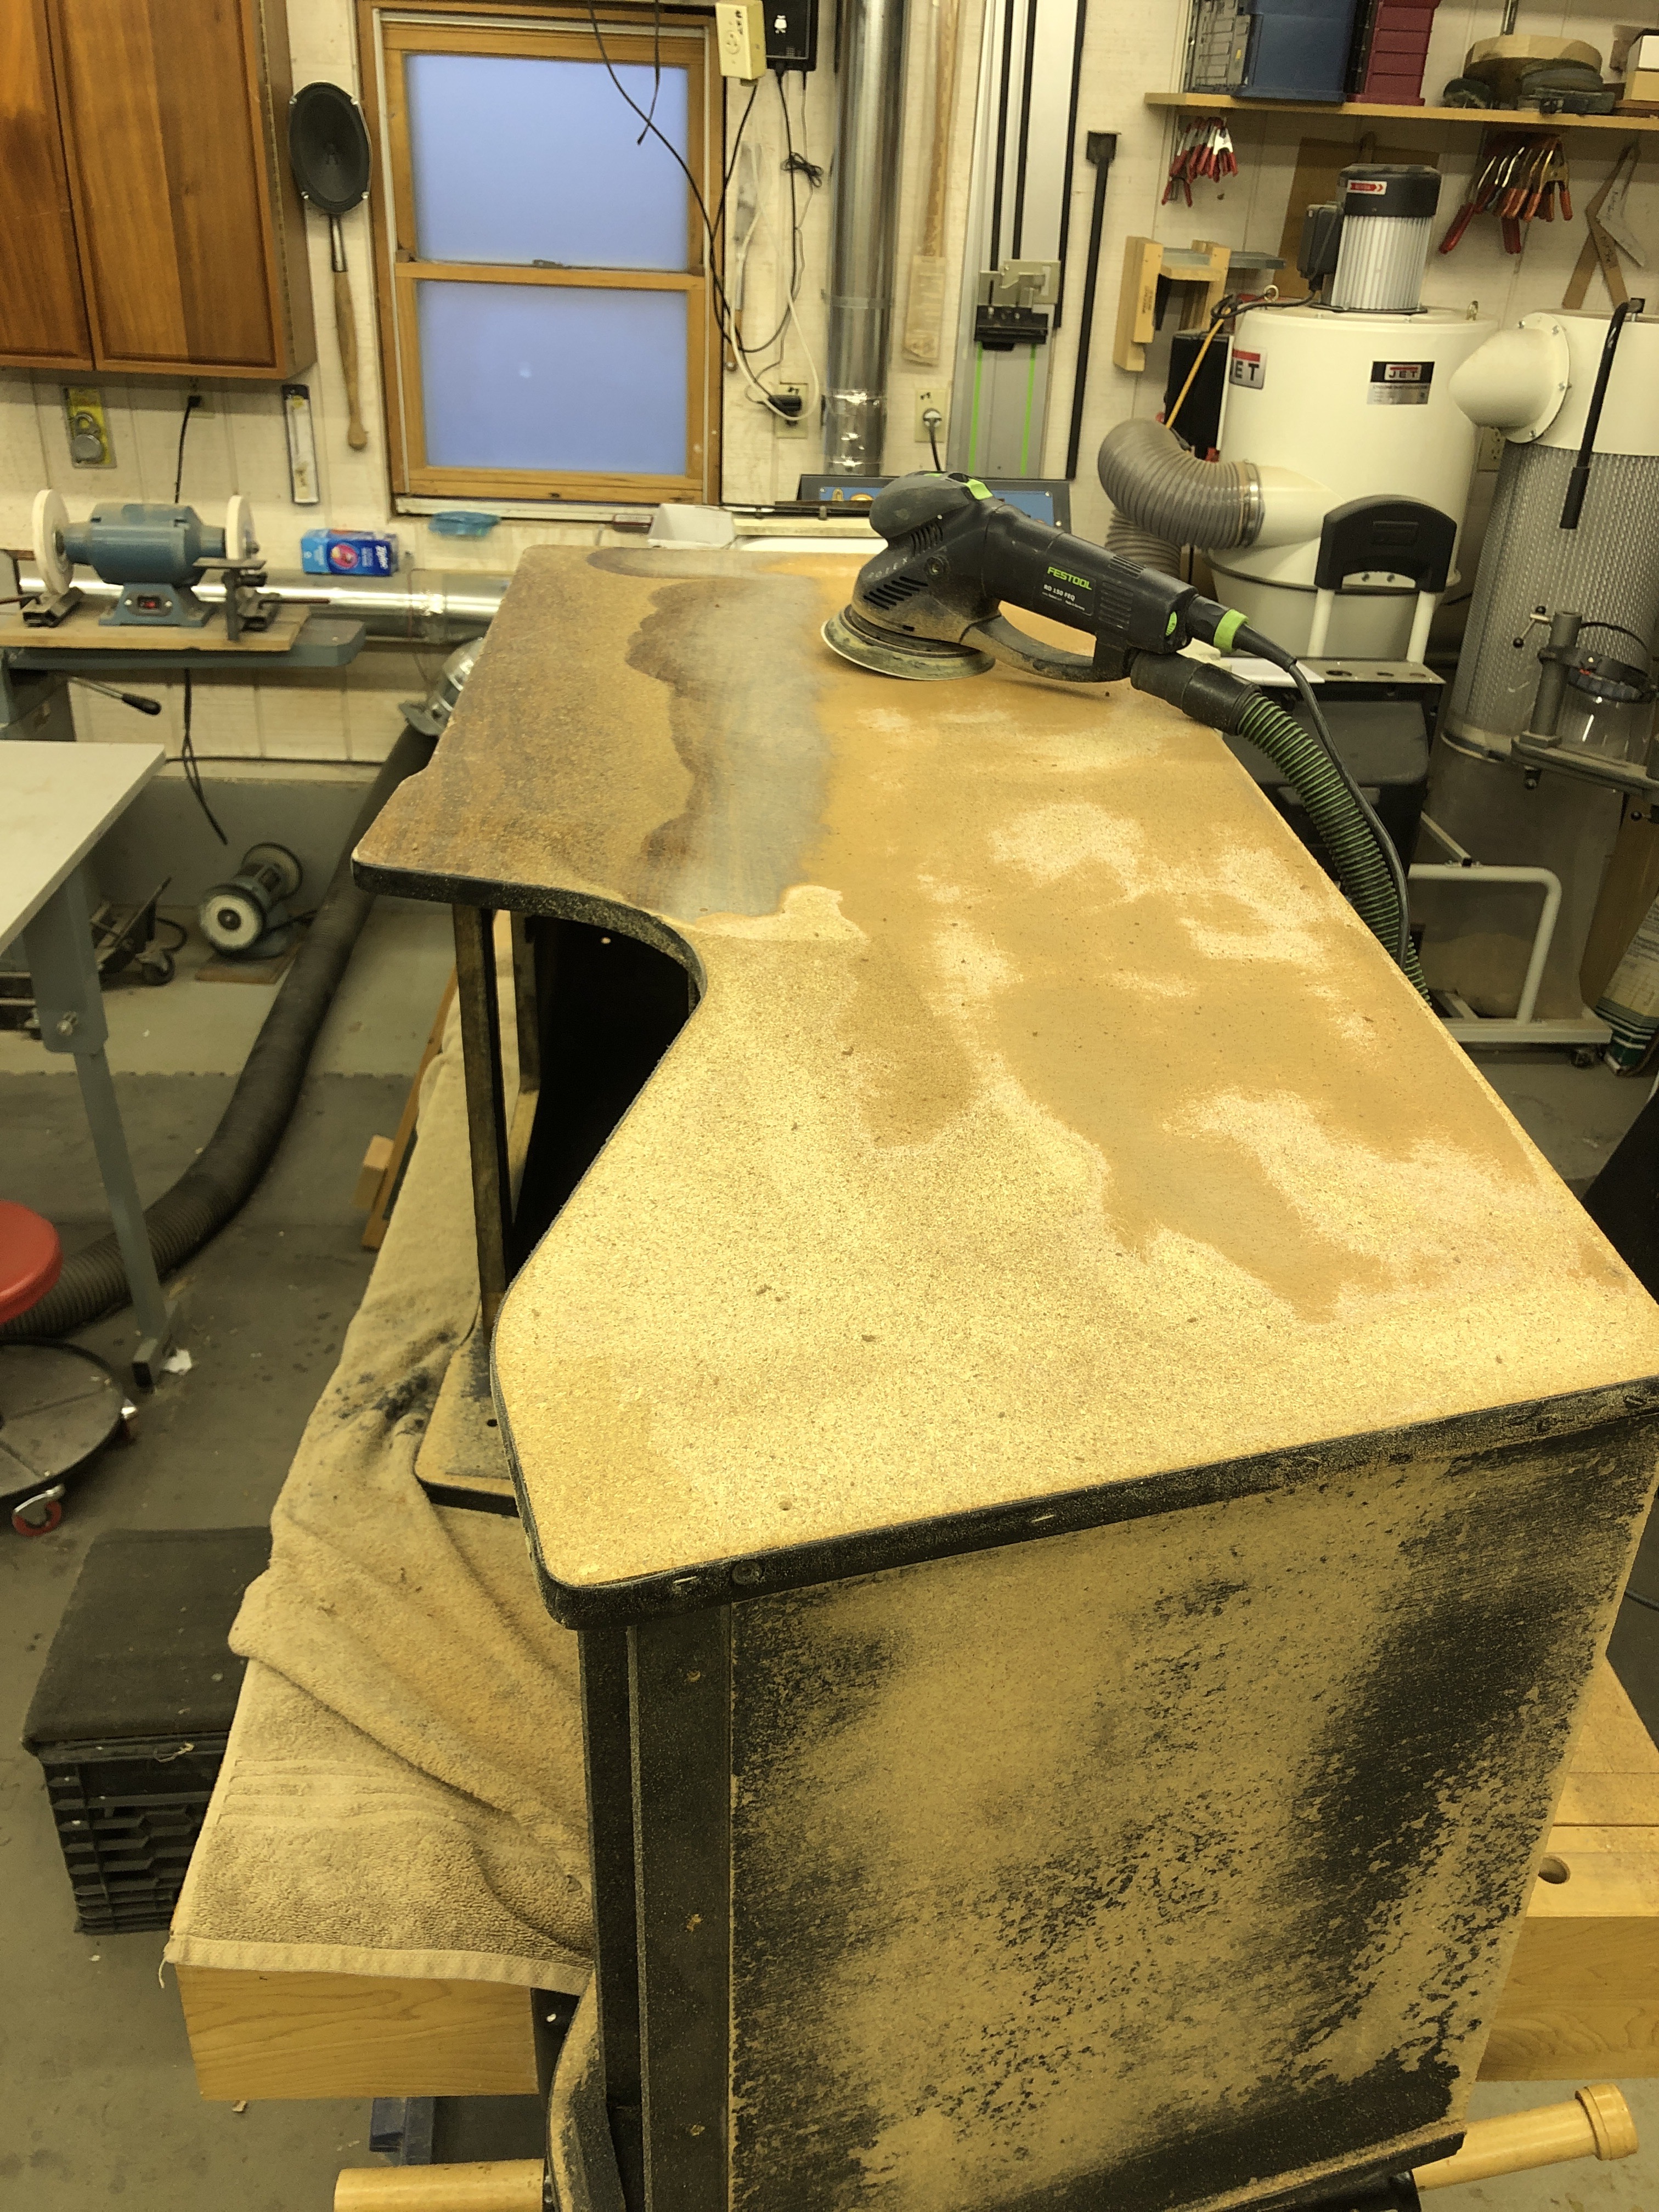
A quick sand on the interior with 120g mostly to scratch the surface and get the dust off. I’ll be painting the inside again.
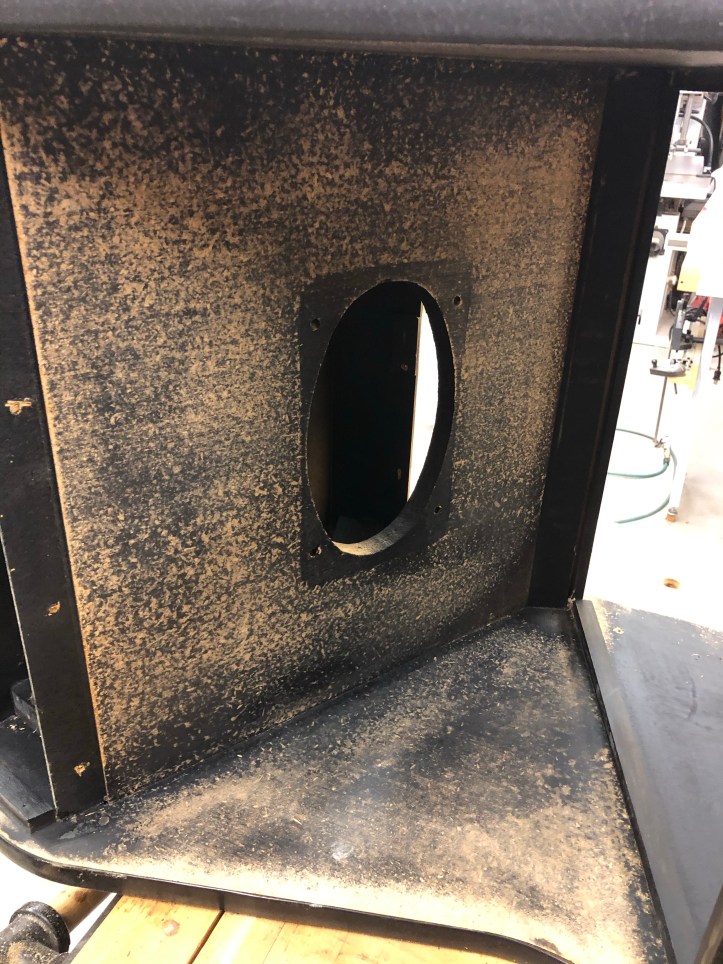
On the flat surfaces where the particle board is exposed – it expands to a pebbly texture. The speaker grill somehow limited this and clearly shows the texture vs. smooth under the grill. Maybe heat inside the cabinet kept it dry? This I sanded smooth with 120g. You can also see the expansion on the inside edge of the T-molding where I brought it back to flat.

Same for the top – It smoothed out pretty nicely. Other machines I’ve worked on left quite a bit of texture even after it was flat.
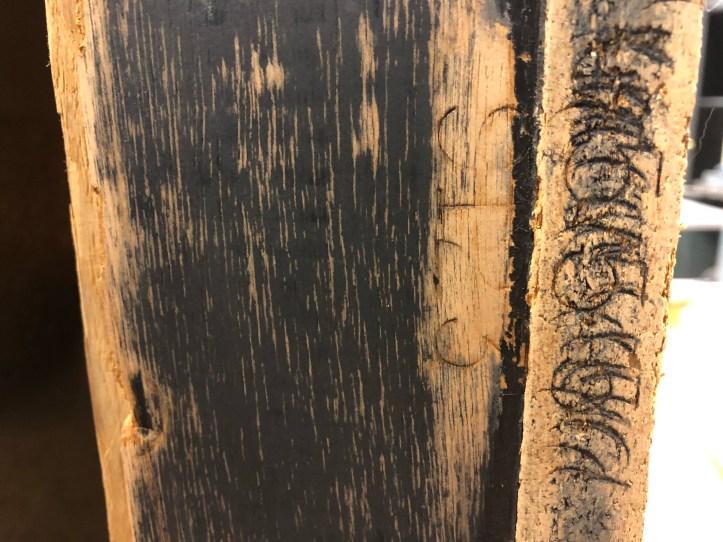
When cleaning up the back – discovered this.. ‘9123’ and some hidden numbers on the rear edge of the top panel. ‘555’ maybe?

The lower corners are puffed up and rounded over pretty good. Areas of the particle board also seems to have split some in the back and on the top along the T-molding.. I’ll have to see if that can be stabilized a bit. I picked up an inexpensive sand blaster this past year and it has been a fantastic tool. Cleaned up the mounting plates for the legs in about 15 minutes.

Both sides are about as good as I’m going to get them. I’ll focus on repairing some of the other damage for a while – splitting boards, loose boards, top separating from the sides, etc. I will be leaving the vinyl on the front for now. It has the area under the kick plate which shows the actual color and grain of the original material. I have a few samples coming to check and a few options after that. Once I make the final decision I’ll strip the front vinyl off.

The cabinet helped make some decisions for me. It was pretty wobbly while I was working on it. The T-Molding track was opening and closing just by moving the cabinet. Pretty much every joint moved.
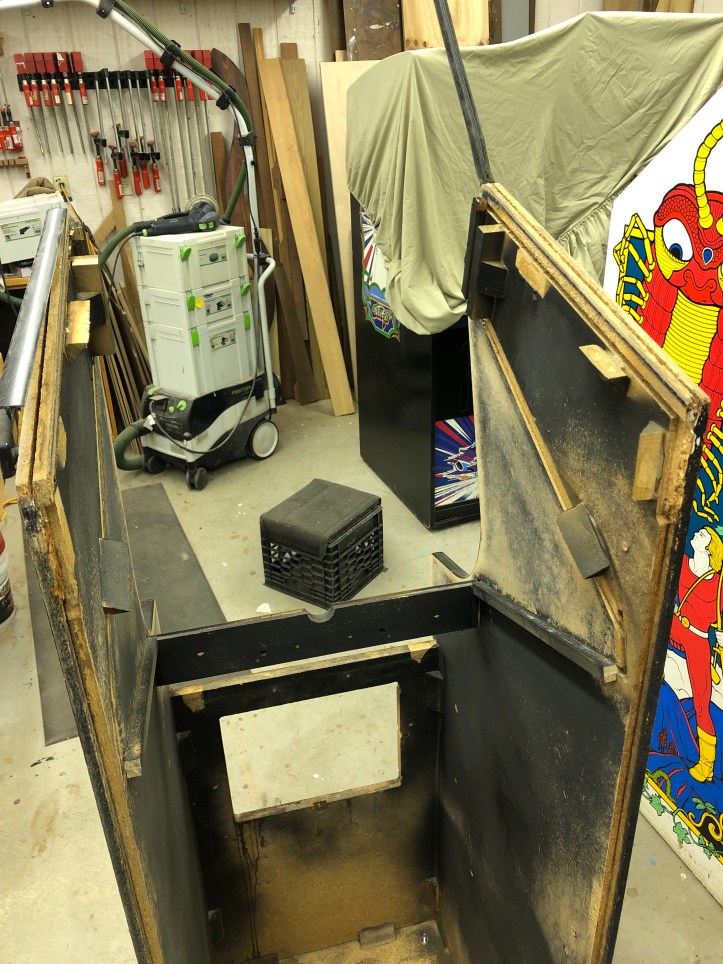
A couple taps with the mallet and the top popped right out.. The particle board edge was just about to fall off too. My original intent was to keep it assembled – but that wasn’t going to work at this point….

The upside is these parts can be cleaned up and stabilized separately.
At some point – a drywall mud repair. Another item is this cabinet was assembled at the factory with hot glue. I’ve been shaving rubber off of the joints with a sharp chisel all over.

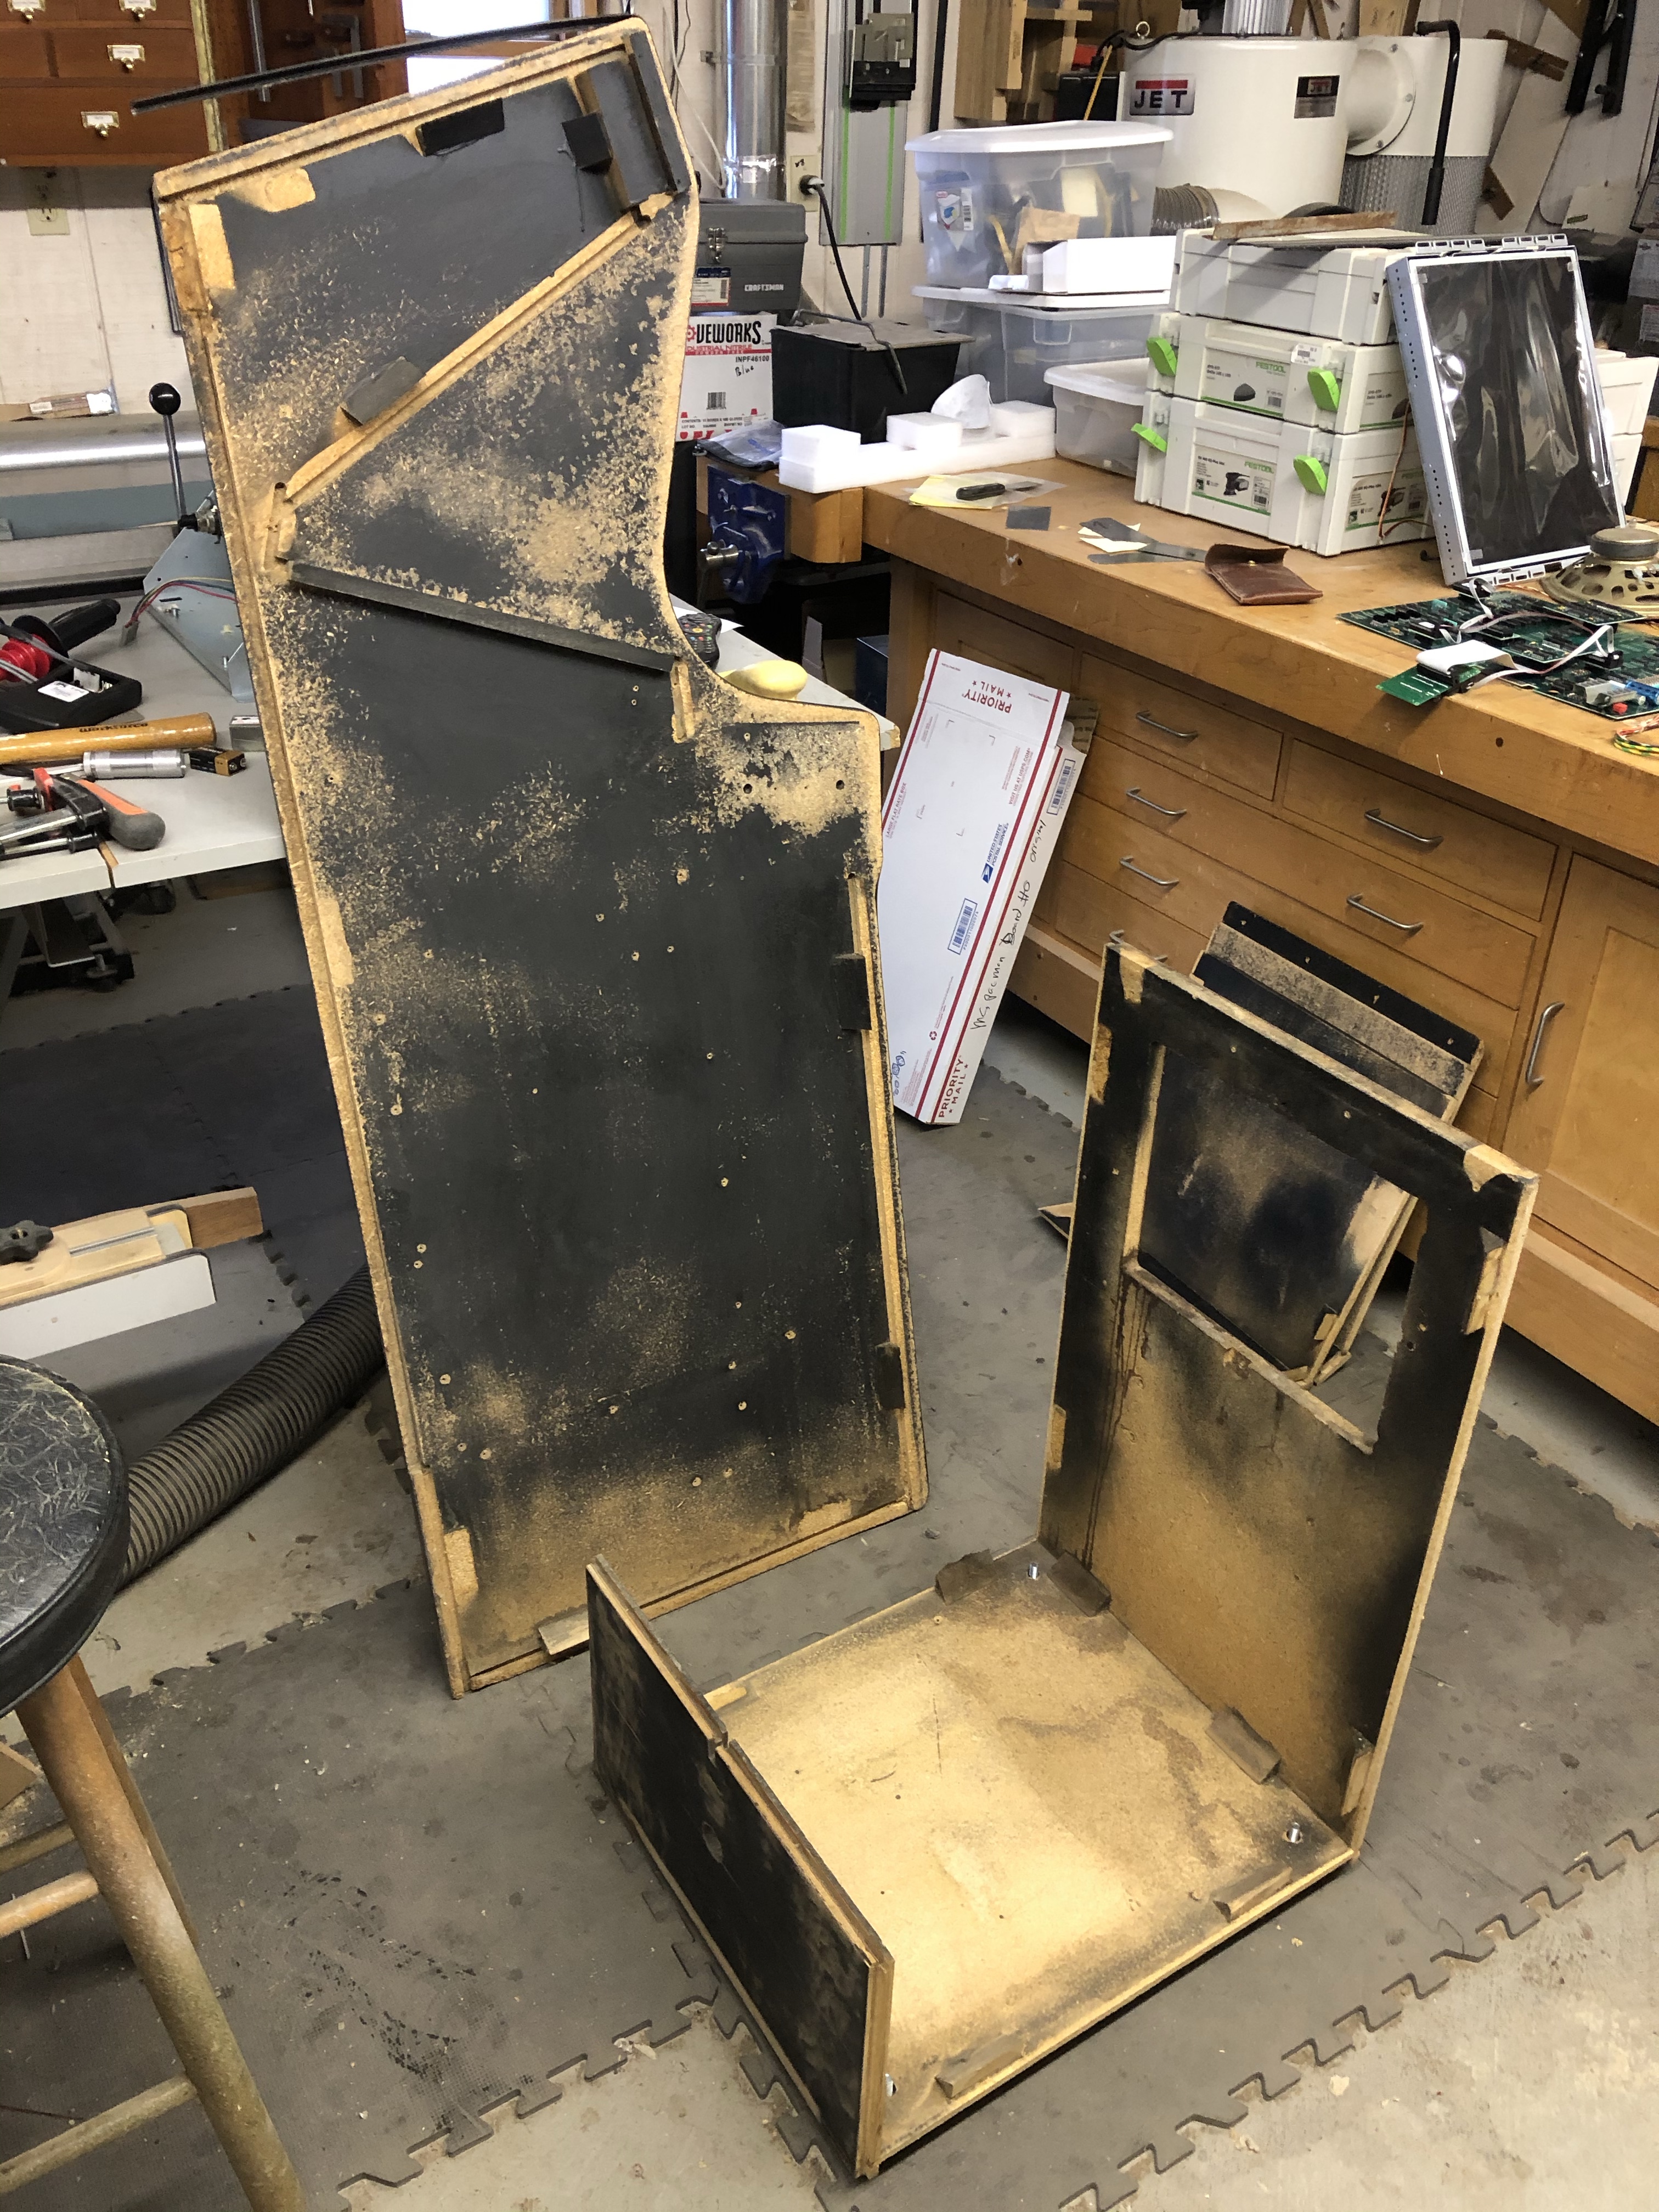
A few more taps here and there and the sides came right off.. The bottom and front are pretty tight so I’m leaving them alone.

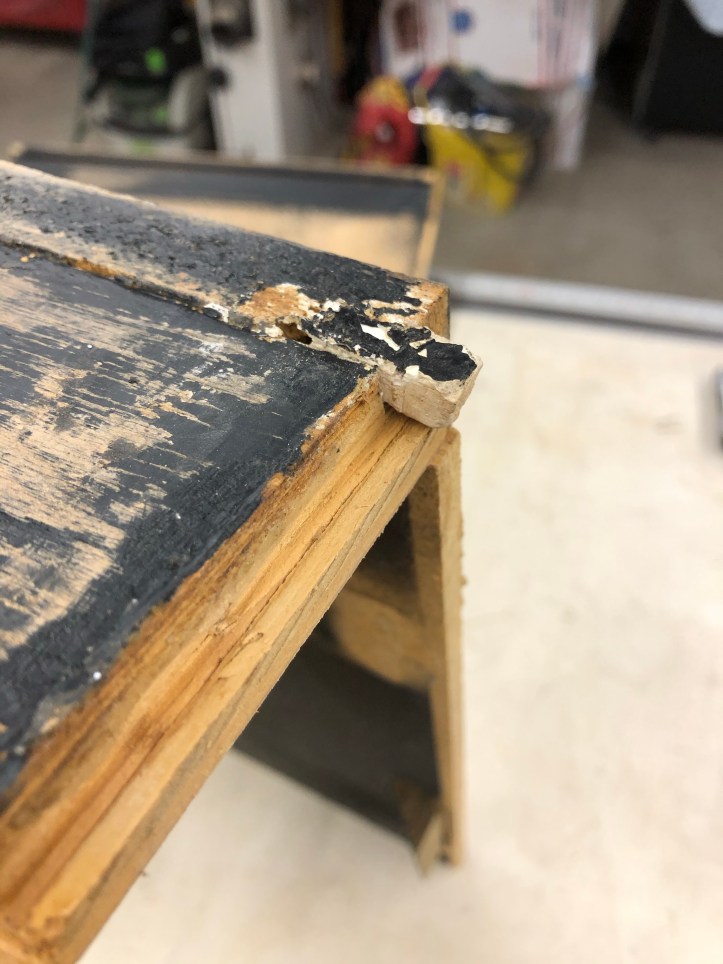
The edges are pretty chewed up. Repairing and stabilizing them is relatively simple. I use clear packing tape over a straight wood block and skim in thickened epoxy filler. Epoxy will not stick to the packing tape. The blocking creates a nice form.
Bondo rant on: Bondo is not a very good adhesive – its for filling small areas that do not need strength. These areas need more than a surface filling. Boats, cars, planes, skis are made with epoxy. They don’t make that stuff out of Bondo. Rant off.
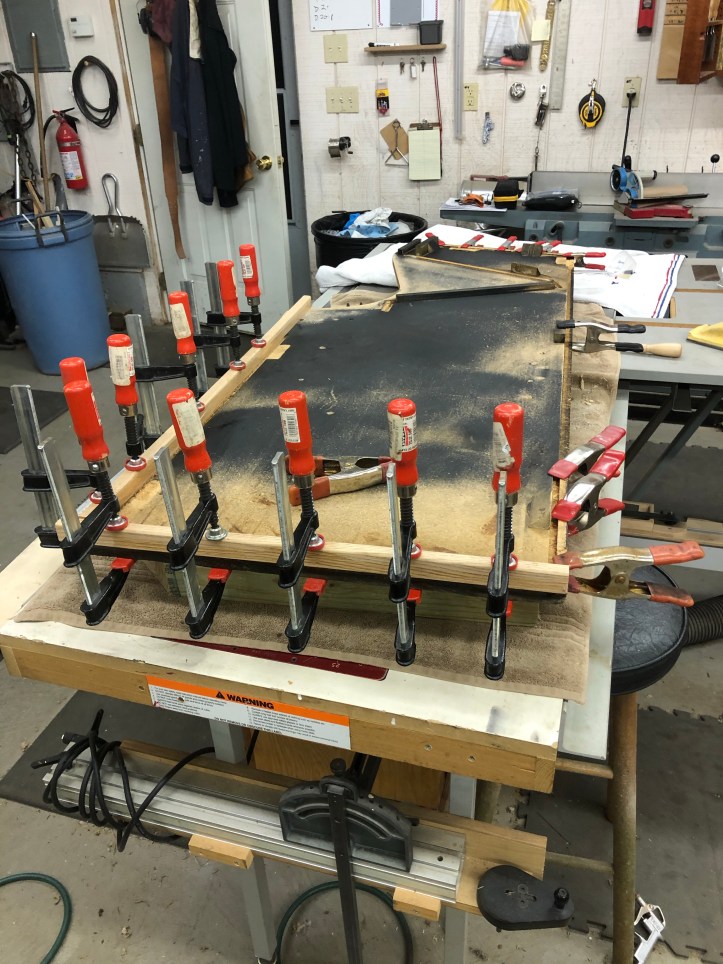
I also used the tape covered blocks to clamp down the split particle board t-molding slots that needed to be repaired. It would have almost been easier to just make new sides.. But not very original.. I try to preserve as much as I can.

After a little sanding – fully repaired edge and much more stable. Once it gets a coat of black paint and the side vinyl installed – it will be invisible. I used this epoxy repair process all over on parts that were chewed up.

Sides are about 95% repaired here. I’ll be using an epoxy based wood hardener (CPES) to lock up the soft particle board and prevent future moisture expansion.
Right about here – I got sidelined for months doing this:
Full kitchen rip / replace down to the studs. Check out that fine Formica wall covering!
New walls and ceiling, added lots of lighting, outlets, replaced electric stove with propane, cabinets, countertops, .etc.. I did everything except the countertops. This occupied weekends for 5 months at our other place (first world problems…) Ms. Pacman waited impatiently. However our kitchen from 1973 was gone.. so there is that..


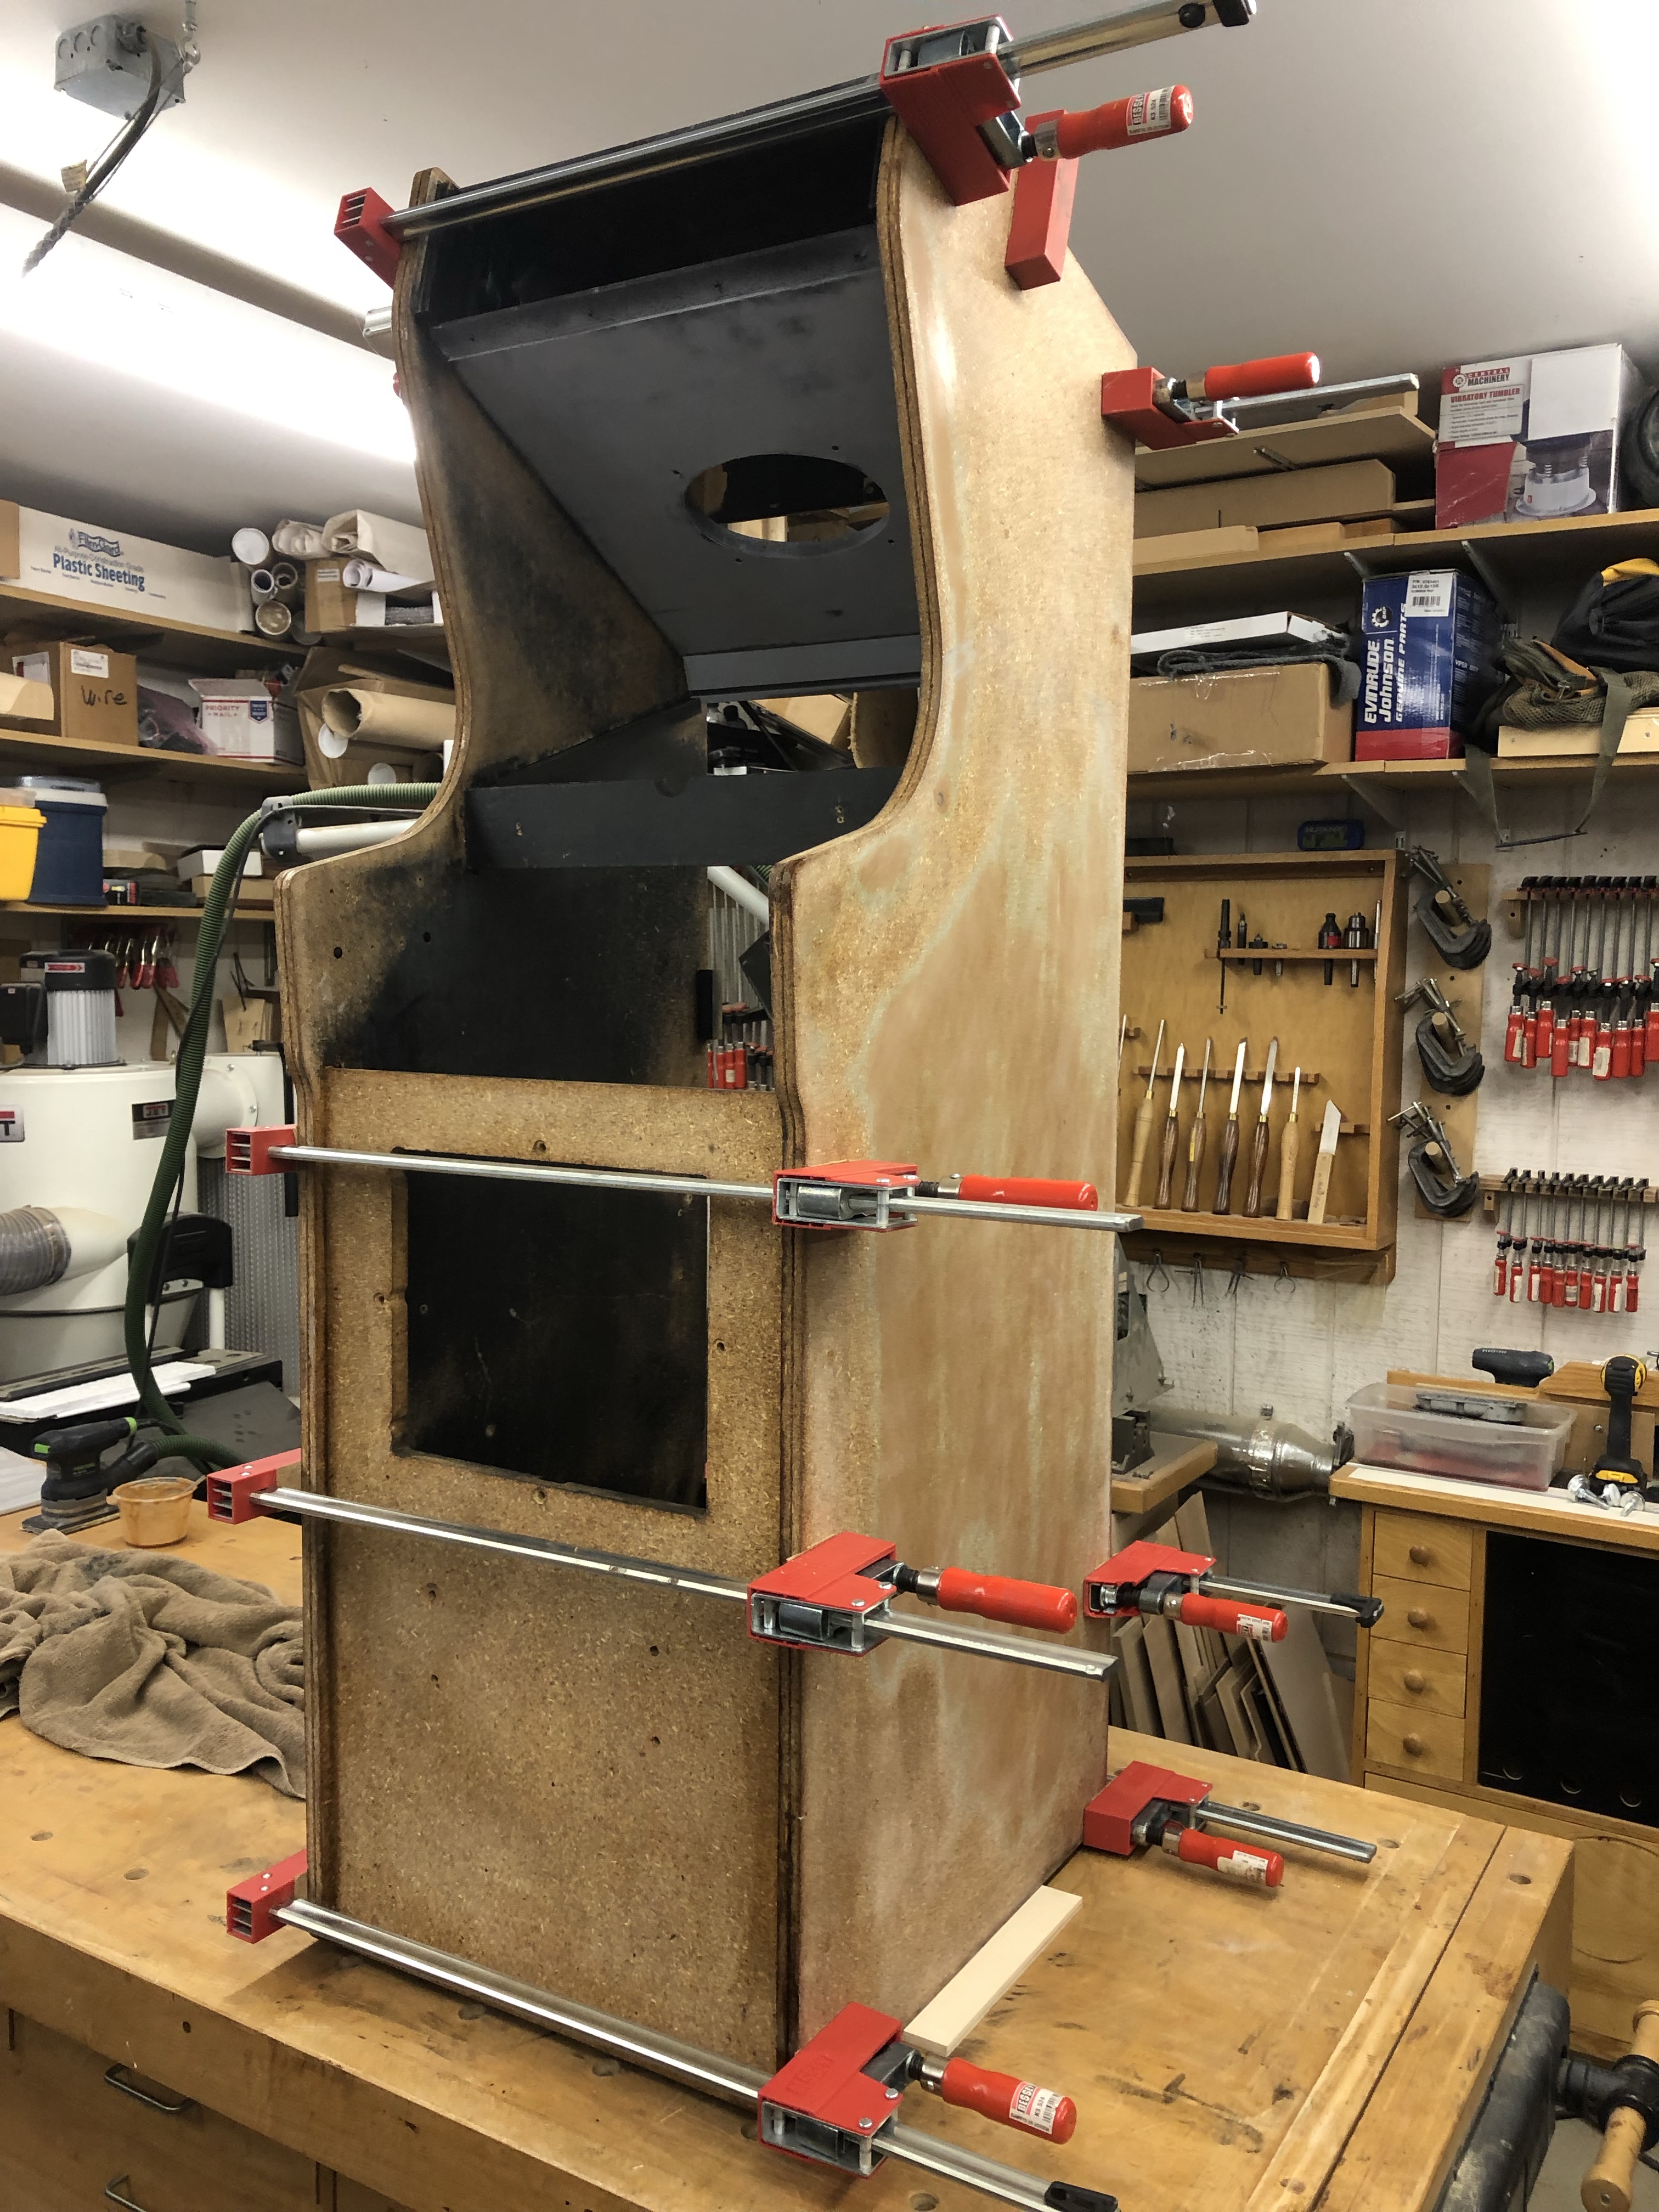
All of the panels got a coat of wood hardener (I use CPES) to solidify the particle board fibers. I mixed epoxy and added filler to a little thinner than peanut butter consistency. Brushed it on both sides of the joints and clamped it up. You want to try for just a little squeeze out all the way around on the joints. That way you know you are filling all the gaps. This is a little more than I normally like – you want a little – if you get none, the joint is too dry.. Too much is just a waste. Clean it all up now. It’s much easy than after it cures.
On the speaker panel and top – there was still a little too much surface texture for my liking. The original particle board was really smooth under the speaker grill. The inside was also quite smooth. I used a rattle can and sprayed on 3-4 coats of sandable primer to fill in the pitting and smoothed it up with 220g. Its not a mirror finish (it shouldn’t be) I think its reasonably close to what it was out of the factory.
All glued up with the excess squeeze out removed. I stood it up on the bench and checked the cabinet for square front and back – just to be sure. No issues.

Temporary spray booth set up – all the black parts are black again. I used Rustoleum Satin Black, cut with a little mineral spirits and sprayed HVLP. I pretty much painted it the same way they did at the factory. You can tell by the spray patterns how it was done originally. I gave it a shot. Getting the HVLP gun inside the cabinet was a pain.. Clearly they used pressure fed guns since it was production work.


I spent some time looking for the closest match to the original wood grain, searched the forums, etc. It’s matched up here on the woodgrain area of the front that was protected by the toe kick.
Here are four samples:
- 3M DI-NOC WG-430 Marine Teak Woodgrain – Vinyl
- Wilsonart Montana Walnut – Laminate
- Wilsonart English Oak – Laminate
- Wilsonart Nepal Teak – Laminate
The English Oak had a little better grain match, but the 3M Marine Teak was the clear winner overall. It costs stupid money for this vinyl however..

I got the vinyl on the front first. The cabinet sides will go on last after I get done putting it all together. This is my first time using this particular material. It’s a little tricky compared to regular vinyl. It will pucker and stretch pretty easily since it can be used as wrap for things like auto interior parts – i.e. it wraps around curved parts. If you pull and stretch it wrong – it’s tricky to keep flat!
I tried to start at one edge and work my way left to right, but I had to keep restarting since it puckered and would not stay flat along the inside corner. Eventually I peeled/cut back 1/2 of the backer paper and started in the center and worked my way to one side – peeled the rest off and worked my way to the other side. Make sure the surface is very flat and no little bits are on it. It will imprint through the vinyl. Somehow I have one small nit under the surface. It won’t ever be noticed… but that stuff can get out of control quickly if you don’t keep things clean.
At the edges – I peeled it back just enough to get a squeegee to fit it into the corner tight – You don’t want any bridging before the final trim. I used a new Exacto blade to trim it all up.

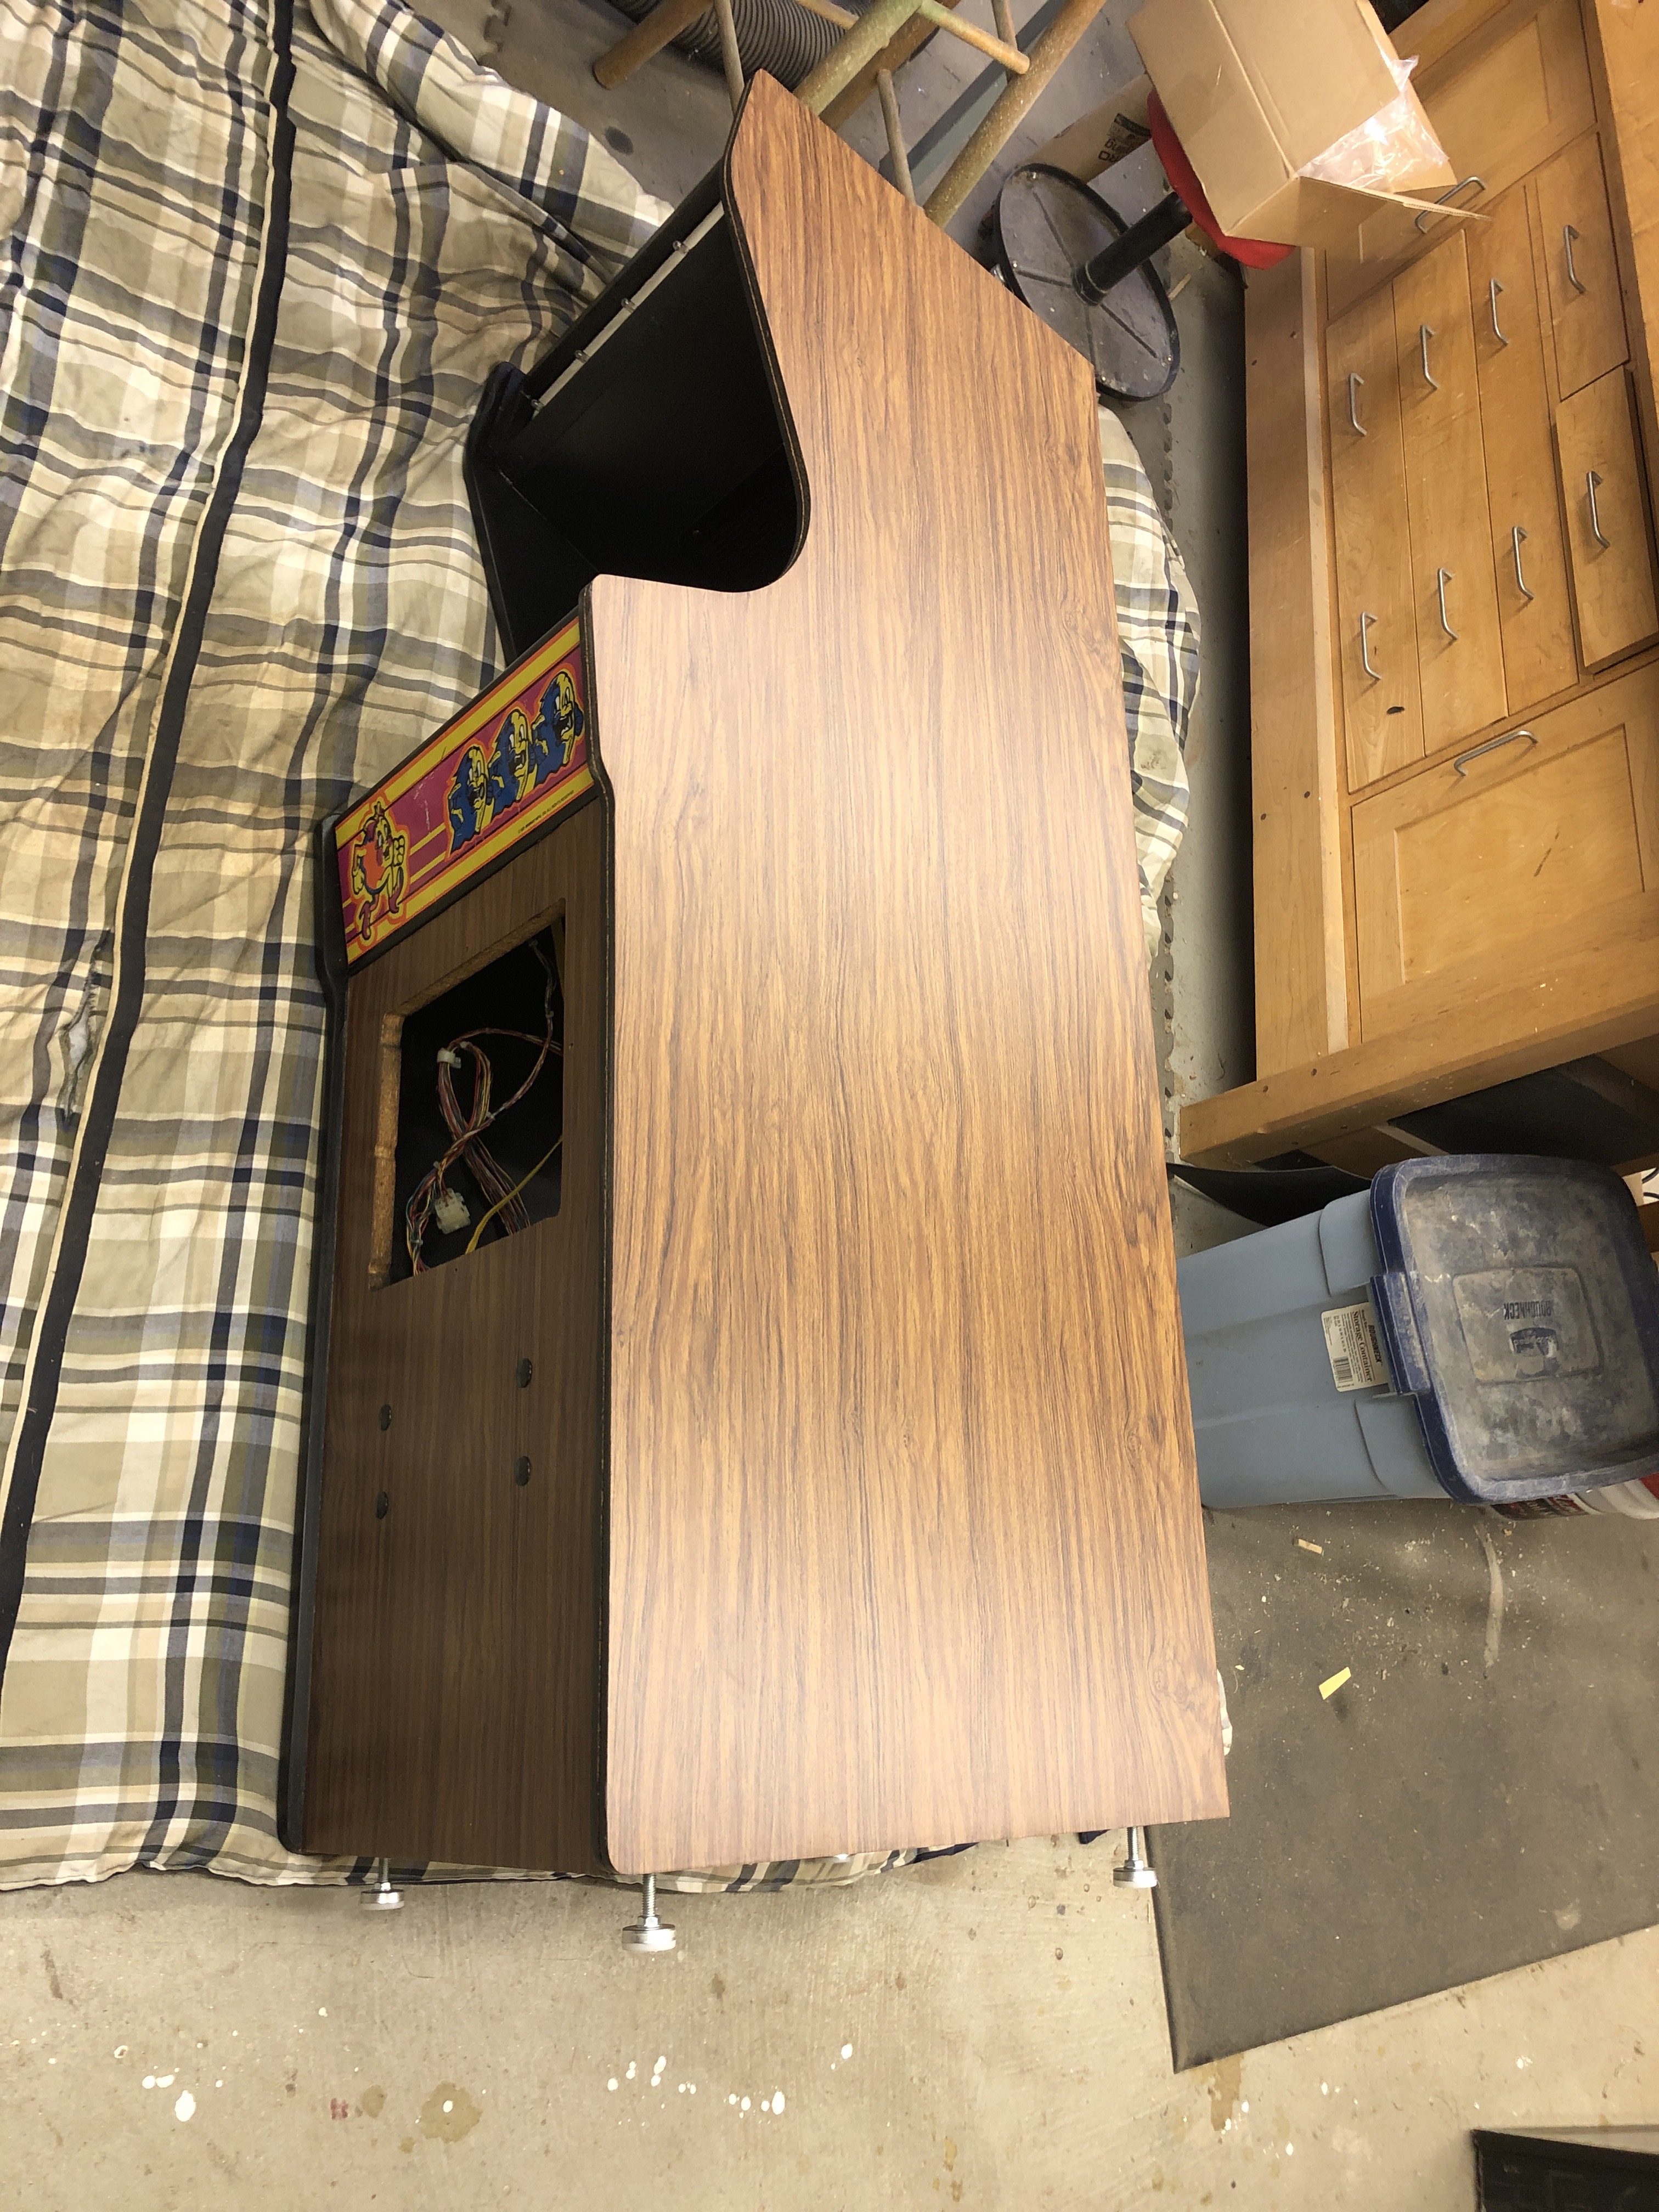
Hardware and harness all going back into place. No broken clips and reused all the original screw holes..


I got to the point where the vinyl could go on the sides. I decided to install it closer to the end of the restore because there would be less ‘bumping around’ of the cabinet. First I did a quick pass with 220g sand paper and made sure there were no little bits sticking up. Anything at all will show through the vinyl. I wiped and used compressed air to make sure it was clean.
The cabinet is 23 3/4″ wide at the control panel and the vinyl is 24 1/8″ wide. This will be very easy to get out of alignment. After taping along the back edge, I peeled back some of the backer paper, cut off enough to allow for ~2″ of adhesion along the bottom, stuck it down and then checked alignment by smoothing it out – all the way to the top. You get a few tries to pull and re-stick the vinyl along the bottom to get the back edge right.
Once that is done – fold it over and peel the paper a from underneath and smooth it on moving to the top while making sure the vinyl stays on track and doesn’t creep away from the back edge.
Once it’s stuck down, cut to the edge with a fresh Exacto blade. Here you may be tempted to leave just a hair extra overhang… don’t do it.. The T-Molding will cause it to bunch up just a bit.. cut it as close to the edge as you can .. otherwise you can get that tiny little annoying wrinkle at the intersection of T-molding and vinyl.

Both sides completed with T-Molding.

Back door going together. Mesh screens back on. I’d filled in the big missing chunks of wood with epoxy. There were screwdriver chew marks around the top and a couple gouges on the thin parts between the vent holes. The original mesh is small gauge expanded steel. It was in good shape.

[…] Ms. Pac-man Mini – Cabinet Work […]