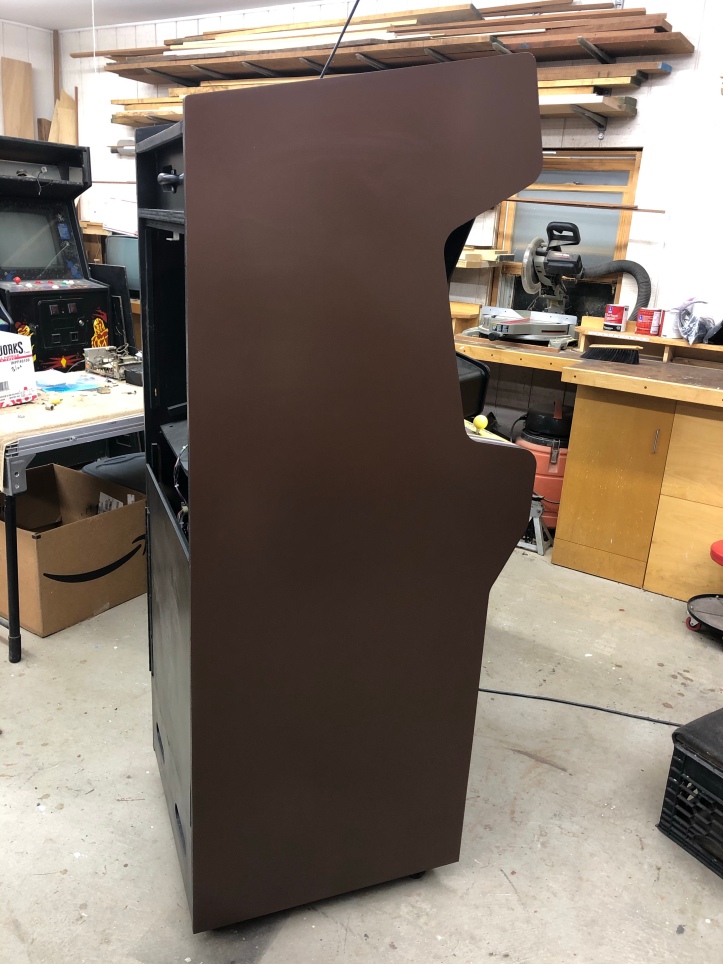
I’m starting with a very smooth base coat for the stencils. This base coat has been on for over a month because I have been working on a few other projects. Its quite hard/cured at this point.
My stencils from This Old Game are very high quality. I let them lay flat on the bench a few days to relax from being rolled up. Before starting I wiped the sides with alcohol to clean the surface and used compressed air to eliminate any bits of dust as much as possible.
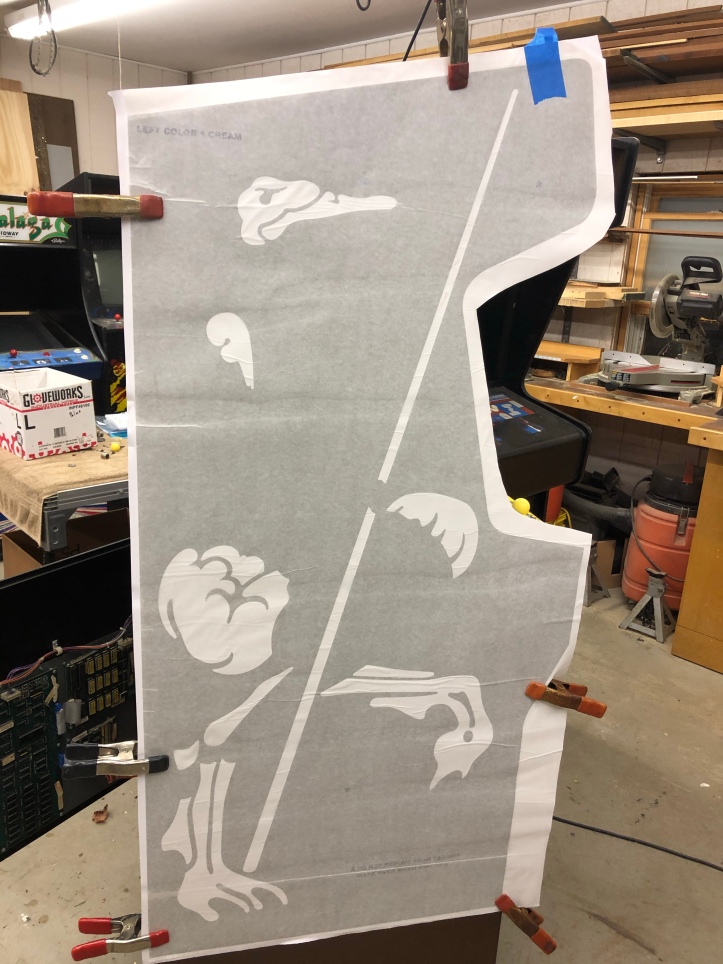
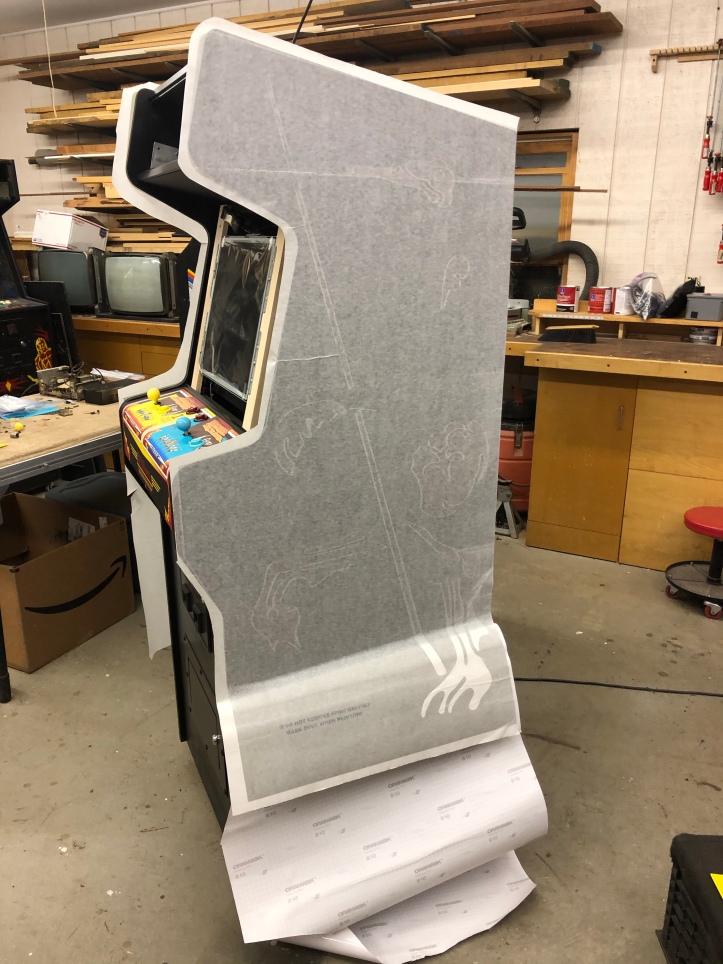
Getting the stencil lined up takes a little messing around. I tried tape, but the stencil itself is too heavy for everyday painters tape and it kept shifting and falling. Spring clamps did the best job holding it in place while I stretched and positioned the first side. On this one – I found the best way to align the stencil was to get the back edge even with the back of the cabinet and find a sweet spot for the top of the cabinet. The stencil doesn’t exactly match the top – but I’m certain these cabinets have plenty of variation in them. The important part is the back edge being in line with the back of the cabinet. The lower front will line up perfectly as a result and everything else will fall into place. Backlighting around the edge with a flashlight will help determine how close you are. Keep pulling the stencil tight and re-clamping until you find the right spot.

Here I did use a wide strip of painters tape and wrapped it around the narrow section at the monitor to assist in keeping the stencil in place. I let the top roll down and I cut off about 3 inches of the backer and using a plastic spreader, pressed the stencil in place working upward and from the center to the edges. You are not going to get every tiny bubble out at this point, and you won’t need to. You do want to eliminate all the wrinkles and get the sheet stuck down evenly. Careful with the scissors – I left little bits of paper on the sticky part of the stencil. It had no effect on the cutouts, but I’m using a razor the next time.
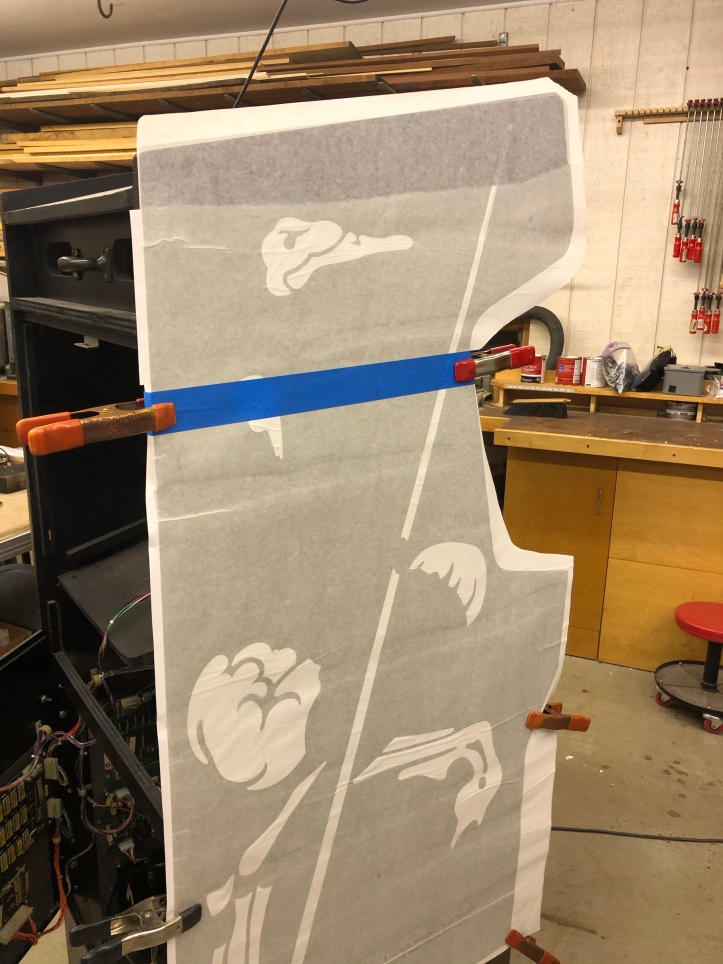
You should end up with the top section looking like this. One reason to start with a narrow strip is if for some reason you need to reposition it – you at least have a chance with so little being exposed. If you removed much more – you would likely compromise the cutouts and have a disaster on your hands. Now it becomes much easier… Remove the tape and all your clamps, slide your hand down the entire length of the stencil to verify it will lay flat and in place as you intended. There is no going back once you stick more on…
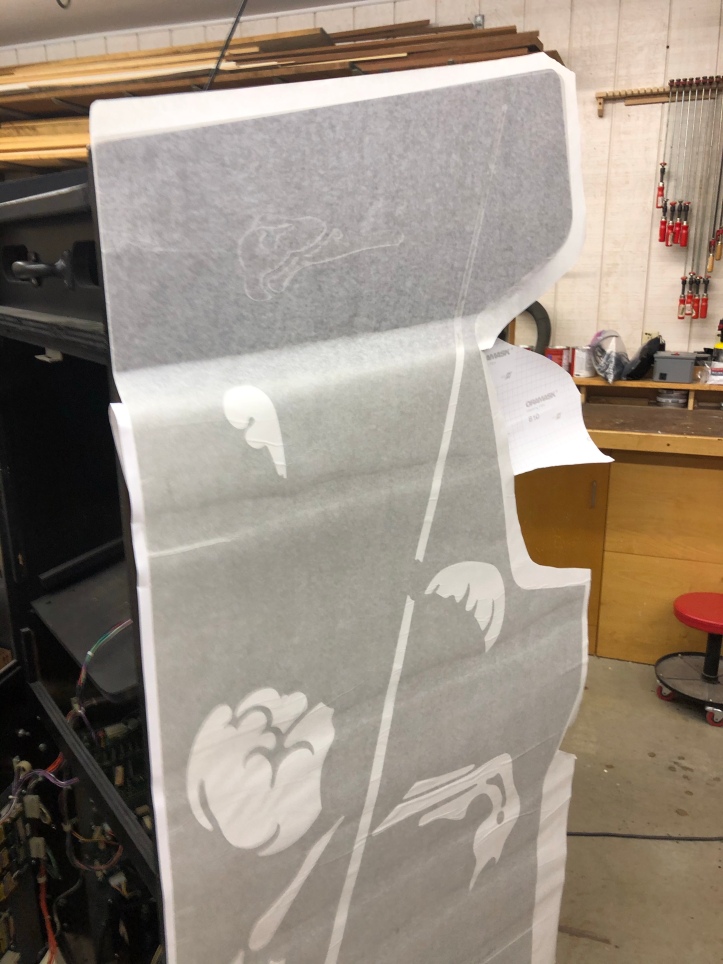
Peel the backer from underneath and roll it down a few more inches – then use the spreader/squeegee again to press downward and from the center out. Eliminate wrinkles and large bubbles and evenly continue down the side pulling the backer off as needed. Keep peeling and rolling down and spreading down.
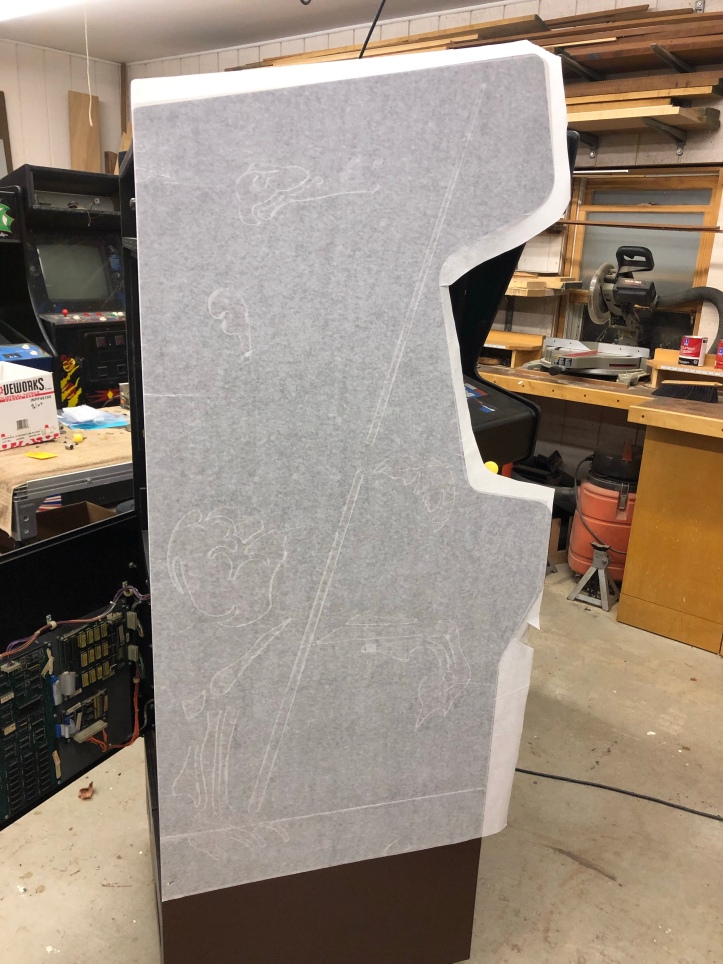
Backer completely removed with no hassle and very little chance of getting debris trapped inside.
Same for the second side. It went faster. Its pretty easy to make sure the stencil is in the same alignment as the first side.
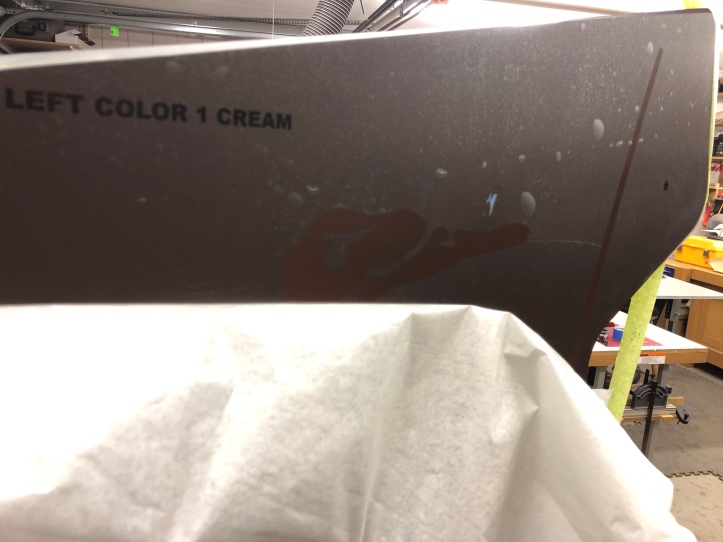
Now you can peel off the face of the stencil (not sure what you call it really, the front backer?) revealing the actual artwork. Here the ostrich head is emerging. There will be large bubbles here and there – they are not really relevant. The only important part is where the cut edges are for the image. Bubbles along those edges need to be pressed out with the plastic squeegee. Just slide the air bubble toward the opening to get the air out. You need to be careful as you peel it away to make sure the stencil stays stuck to the paint and not to the backer. Move slow and deliberately. Joust is not very intricate, but others such as Ms. Pacman have lots of little bits that will peel away easily.
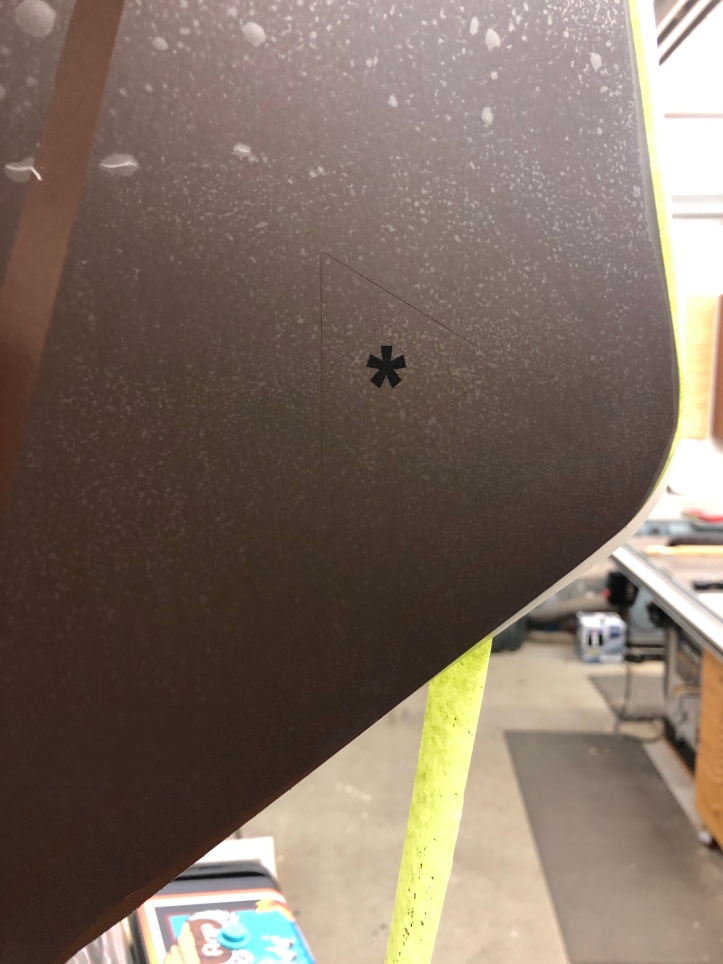
On the upper and lower part of the stencil are these * inside of a triangle. Use some painters tape and cover these. They are used to align the second and third layers. You can also see where a shred of paper backer got into the cutout. I had to lift that with an Exacto and pull it out with tweezers. Thankfully I didn’t stretch anything and it stuck back in place.
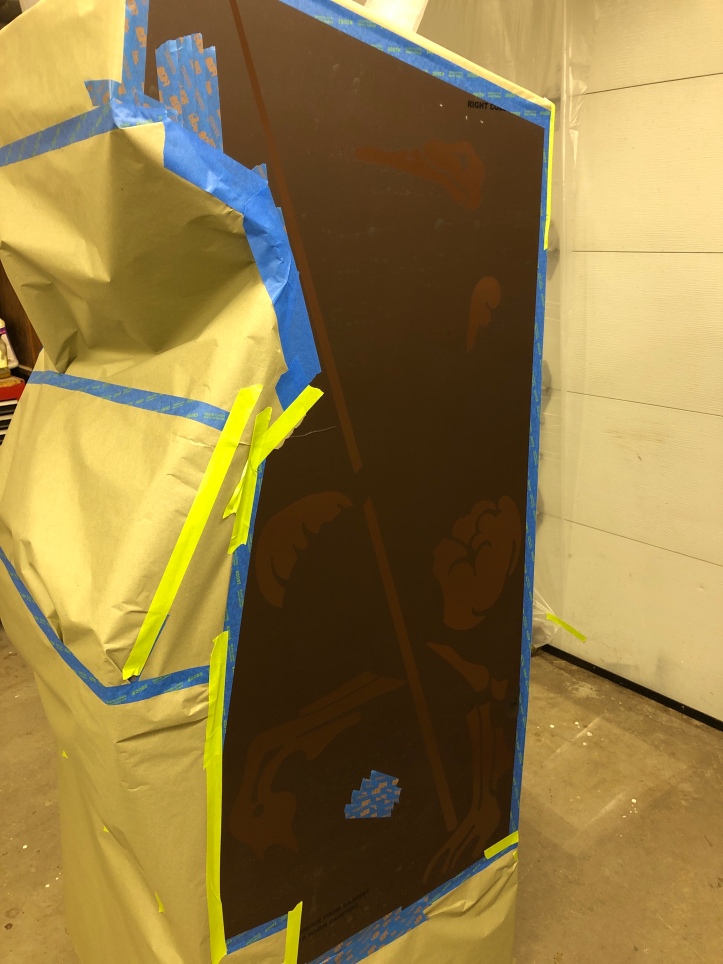
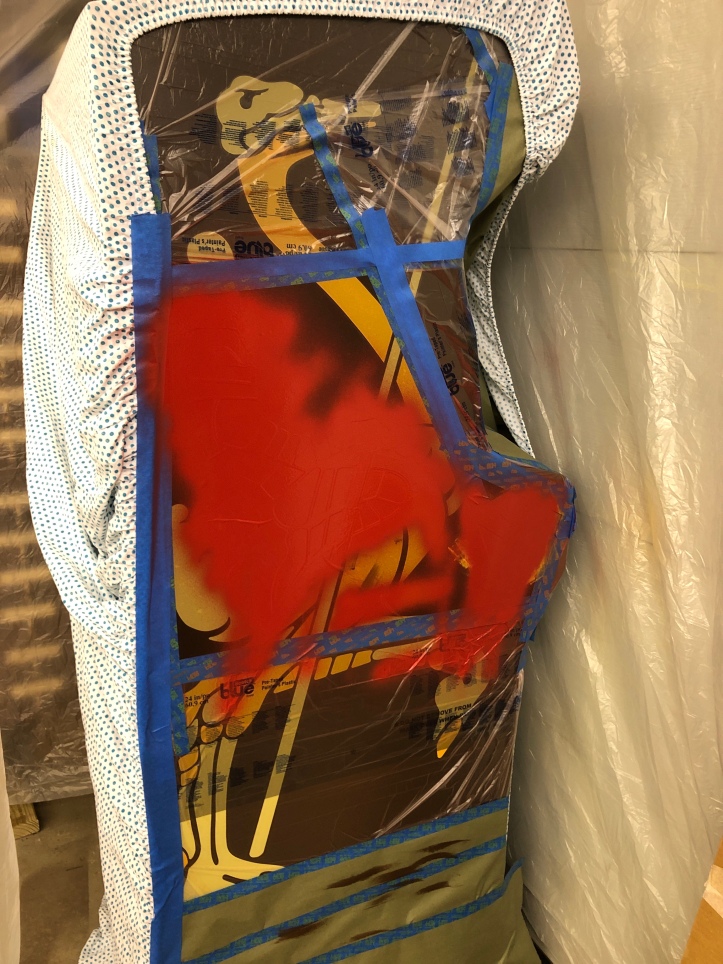
I couldn’t decide if I wanted to mask the cabinet first, then put the stencil or not. I stenciled first and masked second. Most likely I will have to re-mask the entire thing two more times. Otherwise using the spring clamps would be really difficult.. We’ll see… I re-wiped the cutouts with alcohol and used compressed air to blow any tiny dust & lint balls, etc. that were at the cutouts. Clean counts at that little seam where the stencil meets the base coat of paint.
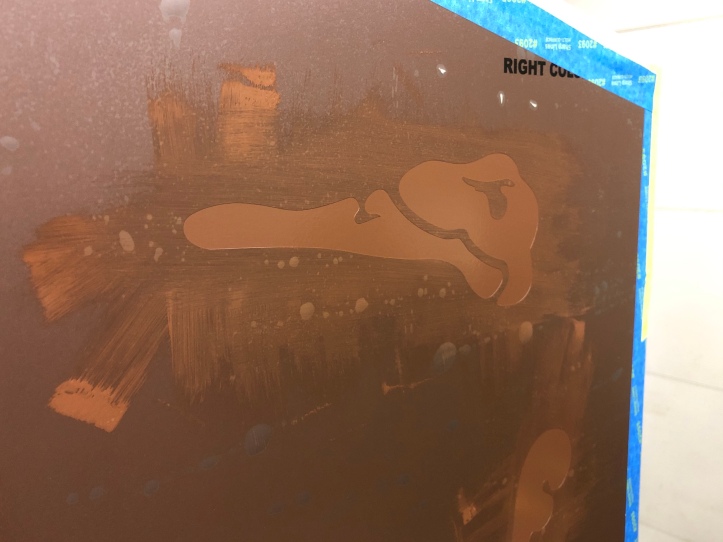
A little trick I picked up from the sign painters. Using some of the original brown base coat, I reduced it with mineral spirits to make a very thin wash coat of paint. I used a foam brush and painted into the seam, but kept the paint thin as you can see.
The goal is very simple: Seal the joint. If there is going to be any paint bleed at all, it will bleed the exact color of the base coat. When the color coat goes on, it will not be able to get under the stencil because you sealed it in brown. We will see how good that works very soon!
Man – that looks terrible huh? I did a close inspection a couple hours after this and the color coat leveled out great. There are a couple schools of thought on stencil removal – some pull it right away – others wait until its dry. I would normally go right away – but this time I decided to wait. Some little voice in my head said to leave it alone!
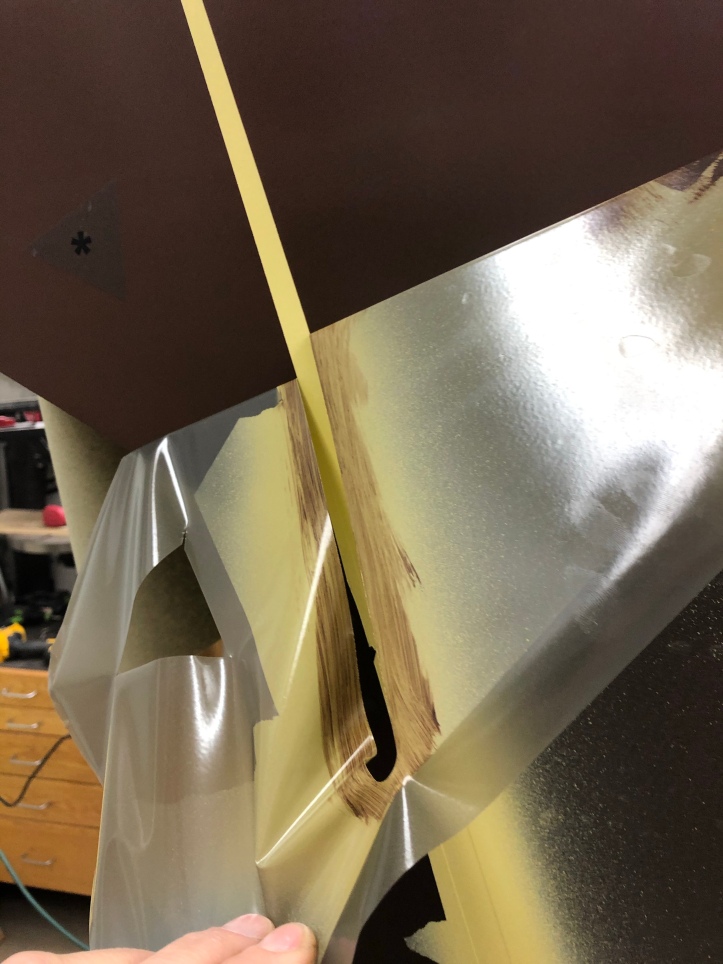
I couldn’t wait any longer. The paint 12 hours later still has just a little bit of tack to it.. But its firm enough to remove. I tested it on some of the masked areas that got painted and it was leaving a nice crisp edge. Whenever possible – peel the masking material so that its cutting back across the paint line like this above. You can’t always avoid areas that lift sorta straight up, but peeling back across itself is best for getting clean lines.
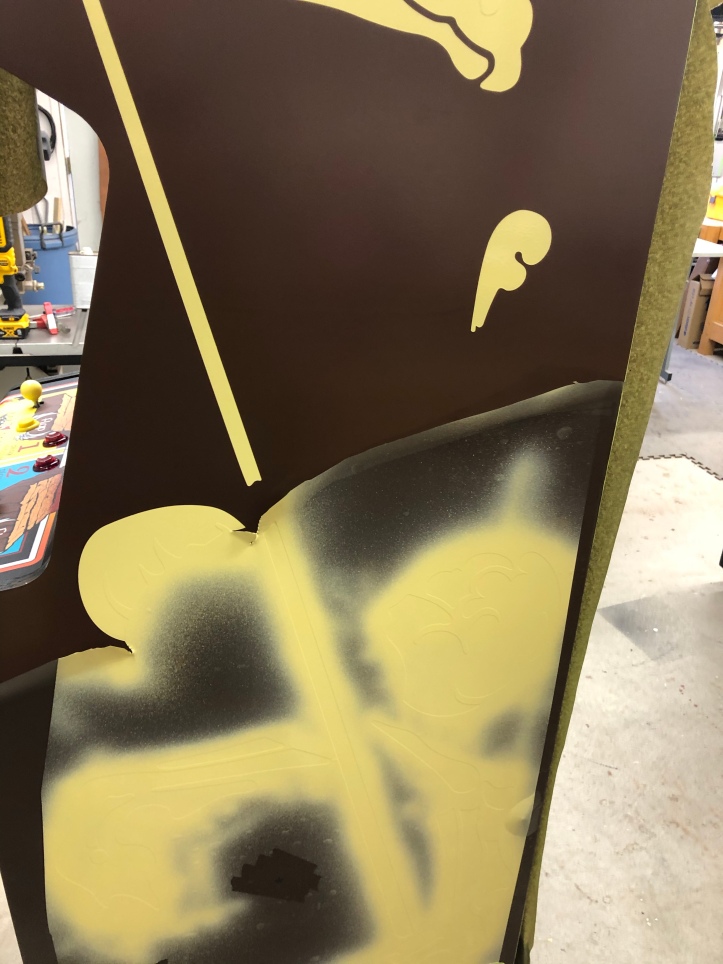
Keep a razor blade very handy (I keep the single edge one in my mouth) You want to trim and cut the masking so that it doesn’t fall back down and it provides the ability to peel back sections easily allowing you to pull back over itself as I mentioned. I little cut here and there can free up large areas of the masking so you can work deliberately.
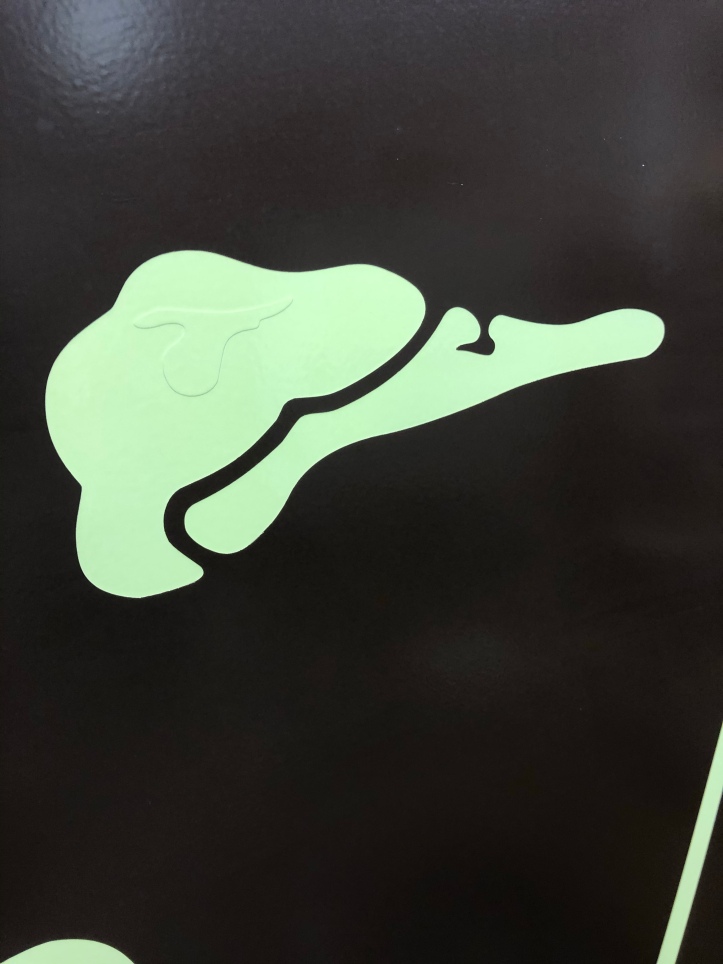
The lighting is causing the color to be off, its not green like this – but captive areas like the eye this can be delicately lifted with an Exacto to start and tweezers to peel it off.
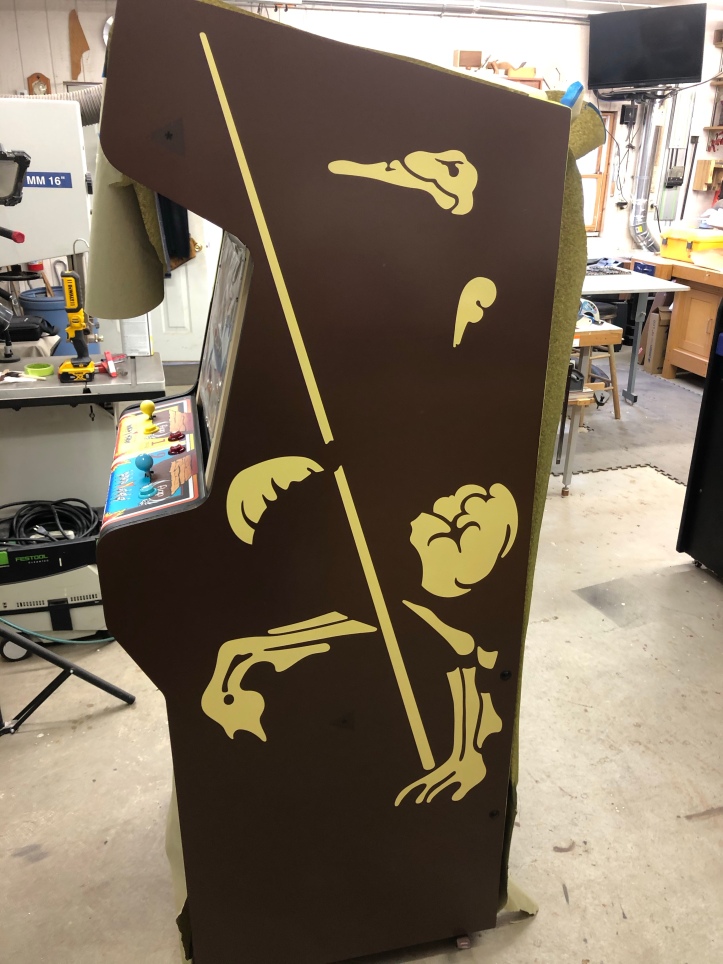

The step where I pre-bleed the brown to prevent the color coat from bleeding under the mask paid off. All of the lines are very very crisp! I’ll have to let this cure for at least a week and maybe more. The second stencil layer will go over the top of this color and I don’t want any chance of lifting the paint if it’s not ready to go.

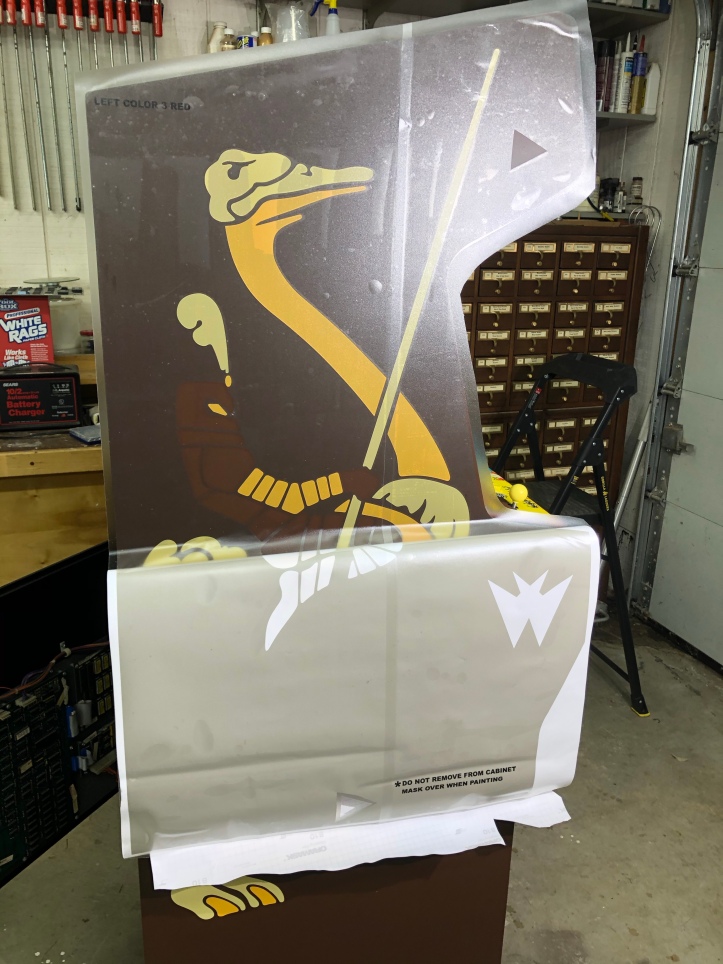
The paint was rock solid in 2 days, I waited 4. Lining up the second color stencil is simple and tricky at the same time. We left the little triangles behind previously to line up the next stencils. They are easy to locate on color 2 stencil . The way I did this was to cut away the back and the front VERY CAREFULLY with the Exacto to reveal just the triangle part. Its easy to cut through all of it – you need to go with the most delicate of touch. When you reveal the ‘sticky side’, use a piece of scrap backing to stick to it until you are ready to hang it..
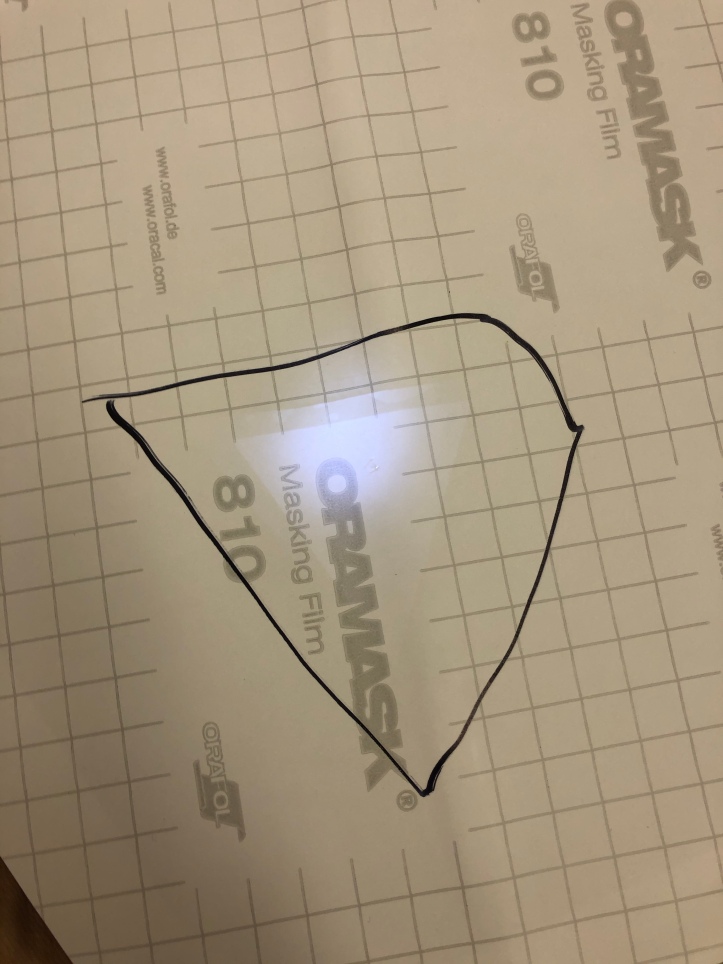
Backlight and a marker makes it easy to locate the area to cut.

Stick it right to the existing triangle and line it up.
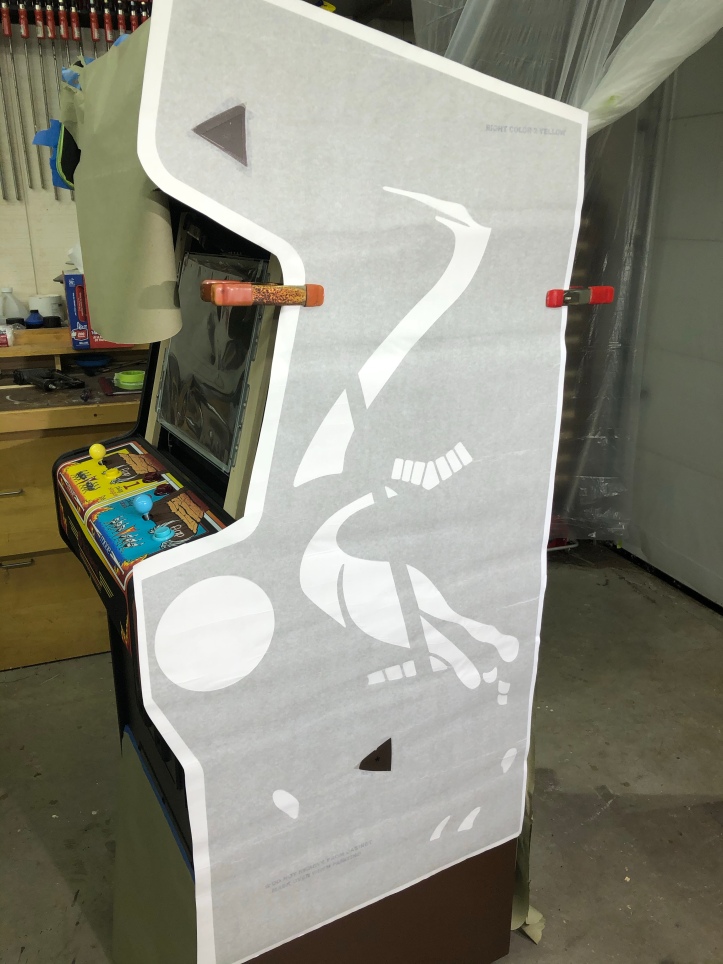
Get the lower one lined up as best you can. Here it will be ok to unstick and restick the stencil to get it as close as possible. I had to stretch it a bit because it never really lays 100% flat. You can get them both very accurate however. Clamp the sides in place near the top – Then roll back the first few inches – trim – stick and spread exactly like the first stencil. You will need to unstick the bottom again to roll the backer off – of course..
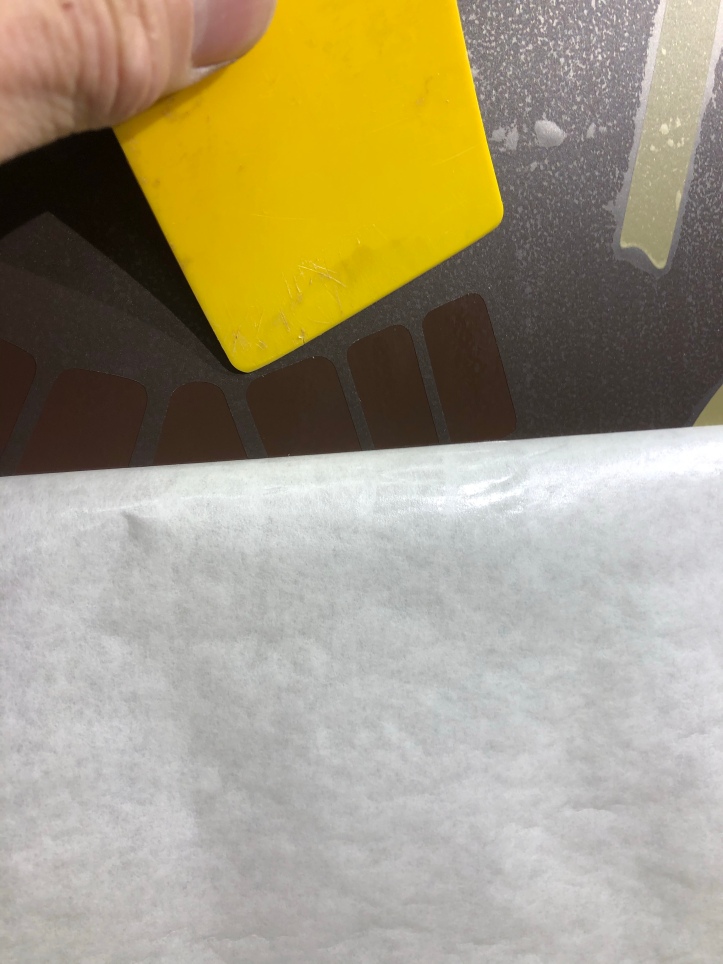
Stencil#2 has more intricate detail. When removing the face sheet, follow closely behind with the spreader and stick down the stencil material. I also used my fingers for parts of this – I’ll be re-cleaning it with alcohol right before painting to remove any oils.
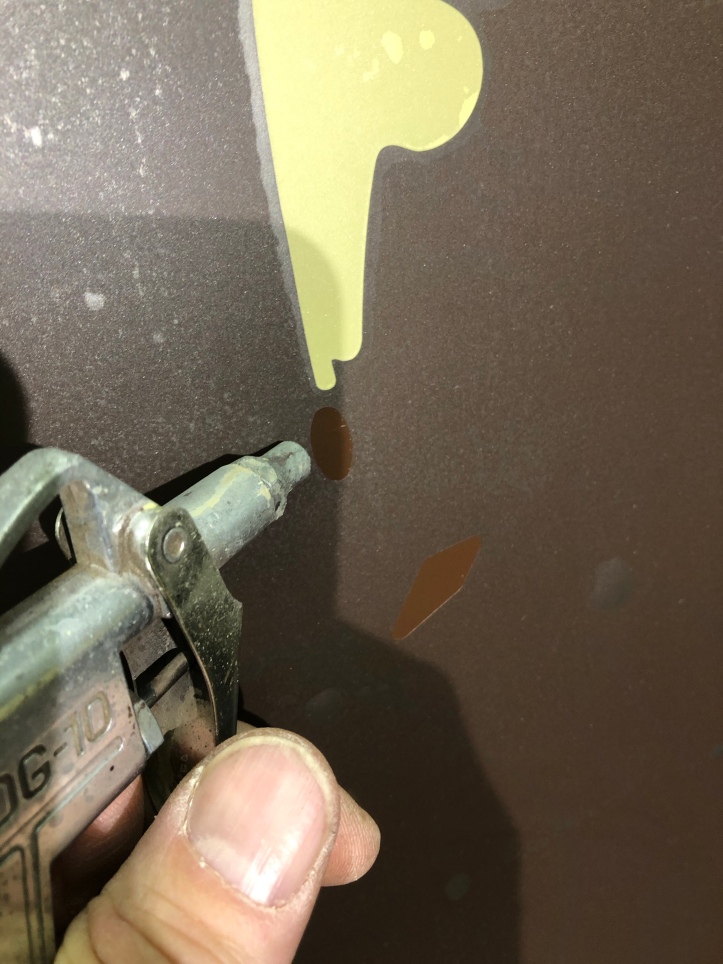
Once its off, make sure all the openings are as tight as you can get them with a spreader or your finger – wipe with a lint free rag, alcohol, and clean the areas around the openings. I used compressed air to clean out any little dust and lint right at the seam.
One more IMPORTANT detail: Double check the stencil for any areas that were missed in the ‘weeding’ process. Weeding is where the peel off all of the parts that will get painted. A couple of these little tiny dots were not ‘weeded’. I would have been ‘missing’ the color in the final result. Use a photo of the finished art and check to be sure every little spot has been weeded. You will see the tiny cut line and be able to pluck it right out. I can see this being a big issue on more complicated designs and I get how they can be missed. Everything is really hard to see with white on white and a nearly clear stencil layer.
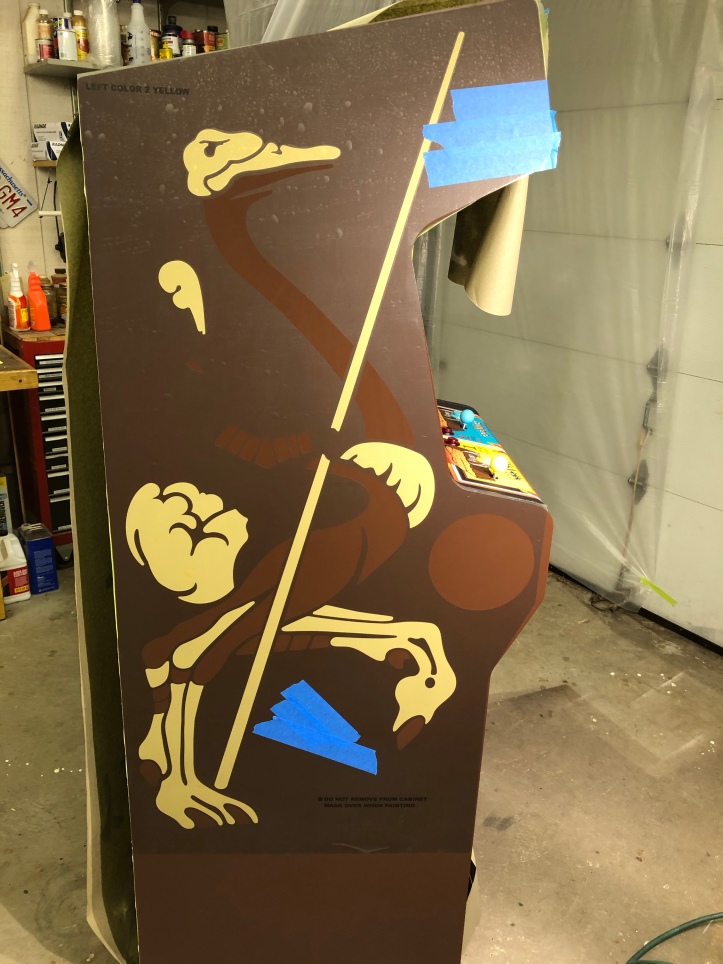
Its very clear where the yellow layer is going!

Thin wash coat of the base color to seal the stencil and prevent bleeding of the yellow.
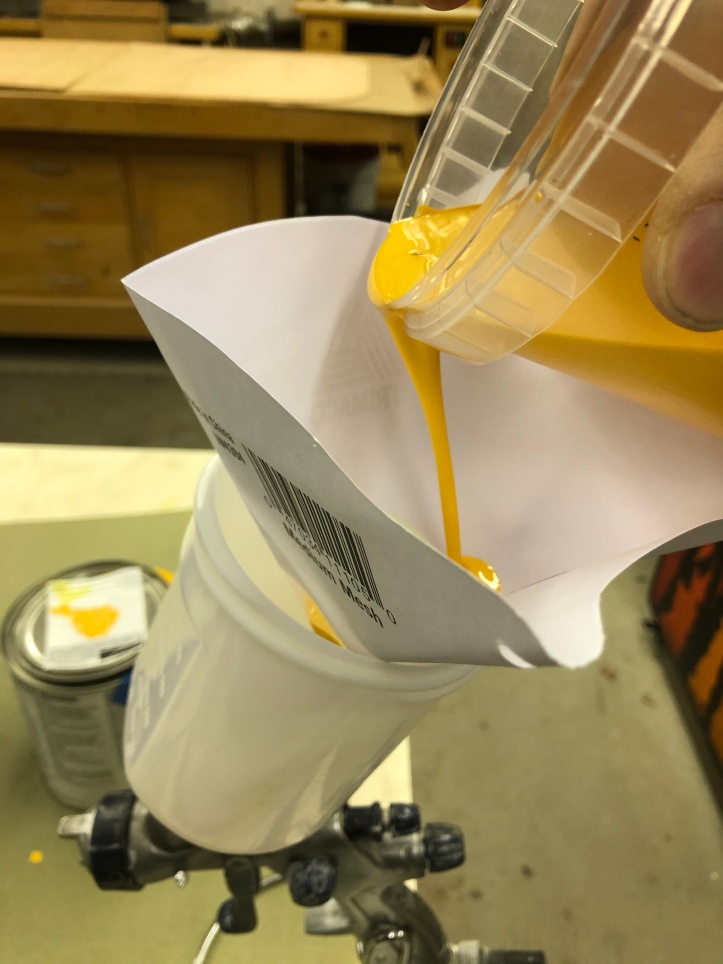
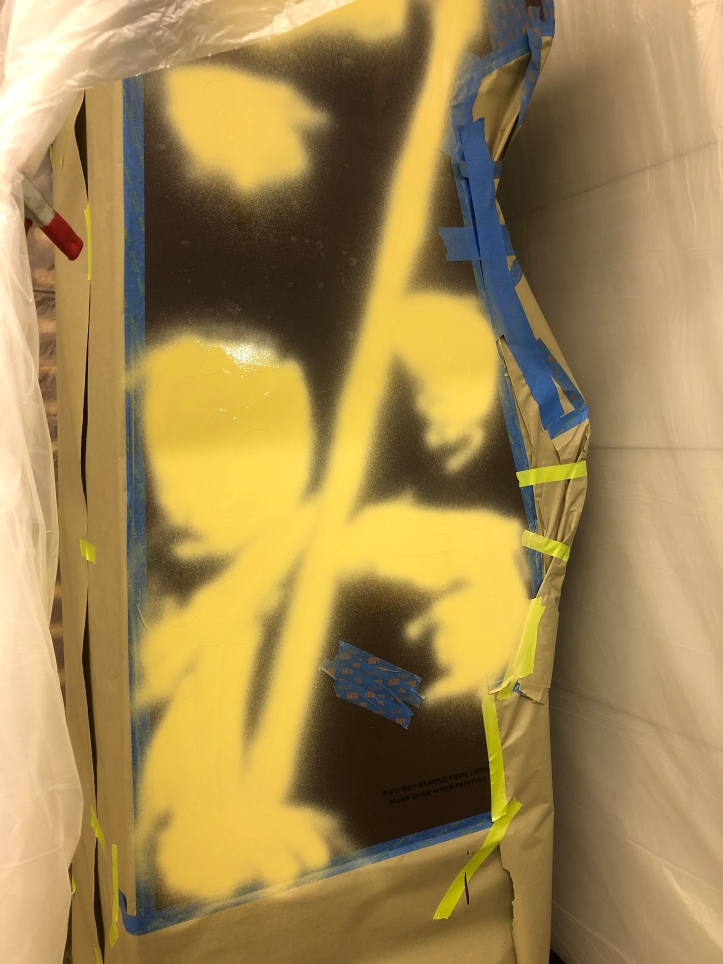
I’ve been using my HVLP sprayer and Sherwin Williams oil based paint. The yellow was much thinner than the cream or brown so I only used a small amount of mineral spirits to reduce it a bit. Always strain paint before spraying – one little clot and it spits all over your work. A strainer costs about $.25 – worth it..
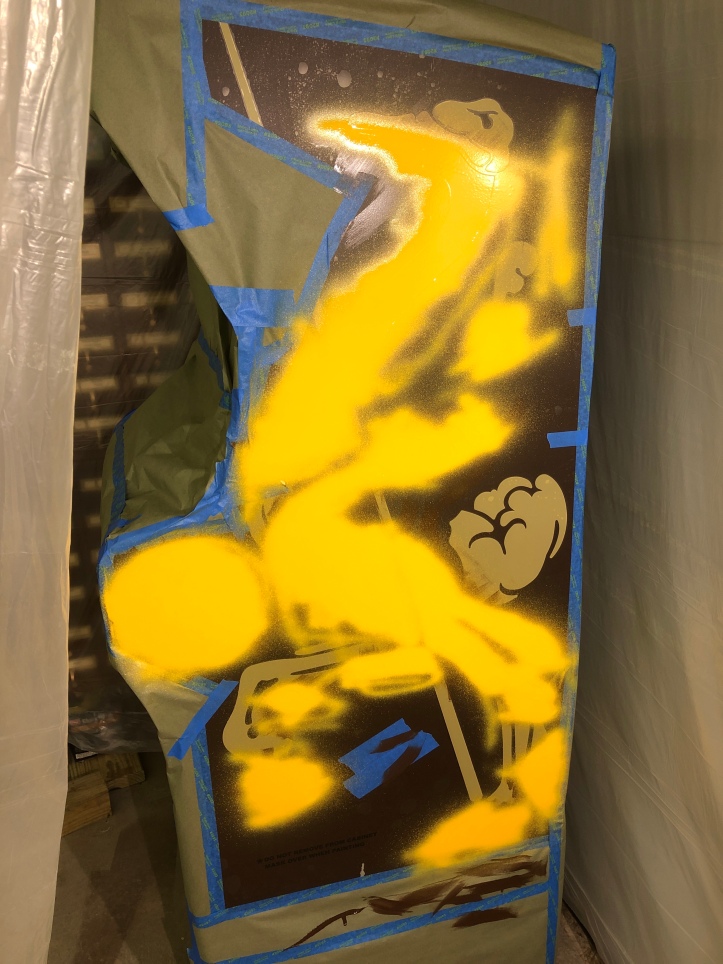
Yellow on – it’s much more nerve wracking than the base coat. I could sand and try again on the base and only lose time. These color coats I have to get right SIX TIMES! on the first try. Make sure you cover the alignment triangles again – going to need them one more time.
Yellow coat on. This side came out perfect. That said, 24 hours of dry time is a little too long for this paint. It had just a bit too much tug releasing from some of the painted areas and I had one small block start to lift on me. I’ll keep it to 12 hours or less for the final coat.
However – I did make a small mistake….
No matter how much I checked when painting, this little part was a bit thin.. I almost left it and chalked it up to allowing the machine to have a little ‘character’. But the best of the best figure out a way to fix these things.. I want to be one of those guys..
I used some of the clean masking material that was removed and cut a piece to go over the area in need of repair. Then I used the Exacto, a small straight edge and a relatively steady hand and re-cut a mini stencil in place on the yellow triangle. Brushed some brown paint into the seam to prevent bleed (again).

After a couple hours dry time, added fresh paint thinned with a couple drops of mineral spirits to help it level. It already looks good – I think it will make a full recovery. We’ll know in the AM..

97% good. There’s a little corner or two I may slice off when this is dry. But this is super close. Pulled the stencil after 1 hour..
Well the red layer stencils put up a fight. I got one side done correctly, will a minor hiccup. Applied the stencil, did the seal coat of yellow and brown. Sprayed red.. This went fine.
I peeled the stencil after about 30 minutes, but got a little yellow drag though the red.. Ughh. I waited a day and brushed a little fresh red on top. Same as the fix before for the yellow area.
The big issue is on the other side, I somehow got the stencil improperly aligned to the point were it will not look right if I shoot the red paint. Need to wait until Monday to see if I can buy a replacement for the one I have on wrong.. Nothing lost except a little time. I can’t peel and reposition it. It will shred. So I wait. I can 100% finish the rest of the cabinet, the one last color coat will be very simple to mask and paint.
Shop lighting vs. daylight
Now for the learning experience..
It’s easier than you would think to get off course applying the stencil. The last one I just lost track of it until it was too late. Here you can see the lower alignment triangle is off by about 1/8″-3/16″. Which caused the rider to just about touch the jousting lance. There is way too much margin behind his foot and almost none in front of it..
Big takeaway from this is once the top section is stuck on and you are working your way down, make sure the back edge of the stencil stays aligned with the back of the cabinet. Its the reference point that keeps everything on track. You can peel the top section off while there is only a few inches attached and reposition it. But there is a point of no return where you will shred the stencil – which is what happened to me.
The people at This Old Game helped me out and sent a replacement stencil within a few days.
New stencil staying aligned with the back edge of the cabinet. Feet, knees and lance are all within the proper spacing now.
Full cabinet masked off except the red area, quick thin sealer coats of brown and yellow to prevent bleed and the final coat of red.
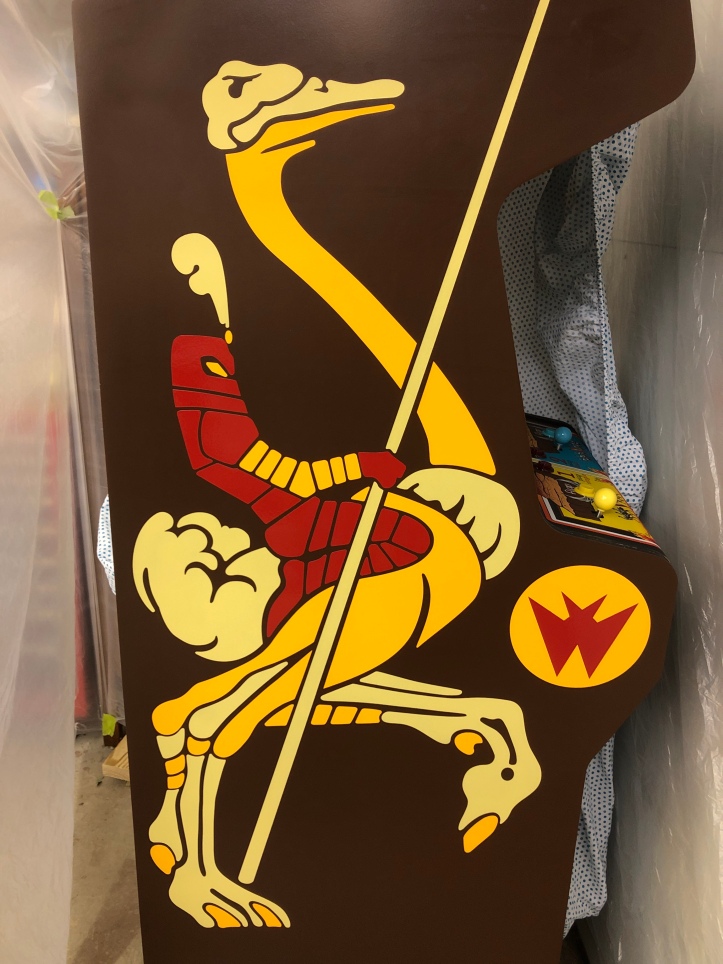
Came out great. Glad I waited to get a replacement stencil. I pulled it off after about 30 minutes and that really is the way to go. The paint is soft and levels off to a nice rounded edge. Just need to be exceptionally careful that the wet stencil doesn’t touch anything while taking it off. Keep a single edge razor in your hand (I keep it in my mouth) to cut away stencil material before it gets too big to handle during removal.






[…] Joust Upright – Side art stenciling […]
Your work is truly amazing. Thank you for sharing.
I am starting my own Joust restoration and thanks to you and watching how you did yours, I think mine will go a lot smother. I was wondering if you took a picture of the paint formulas for the red, cream, and yellow paint? I plan on color matching mine. But the paint on my cabinet is a bit faded and chipped. I was hoping to get samples from other Jousts for a comparison.
Thanks – I’ll see if I can get some pics from the cans. I meant to get some before they got covered in Paint.. But forgot..
https://bperkins.files.wordpress.com/2021/05/img_7642-1-e1622168278741.jpg?resize=334%2C334
https://bperkins.files.wordpress.com/2021/05/img_7644-1-e1622168255476.jpg?resize=334%2C334
https://bperkins.files.wordpress.com/2021/05/img_7643-1-e1622168309650.jpg?resize=334%2C334
Take a look at these. My Brown got painted over
HTH!
[…] Joust Upright – Side art stenciling […]
Awesome. Thank you so much. That is a huge help.
BTW, your brown was posted in your restoration thread. So I already have that.
Thanks again.
Happy to help