
Picked up this machine because it was the right price and I do like Asteroids. It didn’t need too much more than a full servicing. But as I got into it – I kept adding things to the list.

Triage – Asteroids Deluxe
When I picked this one up – the guy who owned it had it sitting around for about a year or so. He told me it played blind and that he hated ‘arcades’. Pretty cool guy however – he did full time pinball machine repairs/restoration. He just had zero interest in fixing monitors and could never find a replacement vector monitor for this machine.
Overall this machine seems pretty original. No major issues internally or cosmetically. It was dusty and dirty as would be expected.
Like any restore – I started at the power cord and worked my way in.. Forgot the before picture of the power brick. 5 of it’s 6 fuses were the wrong ones – no surprise there.

Cleaned up nicely.

The ARI board seemed to be working at first. But after powering on and off a few times, the 5V+ failed and I was getting 13V+ on the 5V+ lines. There were also a couple resistors as part of the sense circuits that had some of the color codes burned off. I replaced the 2N3055 and no change on the 13V+. Replaced the bad resistors and replaced the LM305 voltage regulator. Best to make sure all the voltages are good before plugging the PCB in! The LM305 was the bad guy on this.

There are a few issues with the monitor. The owner told me the spot killer was on, I didn’t even try it myself. R100 and R101 had burned up and been replaced in the past. These can be bypassed per Atari. I checked the resistance and R101 was good, but R100 was failing and was up to about 50M of resistance.
In the HV cage – there had been a grease explosion at some point. I was able to get the HV diode apart. One side was clean – but the board side connection was in pretty bad shape.

This is after the first round of cleanup. I was going to remove the boots and solder the diode in directly, but I kept cleaning the bad one and it had a solid connection under the crud. I used the meter and tested ohms through to the coil and nothing seemed loose inside.

Received a cap kit and a new HV diode. I forgot to get a pic of my replacement. One spring was junk and the other had disintegrated. My solution was a stiff replacement spring from a pen. I curled the leads on the diode to match the pen spring that I trimmed down to about 1/4″ and soldered them to the leads. I put it back in the boots and used a little RTV sealant to secure the boots into position. Since the kit came with a transistor set, I replaced them even though the originals tested good. Testing around the board showed R100 was failing so I removed it and R101 per the Atari service document. 3 of the fuses were the wrong ones – fixed that too. One of the capacitors wasn’t connected. Someone had cut the original on the parts side and then soldered a replacement to the lead sticking up. That solder joint failed. So weird..
I test caps as I take them out AND put them in just to see if there are any bad ones. I couple were out of spec – but nothing too crazy except the one that wasn’t connected at all.
Monitor fired right up! My first vector CRT repair. The picture was jumpy when I first powered it on, Deoxit on the pots cleaned that up. I picked up the B&K HV probe and tested the HV circuit – perfect 14.5KV.
About a year ago I picked up 3 monitors in a really good deal. One was a G05-802 that I never got to a chance to test. My AD has the right connector to plug it in..

Lucky me! I have a test bench vector monitor.


The coin mechanism is very nice on these. The bulbs were dead, the mechs were stuck and it needed a some cleanup. While it was apart – I polished up the reject buttons. I wet sand using a dish towel as a backing pad – starting with 800G paper to get a uniform scratch pattern. Once all of the ‘wear’ scratches are out, I step up through all the remaining grits (1000,1200, 1500, 2000, 2500, 3000) and finish with Novus 3,2,1. Both buttons took maybe 15-20 minutes total.

While it was apart – Soft Scrub did a great job cleaning up the stainless steel plate. I have a bench grinder with a buffing wheel and hit the heads of the bolts which were a bit rusty.
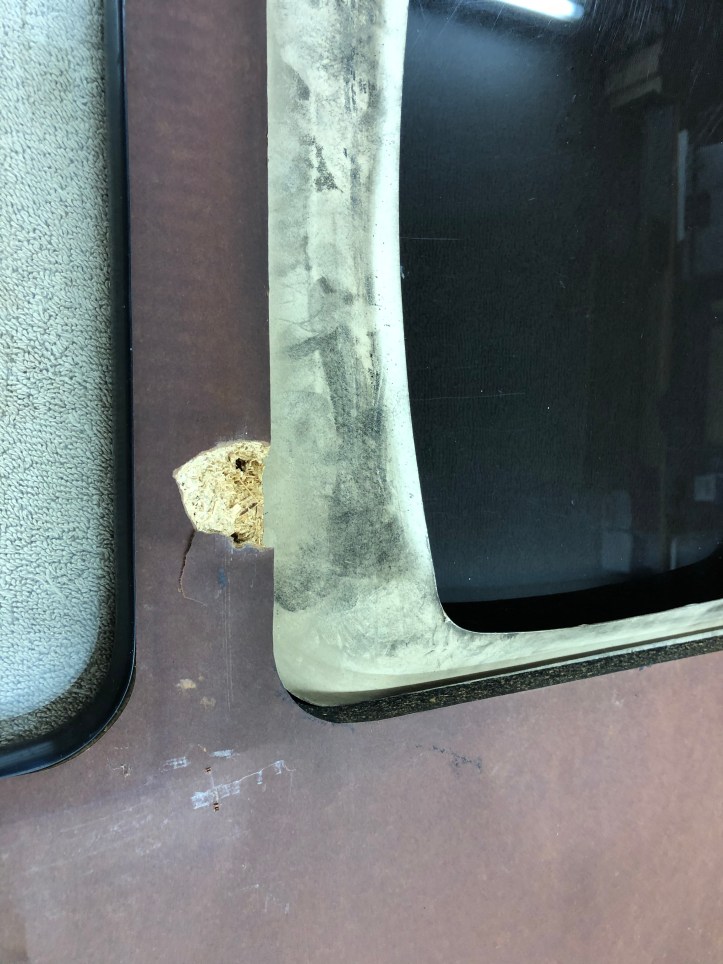
Here is where the support for the table top had been ripped out at some point.

That caused the right side panel that supports the top to pull away from the front and rear. Its pretty easy to let the top go too far without the support actually attached. Thankfully nothing else ripped apart.

Here is the repair to the missing chunk of particle board. Each of these blocks has clear packing tape on them – which epoxy will not stick too. I filled the area with thickened epoxy and clamped it up. Some may be inclined to use Bondo here.. Bondo will just rip apart. An epoxy based filler is really the best choice and will strengthen the area.


The packing tape leaves a smooth surface. I sanded off the squeeze out, added #8-32 threaded inserts and made it so it will not rip apart again. The original 1/2″ screws were a low cost design choice. Not much holding power into particle board.

While it was all apart – I Metal Rescued/rust removed all the bolts. Sanded up the heads on the lathe and gave them a couple coats of satin black.

The control panels had woodgrain vinyl on them which had been nicely installed and I initially thought it was original. Looking through many images it clearly was not. Either way it was hacked up when I got it and needed to be addressed. Once I started scraping it off it was obviously something that was added once the original paint had worn off and the CP started rusting.

Whatever adhesive they used back then – it never wants to come off. I tried every chemical I have and the best I can get it is ‘sorta gummy’. I can’t use heat in this case because I’m saving the original overlay. Here is a shot of it after sandblasting. The media just bounces off the adhesive, but at least its easier to get chemicals under it from the bare areas. A couple trips back and forth between chemicals/scraping and sandblasting got it cleaned up.

The coin box was hacked and bent up a bit so while I was at it – it got cleaned up. Same with the corner clamps.

Finally got all of the adhesive and paint off. The rusted areas were pitted and need to be filled in with some primer. Anything that gets sand blasted gets a hand sand with 180/220 to smooth up the surface before the first paint coat.
First of about 4 coats of primer. A light sand between coats at the pitted areas helped fill and level them off.

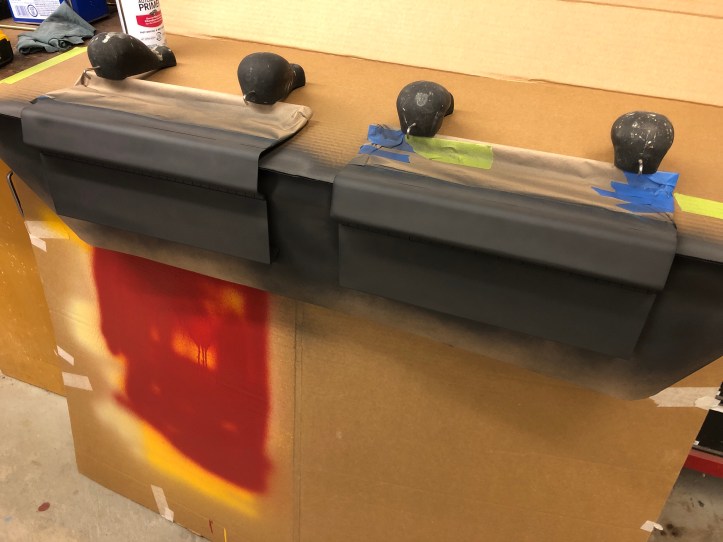
I tried a few different ways to paint these – this turned out to be the easiest to do..

Bracket secured to the top – quite sturdy now.

The tinted plexi that covers the monitor is way worse than it looks in this picture. The tempered glass top has a few scratches, but this thing looks like it was dragged down a dirt road for a few miles..
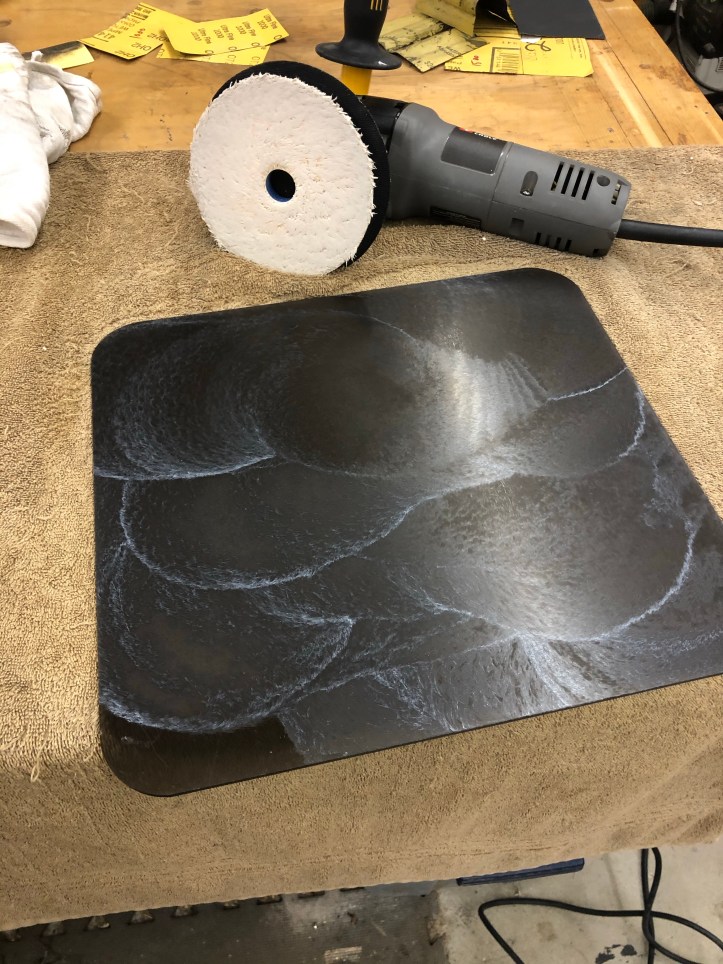
It got the full treatment with the Novus #3 and #2. It took 30-45 minutes to get it presentable. There are a few scratches left – but they are not obtrusive. I’d love to know how it got so messed up – on both sides – as compared to the glass top which was relatively scratch free.

Much better!

Corner brackets look like they have original paint, mission accomplished.
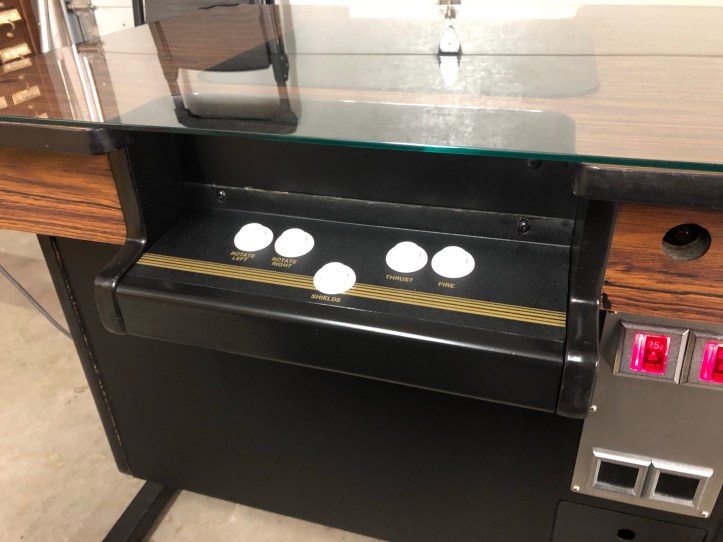
Control panels back in place. Both cleaned up pretty well. I did try to use the old buttons – took them apart – dishwasher, etc.. but they just looked terrible and were pretty rusty. Bleach did nothing and the replacements are identical. I’m glad to see the wood grain contact paper gone.

Player #2 side

Player #1 side.
I have a couple small items left: An Asteroids Deluxe glass underlay is on its way. Need a coin box lock and the caps for the legs. Maybe mess with the monitor just a bit more, the vector lines are not clean. The have a dotted effect when you look closely. Seems off to me.
Shop cleaned – ready for the next project.

Fantastic restoration, really enjoy your presentation.
Great restoration. Inspiring me to work on mine. At a loss as too how to repair the double sided connection on the main board where the copper foil has worn away. Havnt looked at it in year though.