
My arcade cabinet started as an idea years ago when I discovered MAME and that I could play Centipede (my college game) exactly as I had then.. the desire to build one came and went until last year when I ran into a real Centipede cabinet that was operational but unplayable.. it was infuriating.
I spent about 6 months designing a cabinet in Sketchup, acquiring components and perusing the Arcade Controls Forum formulating and overall design. In December of 2017 I started the actual cabinet construction.
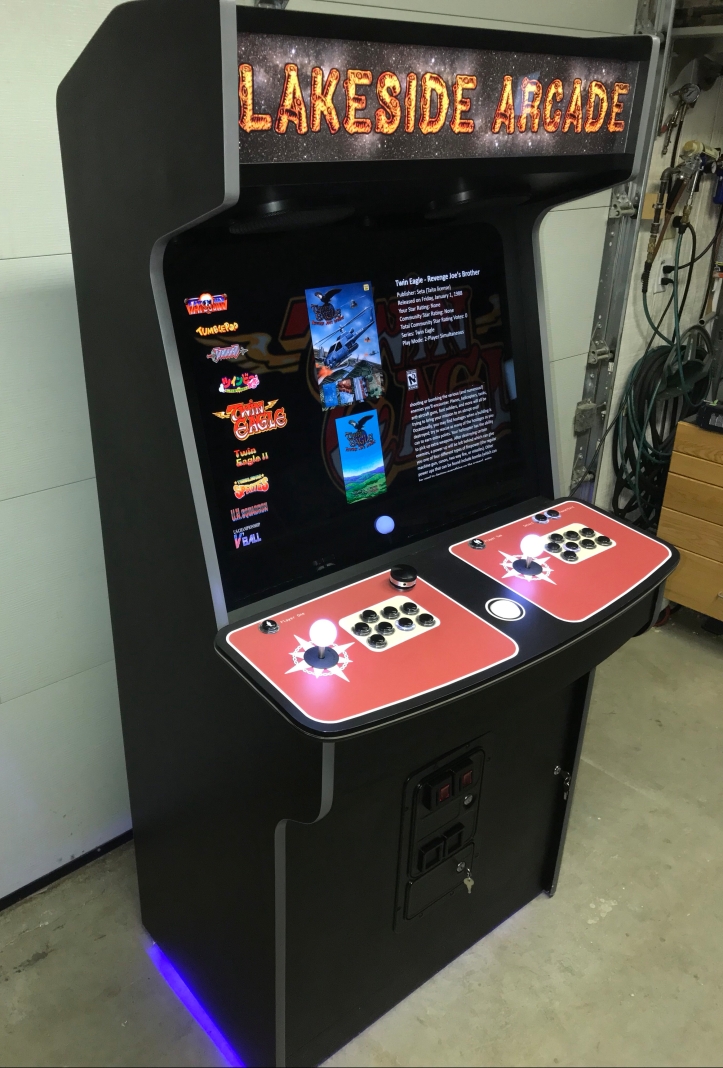
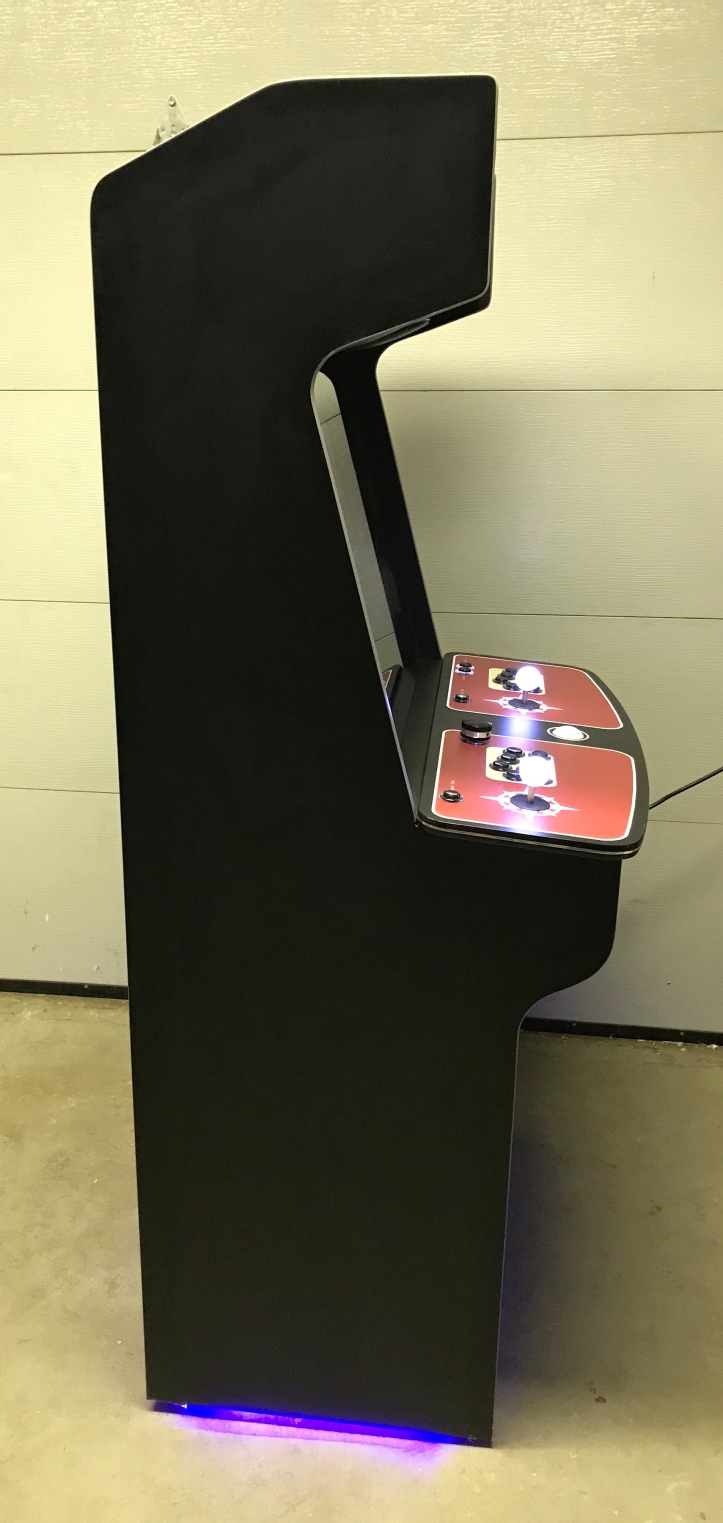
The design goals were rather simple – build a cabinet that was reasonably modular and that I could take apart if needed. It has a relatively powerful PC so that I can add newer games down the line. My research led me to a 32″ monitor to give the height needed for vertical games which seems to be working nicely.
Ultimately the machine will end up at our lake house once I get all of the software sorted. I’m using Bigbox as the front end and LED Blinky to show us all the buttons and controls for the games I don’t know – the pause/help feature is really useful. I’m also no artist so the overall look is pretty basic when it comes to that. The control panel mirrors some design points of a traditional wooden boat – but overall – I didn’t want it to be too busy.
Construction complete! Shop is all cleaned up and ready for the next project.

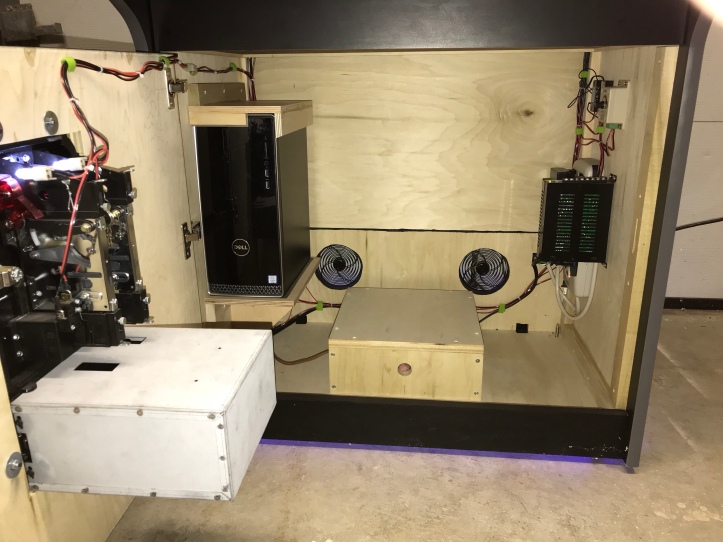
Dell PC, Coin door, Arcade power supply and small subwoofer for Jukebox mode.
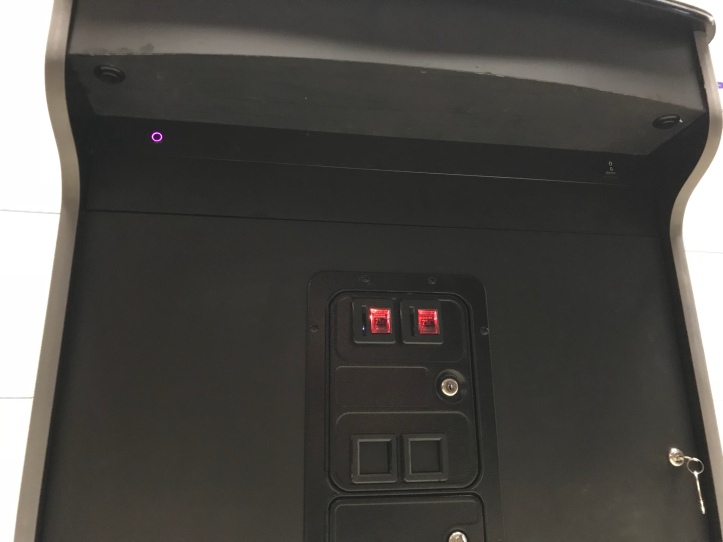
Coin buttons under the CP on each side, lighted PC power switch and on the right – volume up/down.
Moving handles and cooling fans – so far the fans have not been needed.. I’ll keep an eye on the cabinet heat. They make a little more noise than I like – maybe there is a variable speed fan controller/thermostat out there I can rig up..
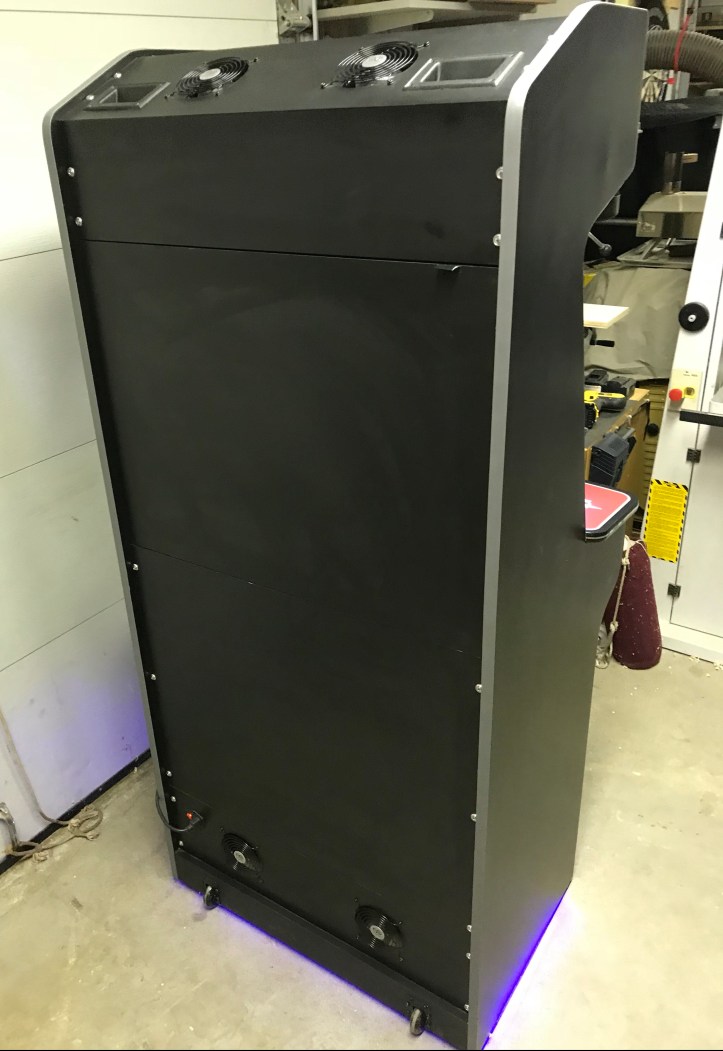
Relatively slim profile – overall less than 28″ deep.
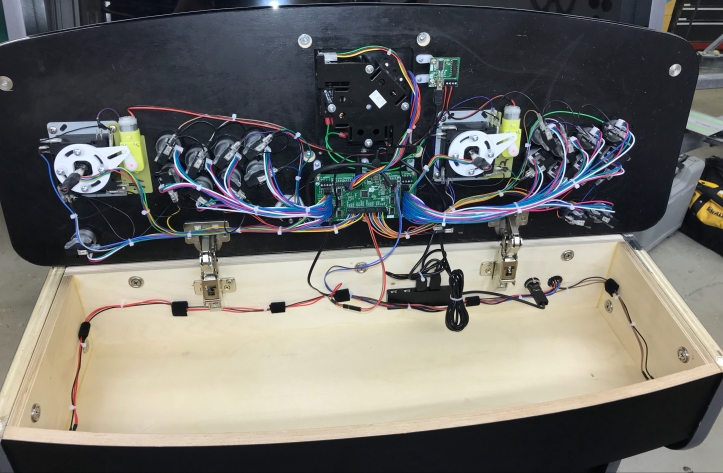
The fun part – wiring up the central nervous system.
Next steps are to start over on the software installation and create a little documentation to keep track of all the little changes and make it a bit more bulletproof. Right now I have to jump through a bunch of steps to get it ‘ready’ for someone to use. I’ll be pinging the forum for help on that too. Maybe add some other emulators? Not sure which ones even like arcade style controls.
I’d like to create some side art that matches the lakeside theme – that is quite the undertaking – we’ll see if I get that far.
We have a LOT of people who are ready to play some old school games.. I need to get the software done!

This looks epic! I posted a question on a page I think it’s broken. Can you share a pdf file of this build? Do you have a psd for your cabinet? To try and create artwork or at least a psd for the control panel? Again appreciate you sharing , it’s inspired me to start my own build. I will definitely update you once I complete mine
I do not have anything other than the Sketchup drawing I posted the link too.. Hope that helps.
hi bob how are you
i started building this amazing cabinet you made
i cant understand how to put the bezels with the glass inside the cuts around since its dimensions are bigger
can you please explain ?
[…] Cabinet Construction Completed […]
A total noob question about the SketchUp plans; I can open the plans but all I see is a side panel. How do I see the full build?
Thanks!
If you open the plans in Sketchup – you should see a bunch of tabs across the top (like a browser) – every panel, etc.. is in there.. Hope this helps!
Thank you! I love your cabinet and I hope to make mine look half as good as yours!
Thanks – let me know if you build it.. You should be able to print the entire set of plans. basically ends up a bunch of build sheets.
Do you have the plans for this cabinet in PDF? I don’t have sketchup nor do I know how to use it but I would love to get the dimensions to try to replicate your cabinet.
Thanks
Hi – I do not have PDF.. Sketchup Make is a free download.. If you get it and load the app. You don’t really need to understand how to use it to navigate through the tabs and see it. The PDF output does not work well. Let me know if you build it!
i just exported all 26 sheets to PDF. I wonder if i would be able to side panel and control panel printed to scale looks like pages are 66 inches wide. I’ve seen 40 inch printers before. Can the pdf be converted to psd files to make side and control panel artwork or what format should these be saved in.
hi
great build amazing
but i cannot understand how to put the bezel with the glass inside the cuts if its bigger than the front bezel
how can you push it inside the cuts around ?
please help
If I understand your question – you need to assemble the cabinet around the glass. Assemble the side and put the shelf and speaker panel in place – then slide the bezel in – then put the second side on…HTH
i just exported all 26 sheets to PDF. I wonder if i would be able to print side panel and control panel printed to scale looks like pages are 66 inches wide. I’ve seen 40 inch printers before. Can the pdf be converted to psd files to make side and control panel artwork or what format should these be saved in.
If you use page 7 from the PDF export – it give you all you need to draw it directly onto a side panel. That is how I did it. It will me much more accurate (and free) than printing it.. the diagonal lines can be drawn in using all of the x,y coordinates provided.. HTH
You mean to create artwork or to try and cut a side panel to scale from your drAwing?
Yes – use the measurements from the drawing – draw directly on the side panel – then cut from that. Its easier than trying to print to scale, trace and cut.. All of the data needed is on that one page to make a full size drawing directly on the side. HTH