

For years I’ve wanted to take the Half Hull Carving class at Wooden Boat School.
It is always the last week of September and for whatever reason it never worked out. Until this year.
I chose Minerva for my first half hull. All of the model details are pre-calculated and drawn to scale. Just trace the patterns onto wood and cut them out. Sounds easy enough, but it was an all day event. I stayed late and got mine all glued up so I would not have to wait for glue to dry on day 2.

Day 1 consisted of instruction and descriptions of the process and picking out a design to build. The Wooden Boat Store has plans for a dozen or so boats. Class came with a set and they really take the guesswork out of your very first model. The plans are simplified so that each lift is easy to cut, trace and transfer to wood for carving.

First cut out a lift from the plans and align the straight edge to the edge of the stock, pinning it in place.

Using a pin. Poke holes through the paper each 1/2-5/8″ along the line to transfer the shape to the carving stock.

The next step is to ‘connect the dots’ using ships curves. This takes a little practice but you want to connect as many dots as possible using any part of the curve(s) that best batch the shape. In the end – you want a fair line that has no humps or hollows that were not intended.
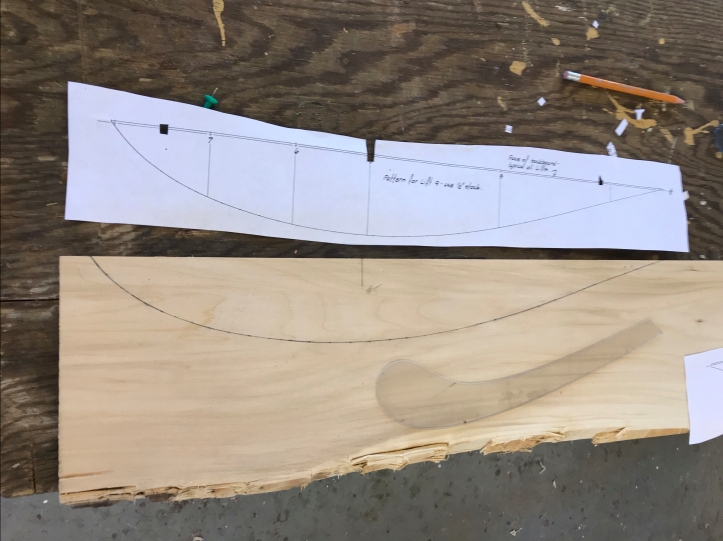
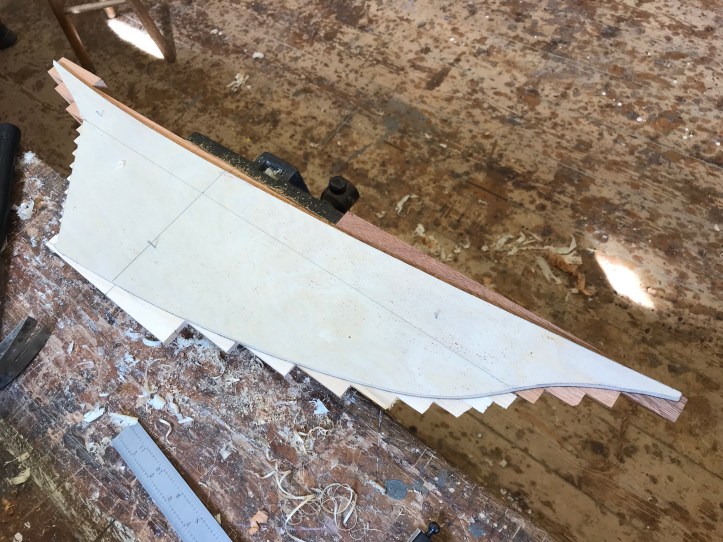
Here is a paper template, the lines transferred and a ships curve that had some of the finished shape in it. Each lift will also have a common station mark that needs to be kept across all the lifts. I marked the thin edge of the stock with a marking knife so that I can precisely calibrate all of the planks when gluing. Also label each lift since the can get mixed up pretty easily on some hull shapes.

Next lay out all the lifts and cut them on the bandsaw. I like to leave the pencil line and finish each one with a bench top disk sander, small hand plane and spoke shave. I missed getting a few pics of that part. If you can, split the pencil line and leave a nice fair line for each lift. The edge left will be where the hull is carved down to once they are all stacked.
The plans will show the thickness of each lift – normally 1/2″ or 3/4″.. but the thickness matters. You also want to keep all the lifts from the same board if possible so the color of the wood matches. This only matters for hulls finished bright of course.
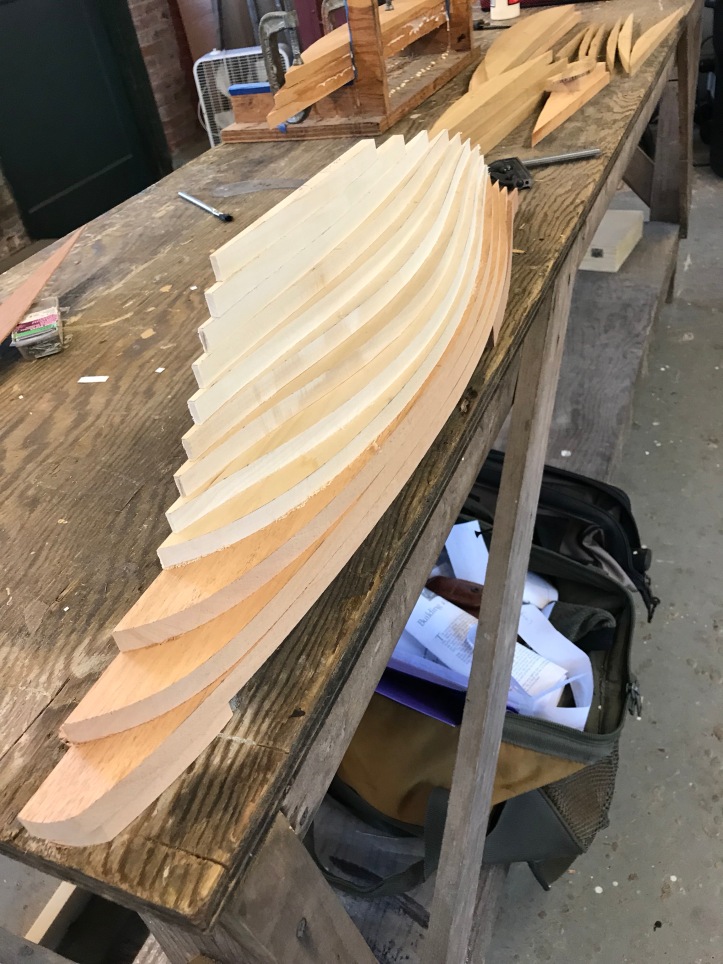
What you should end up with is a stack of lifts that are a blocky representation of the final model. Each lift should have a clean fair edge. A quick finish sand on the mating glue surfaces is a good idea as small gaps from machine marks can show up in the final model.
Glue up is next.


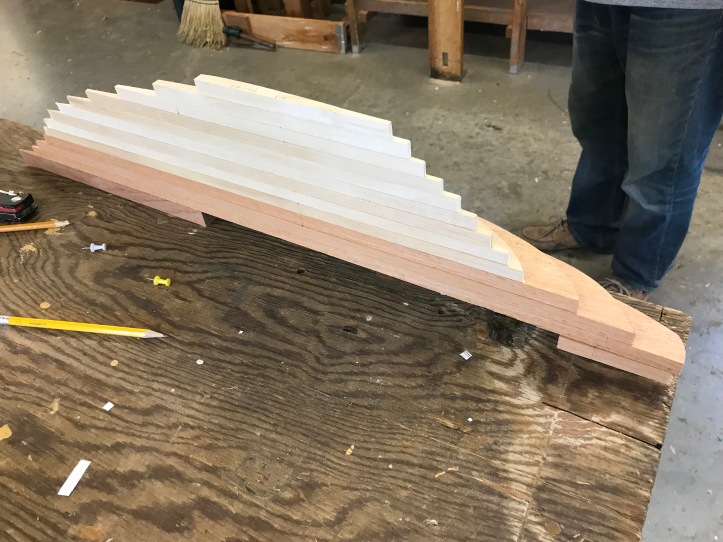
Plain woodworkers glue is all that is needed. It is easiest to glue up 3 lifts at a time to control shifting and slipping of the lifts. Once each 3 lift assembly is dry, glue those together for the final assemble. One student at the class had been there before and created his own version of the gluing stand.. I’ll be using some of these design features for my own stand. Having more vertical gluing posts would have been helpful.
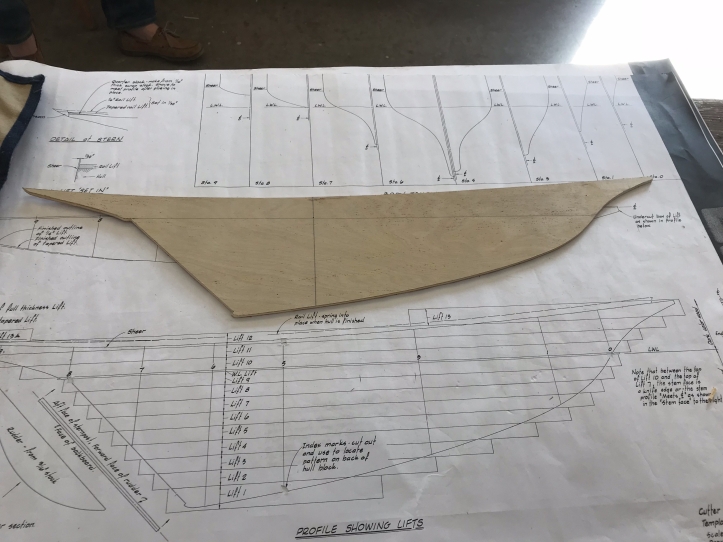
Next step is to create a full template for the profile. This is also supplied on the plans. Transfer to pattern stock and shape just like the lifts. Be certain to transfer a common water line and station as with the rest of the lifts to line things up..
If you have a router table and a pattern following bit – consider making a copy of the full template. Having a spare may be useful if you ever want to make a second hull and it gets ‘accidentally’ ruined in one of the one of the next steps. A copy will only take a couple of minutes with a router table/pattern bit copy.
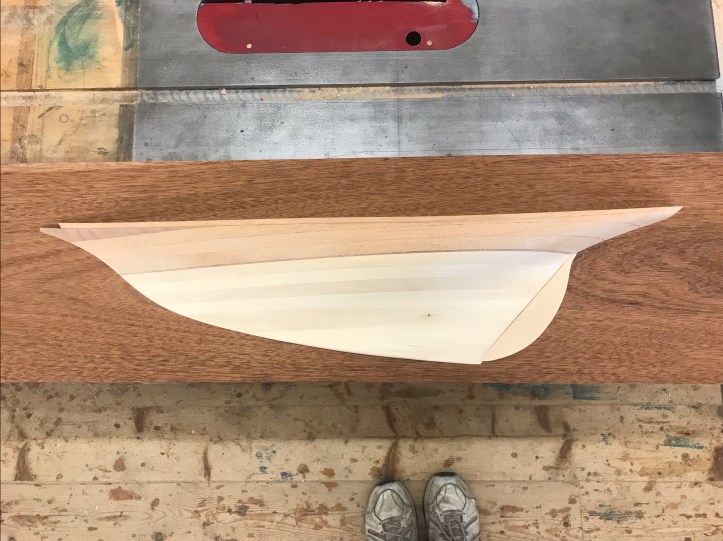
The ‘Flat’ mounting surface of the hull will be a mess after clamping and gluing. It needs to be scraped and flattened so the hull will mount cleanly to a plaque or the wall. In the class it was done many ways – but after scraping the glue off – a hand plane was the fastest, simplest way. Test for flatness on a tablesaw.
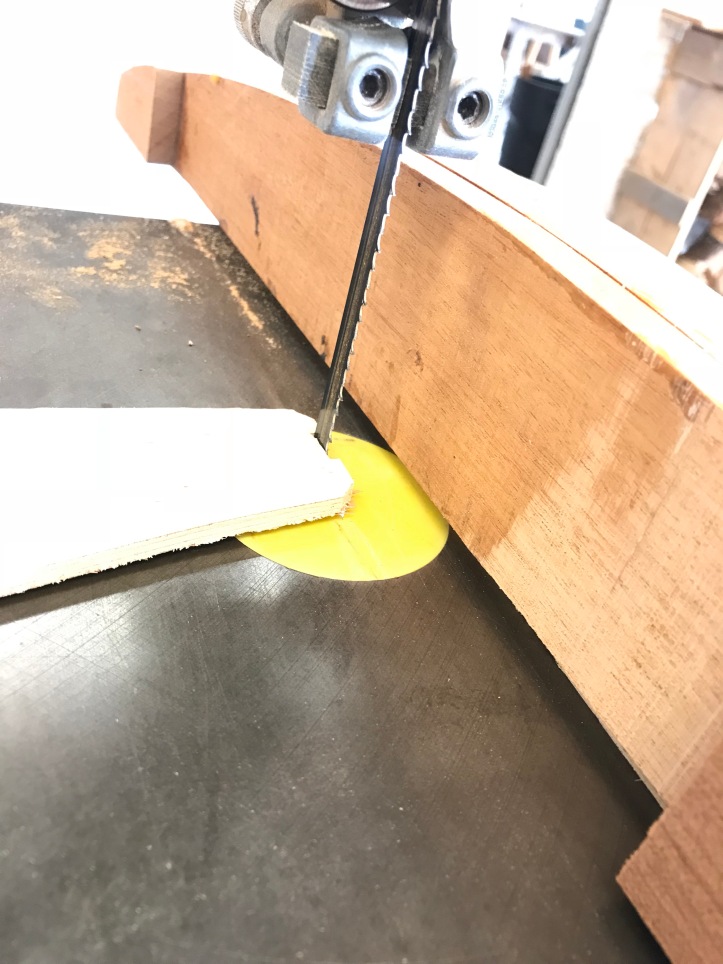
Now attach the profile template to the model, lining up the station and water lines. tack it in place. I used 1/8″ ply on this one – before I came up with a simple method of cutting the profile on the bandsaw with a pattern following guide. Use 1/4″ plywood for the template to make it easier to follow.
Here is the guide – just a simple piece of scrap that covers the blade and can follow the template on the back of the model. Carefully trim to shape around the model.
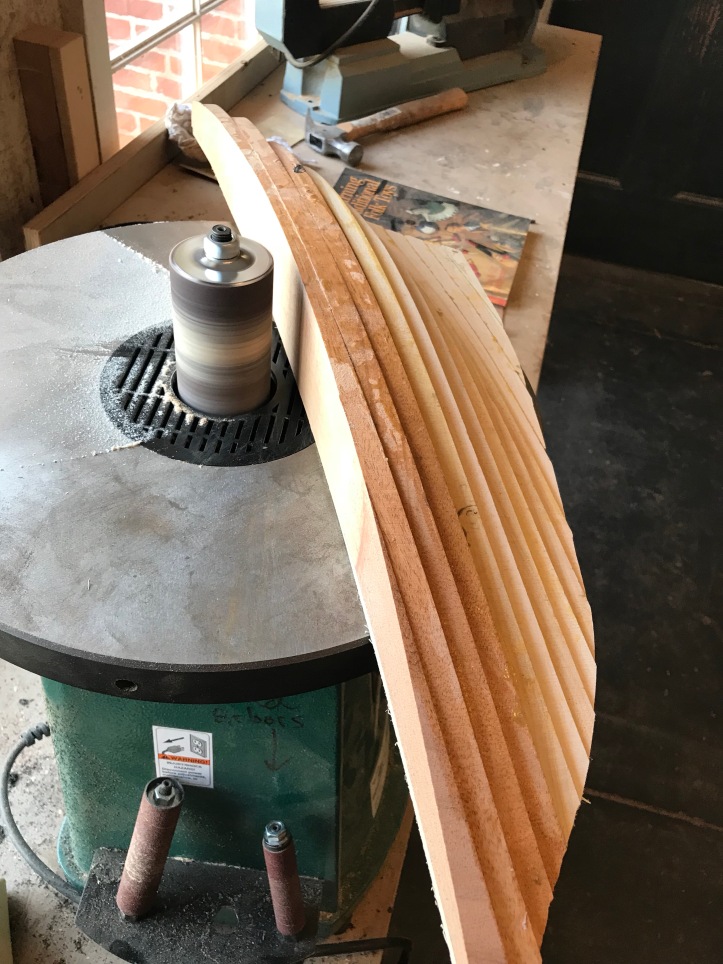
Once trimmed, I left the pattern in place and used the drum sander to clean up the cut lines on the deck. Without the template in place, you would not se the pencil line you were sanding too… The template makes it easy to see the finished profile. It is also why I recommend making a copy of the template if you plan on making more models. It will be pretty easy to mess this one up.
Clean up the edges all the way around w/o cutting into the template on the bottom. Just get it close and fair. The very last of it can be sanded to profile with a block.
Next is the shaping and carving step. The goal here is to remove all of the ‘corners’ but not shape past them. You want to shape down to the intersection of each plank – but not through it. The spokeshave, small hand plane, carving tools and rasp can be used.
My methodology is simple – shape the entire hull so that the gaps are equal and shape down to the intersections evenly across the entire hull.. Do not shape from front to back for instance.. shaping the hull evenly allows flexibility to fair the shape evenly to make up for any cutting errors on the planks.
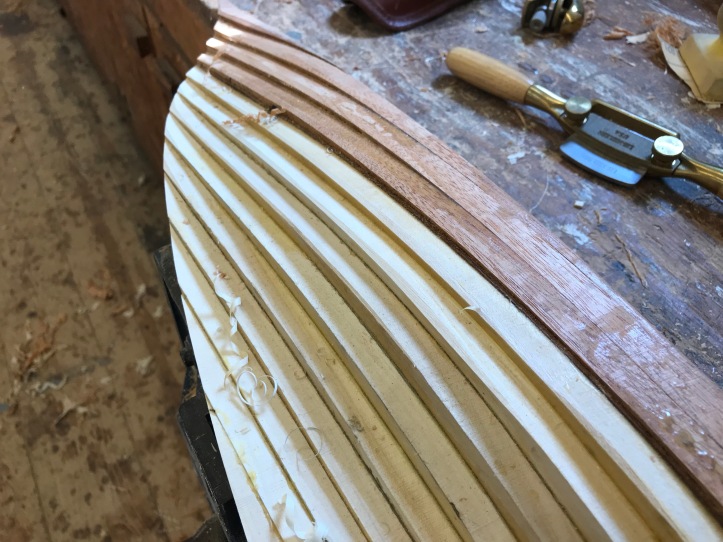
Here are the planks being carved evenly down to the intersections. Shaping them down evenly gives you a feel for how the wood is carving and what tools can be used. Curved spokeshaves can get into the hollow and bring them down to shape.
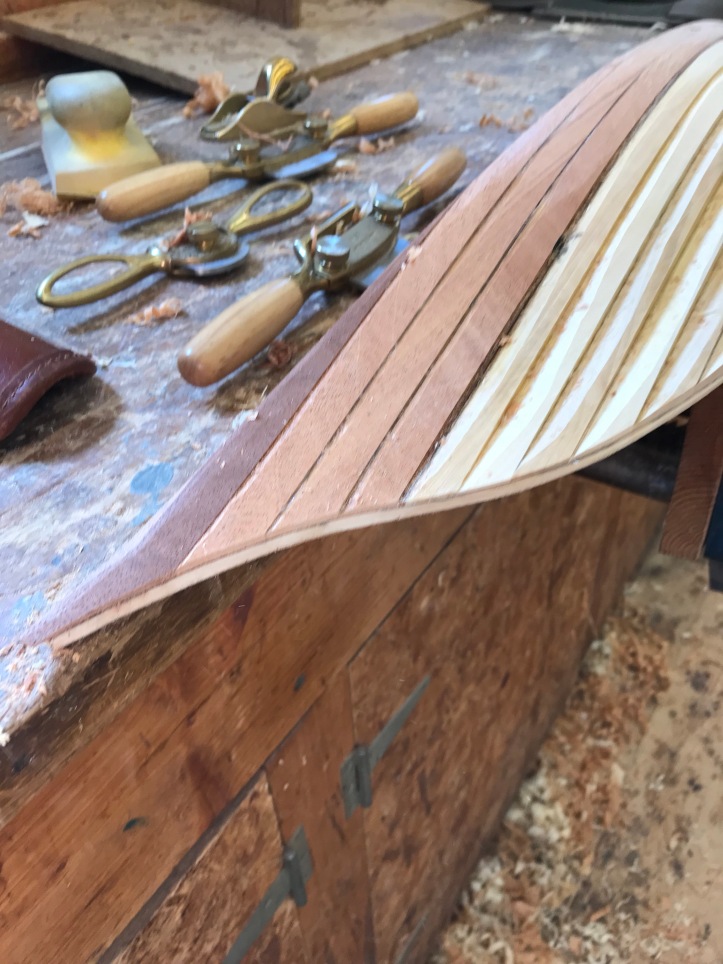
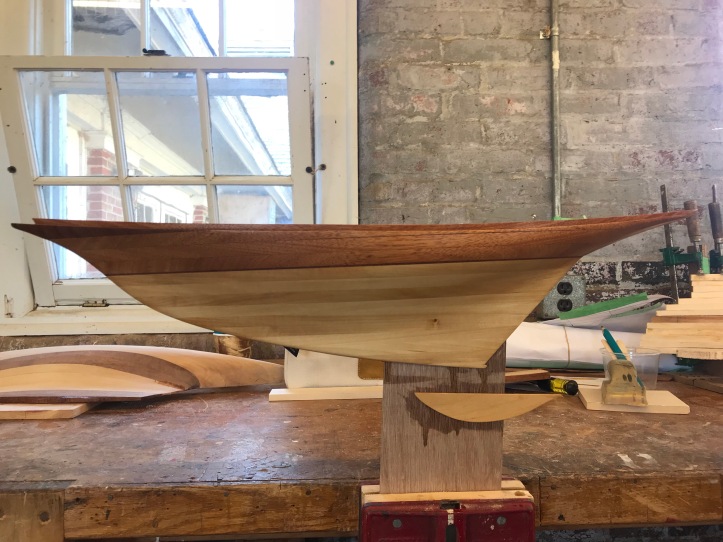
Here all of the planks are shaped down very close to the intersections. The stern area and turn of the bilge can be very tricky for many hulls because it they change shape rapidly. Bringing the shape down so the groves are even helps find the overall shape and gives you a feel for material removal in those awkward areas.
One issue I ran into is that glue squeeze out can fill the intersection once you get close to the final shape. In this case, the hull will be smooth, but it really needs move material removal to get to the true intersection. It will appear is a thick joint line.
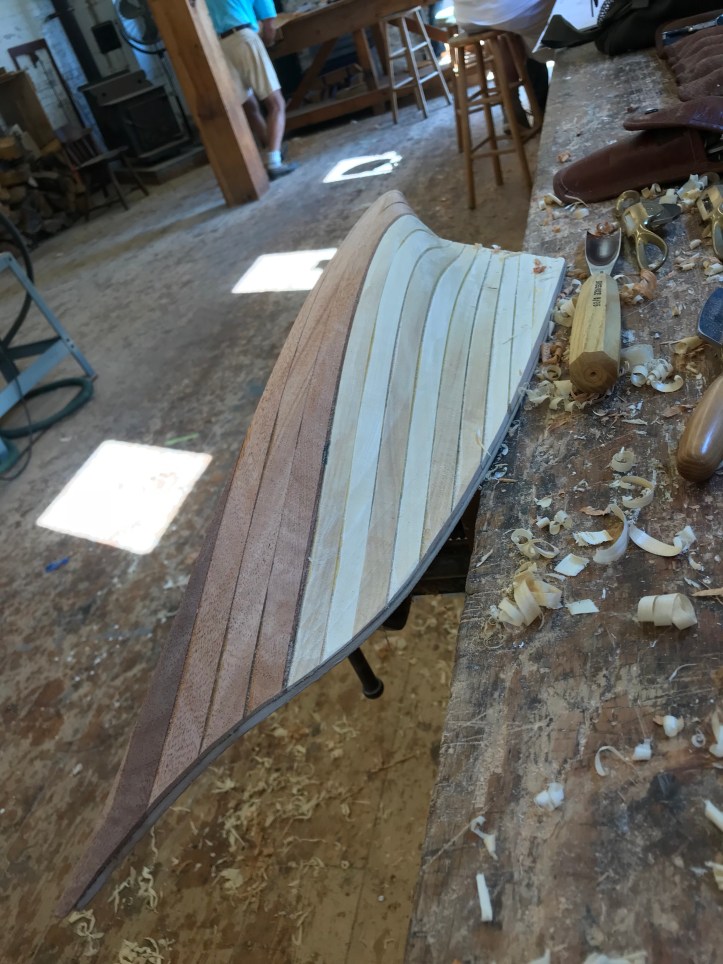
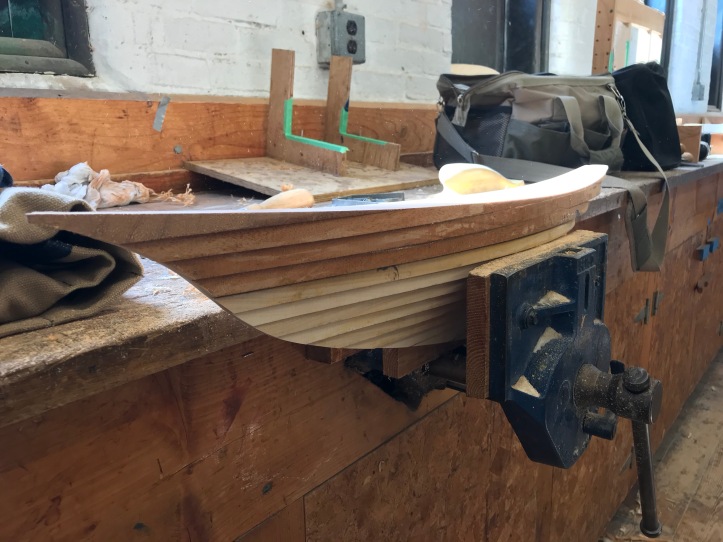
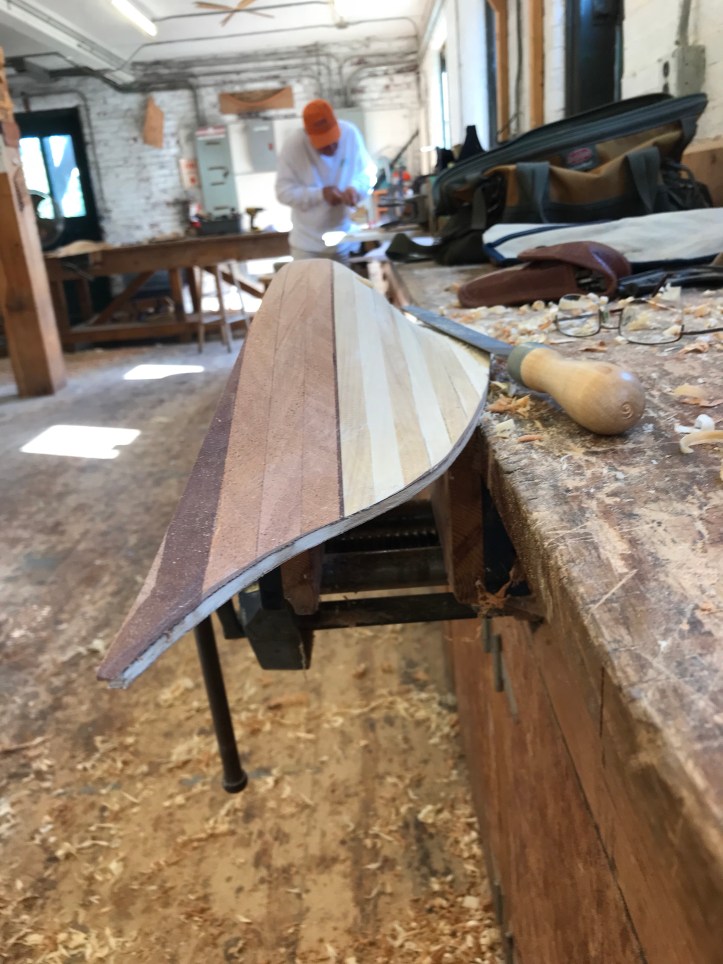
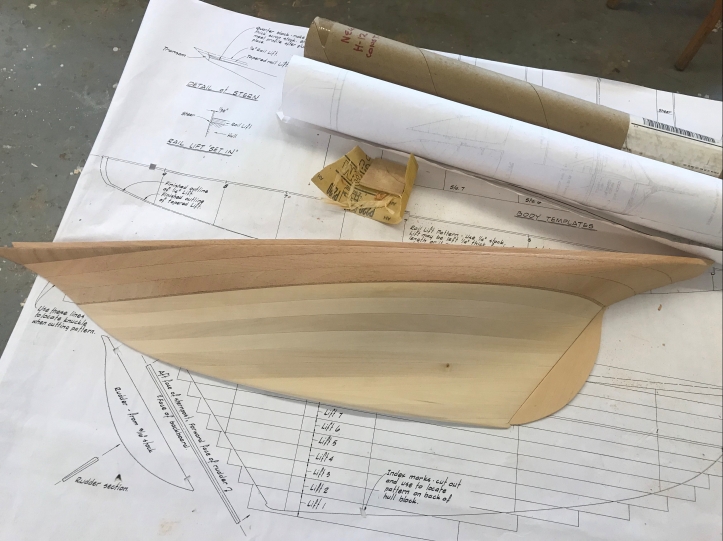
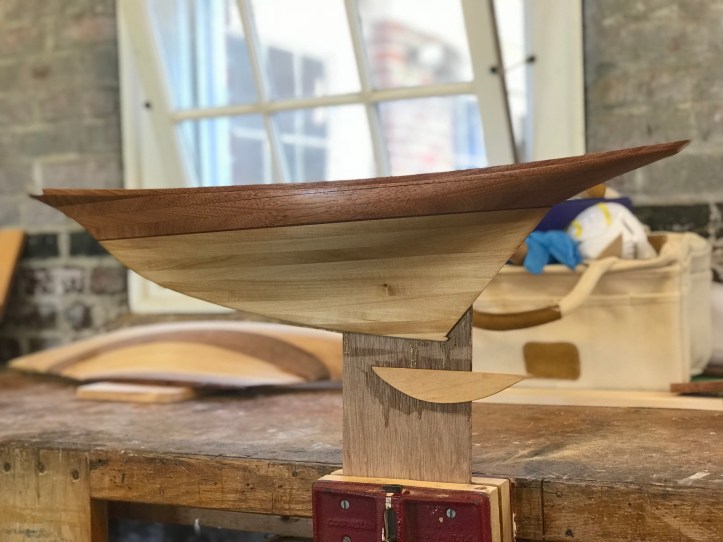
Here it is very close to finished. All of the joint lines are just about gone. In these last stages, a soft sanding block with 80g paper is how I approached the final fairing. Sighting from many angles checking for unwanted lumps and bumps is the last step.
One tip from class “If you make it any better, your going to make it worse”. It’s tough to know when to stop. The glue in the joint lines were the trickiest. Sanding them out and hoping not to make it worse is a learned skill. That said, the lines cleaned up as I cautiously kept sanding out the glue lines. What makes them difficult is you do not know if they are truly excess glue at the intersection or glue filling a gap in a less than perfect lamination..
This design has a very thin rudder – shaping and fiddling with it was a bit delicate.
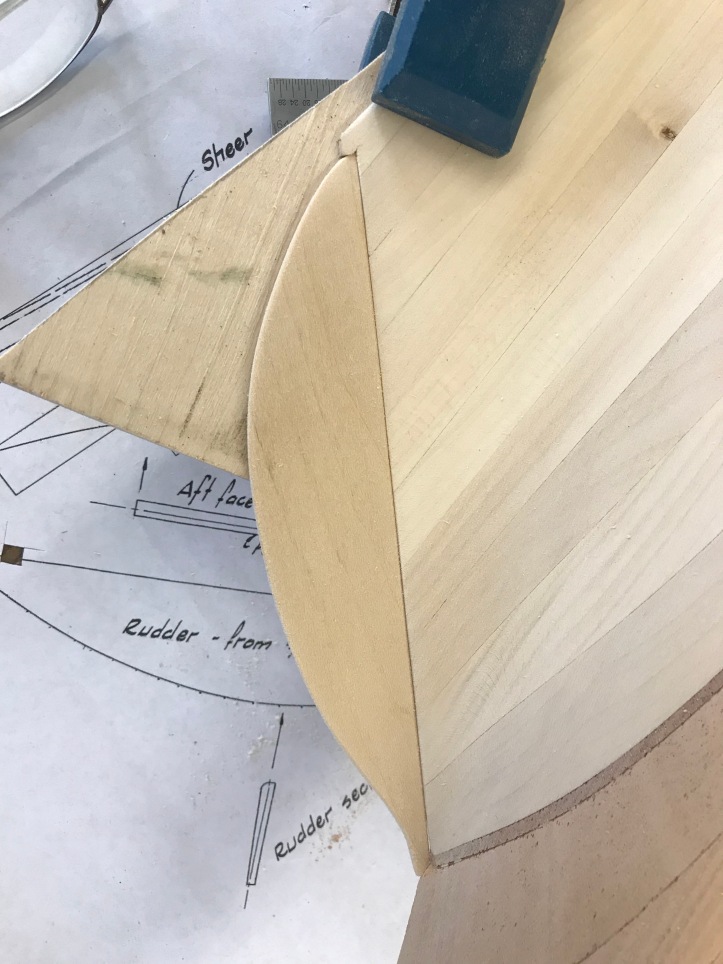
Next up was attaching a deck detail. The plank shown is ~1/16″ of an inch smaller that the existing top. It creates a railing line on the hull.
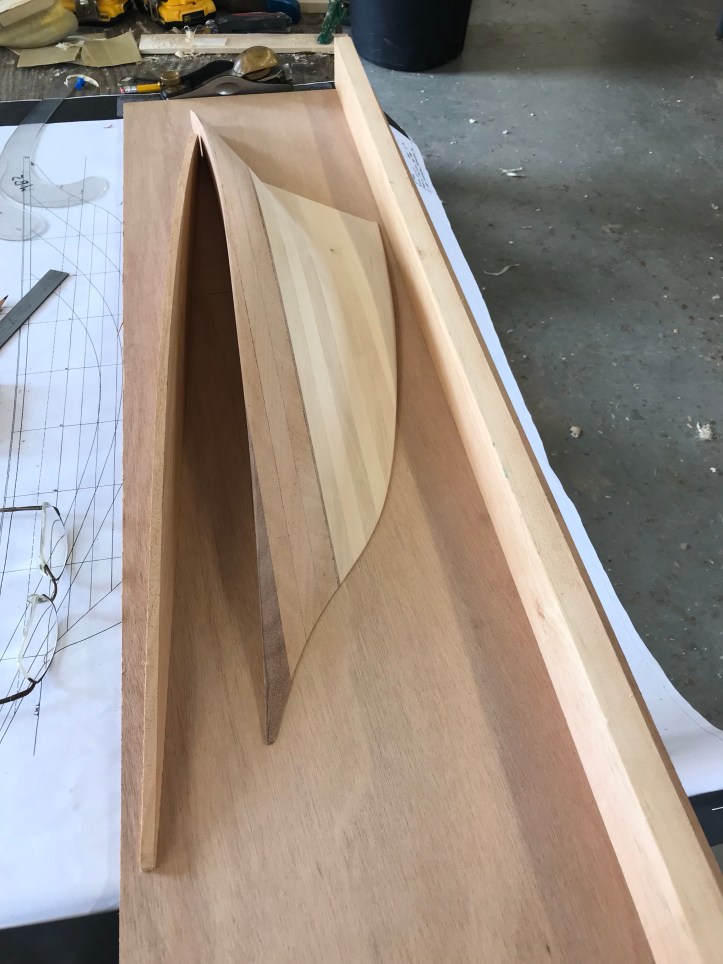
A clamping jig needs to be used to hold the hull and get the deck in place. When I make one at home – it will be a little stiffer than this one. Its important to clamp the deck on the inner and outer edges so that it is evenly held down.
One mistake I made (rookie) was the boat is pointing the wrong direction. During the initial glueup – double check the direction. There is no change in overall outcome – but if you want to check lines against the plans… you can’t..
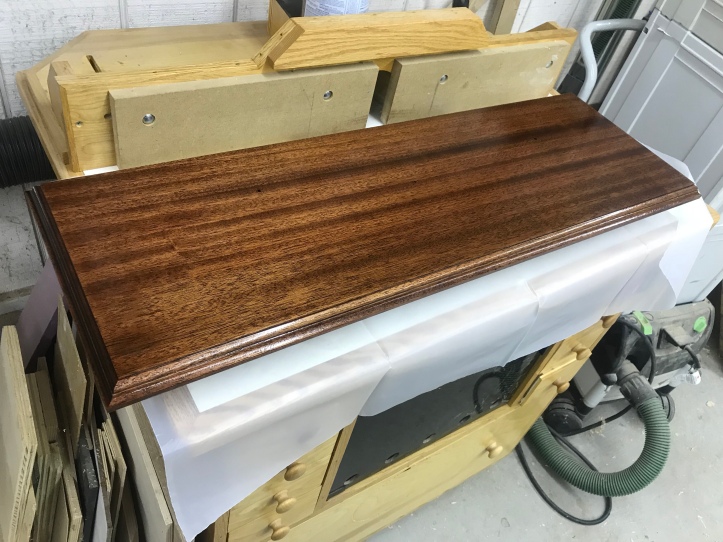
WBS provided a nice backer board – They didn’t have a router bit that I wanted to use for the edge, so I decided to do that work at the home shop.
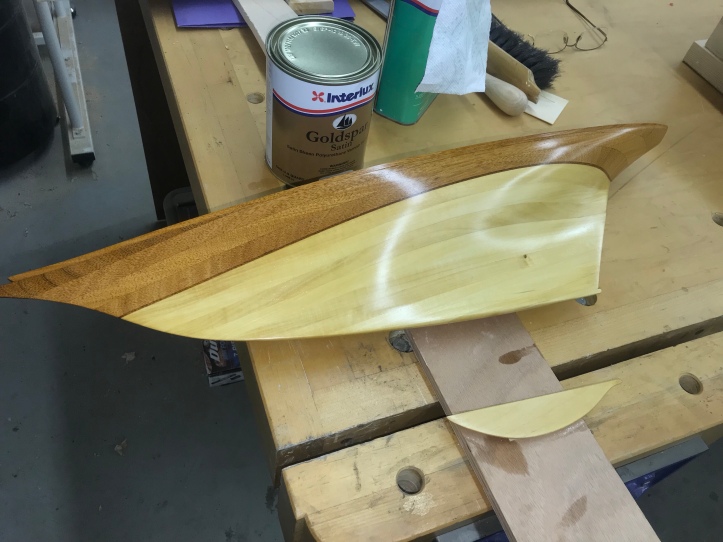
This hull is going to be finished bright – WBS used Interlux grain filling sanding sealer. I have not used it in the past – but it is a very nice product. A few coats with a quick sanding at 320 grit really put a nice surface on the model. The rudder is held on with double stick tape.
Back at the home shop – I finished with Interlux Satin varnish. I put on 2-3 coats to finish it off.
Backer board with a little dark stain, grain filler and some gloss varnish.
Completed..
Pretty good for my first model.
A few items for the next time:
- Point the hull in the direction of the plans
- Try to use planks all from the same board if the hull is not painted.
- The little wedge at the bow was not intentional
- Finish sand each plank before glue up for tight glue lines
- Be careful not to get too thin at the edges – mark a line and don’t sand through it.

You make model boats as well?! It’s like we are twins separated at birth. Ha ha. I made my first bread and butter hull back in 1990’s. It was very challenging. Nice work.
Thanks again – I’ve built a few real ones too 🙂