It does have the original control panel..
But it was converted to a Silkworm panel (or something).. there are many many holes.
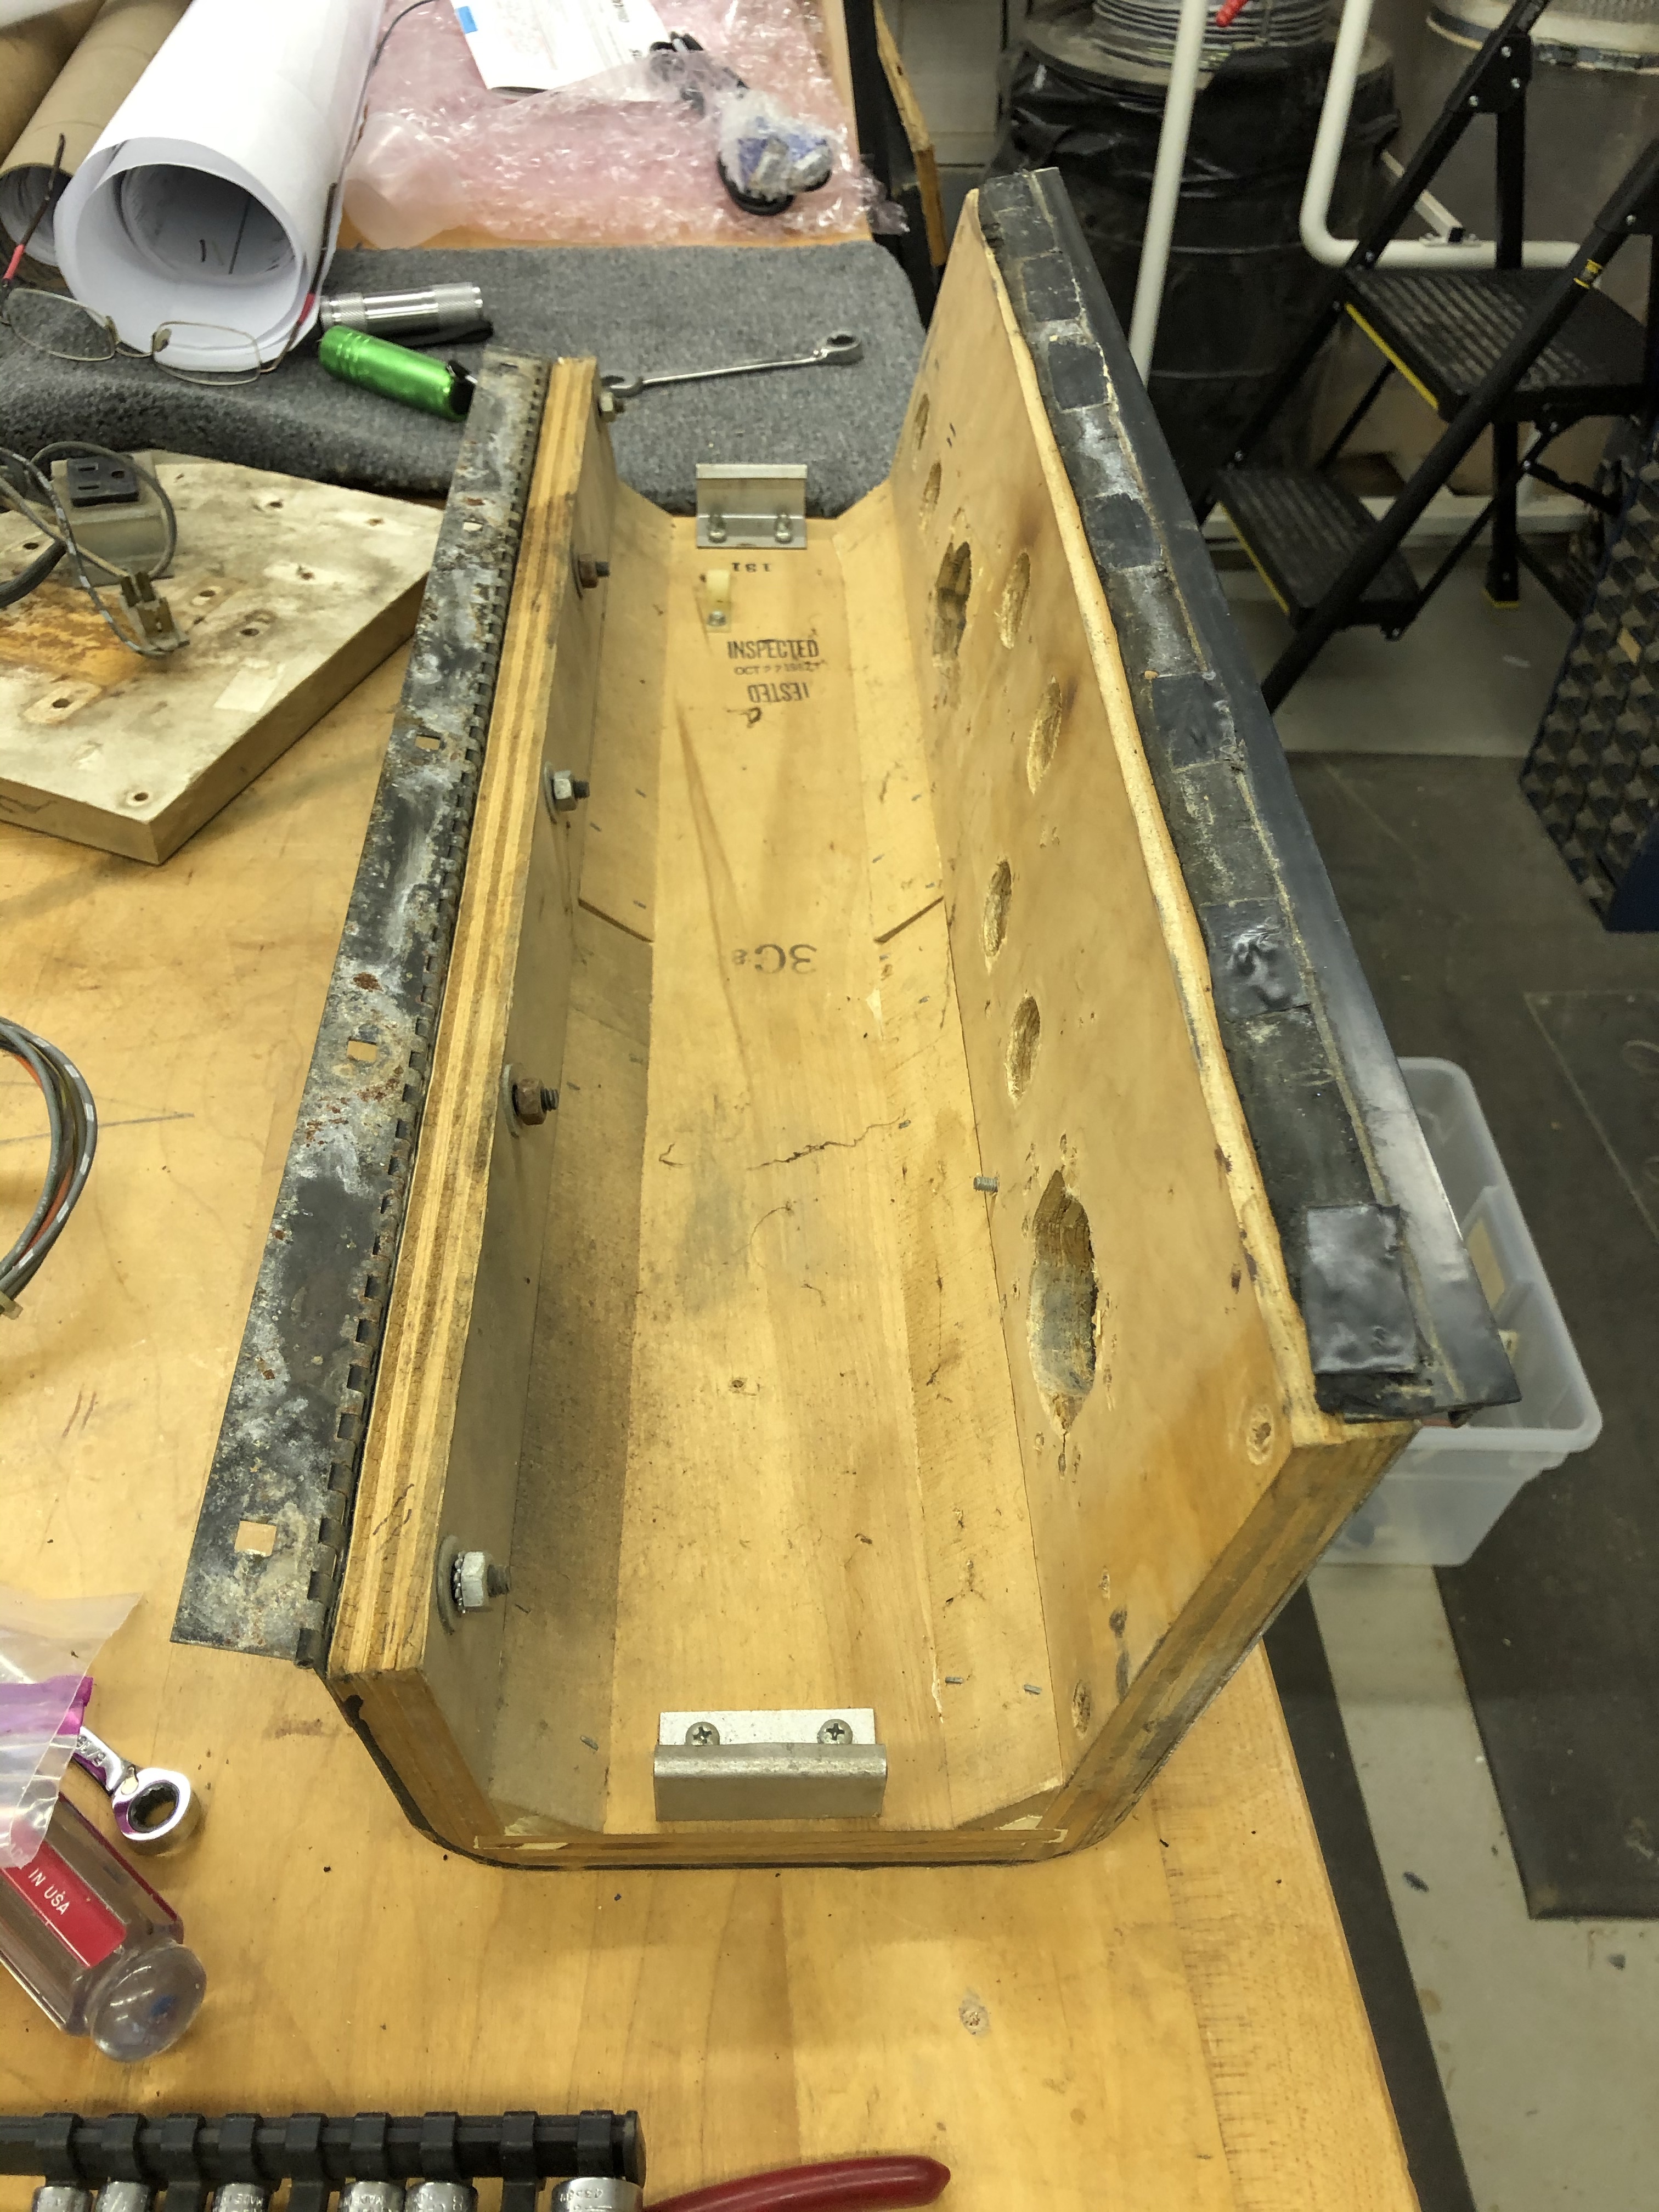
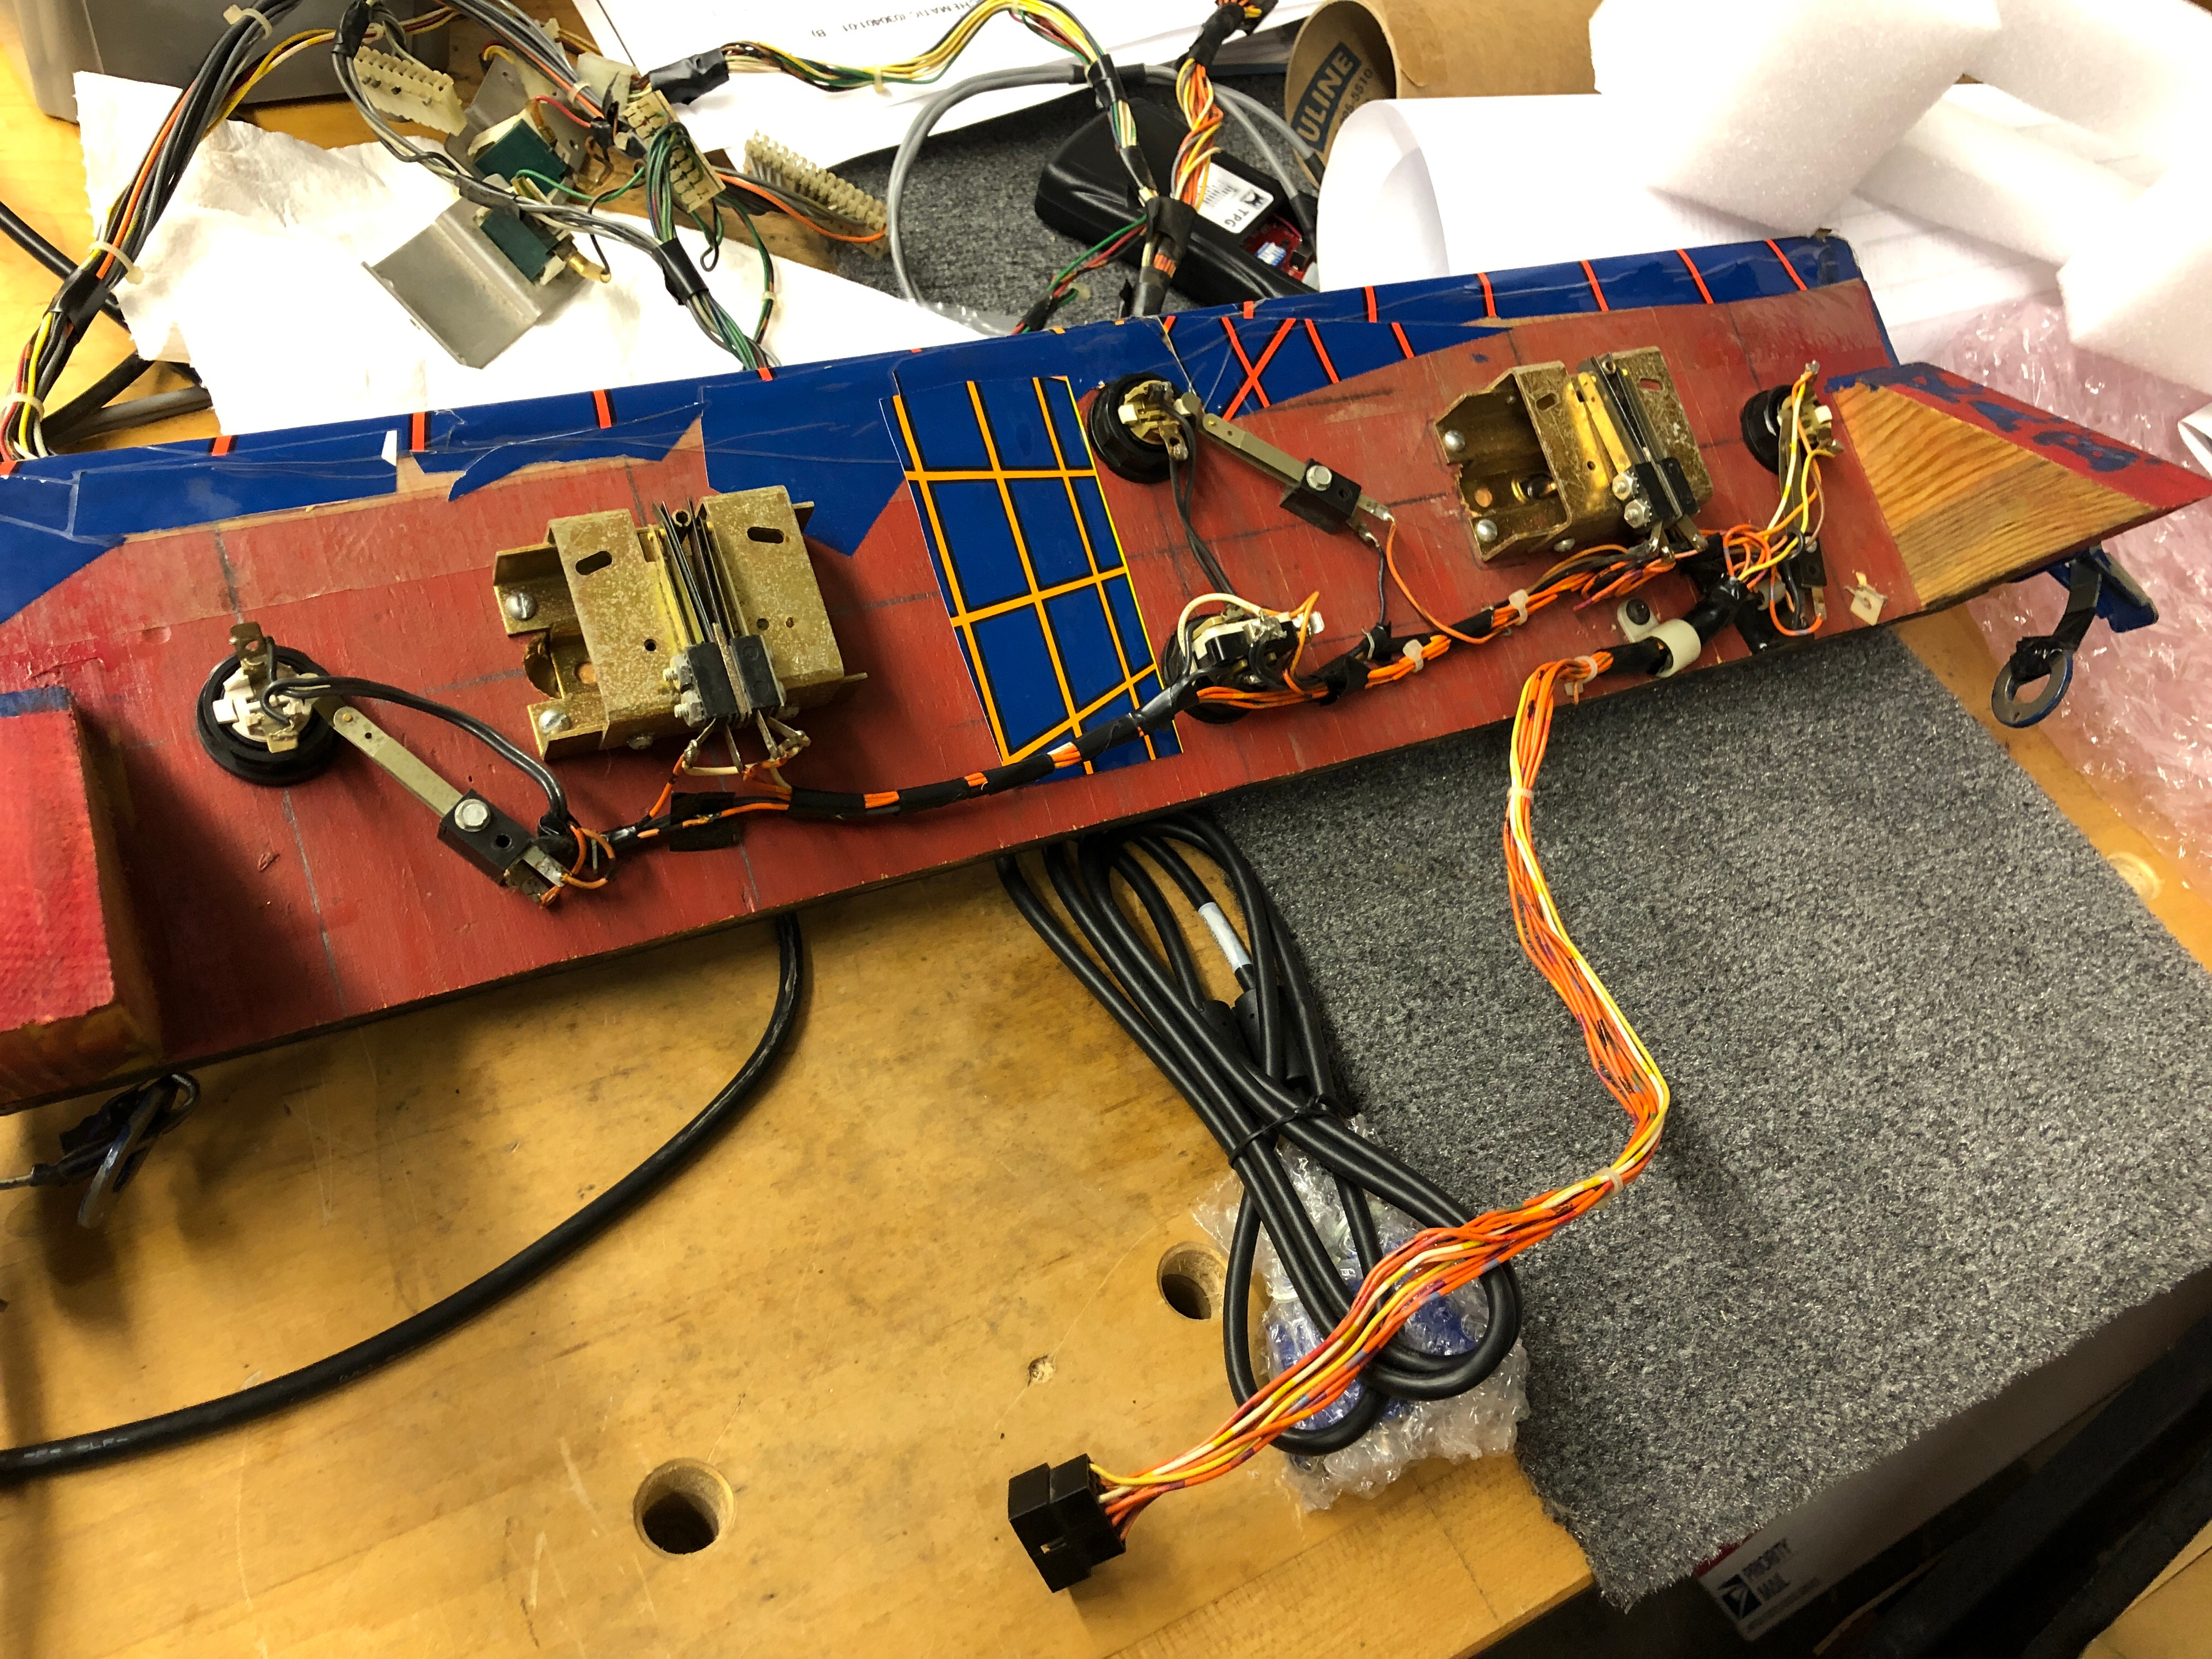
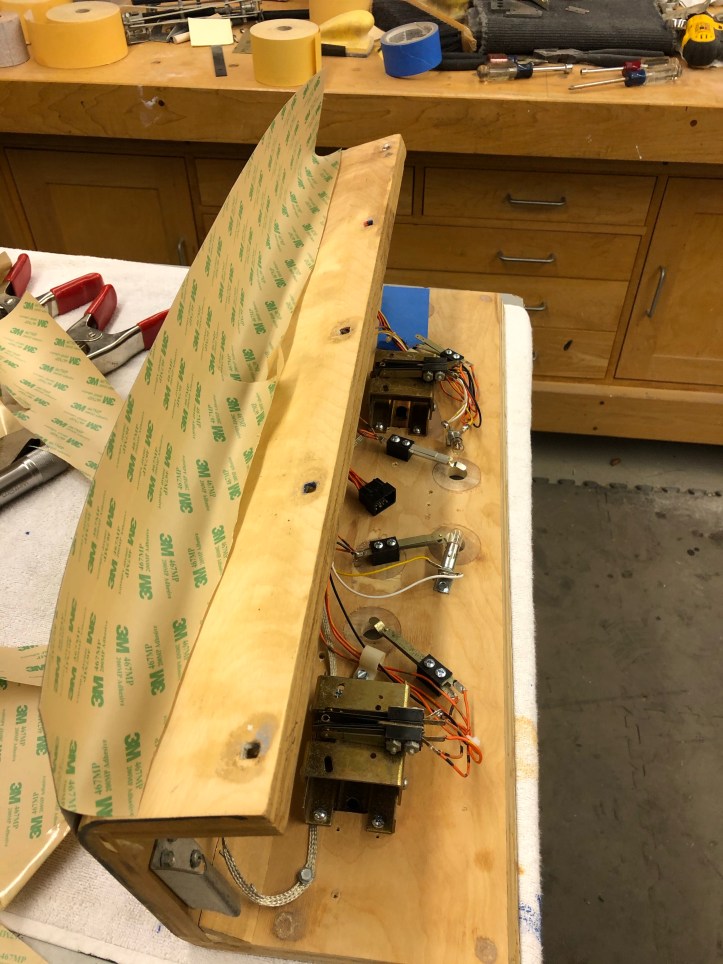
Here is the backside of the clip-on Joust control panel that was used with the Sinistar cabinet. A hunk of wood with odd buttons, etc. At least the joysticks and leaf switches seem to be original as well as a chopped up original wiring harness.
Back to the control panel…. The overlay must have been put on many years ago.. it is extremely tough and would not peel off. When I could get some of it – it started taking the grain of the wood with it…

So I used a standard heat gun and putty knife to get it off. I’m not 100% sure I’m going to reuse this panel – but I needed to get it uncovered so that I could measure it to manufacture a replacement.
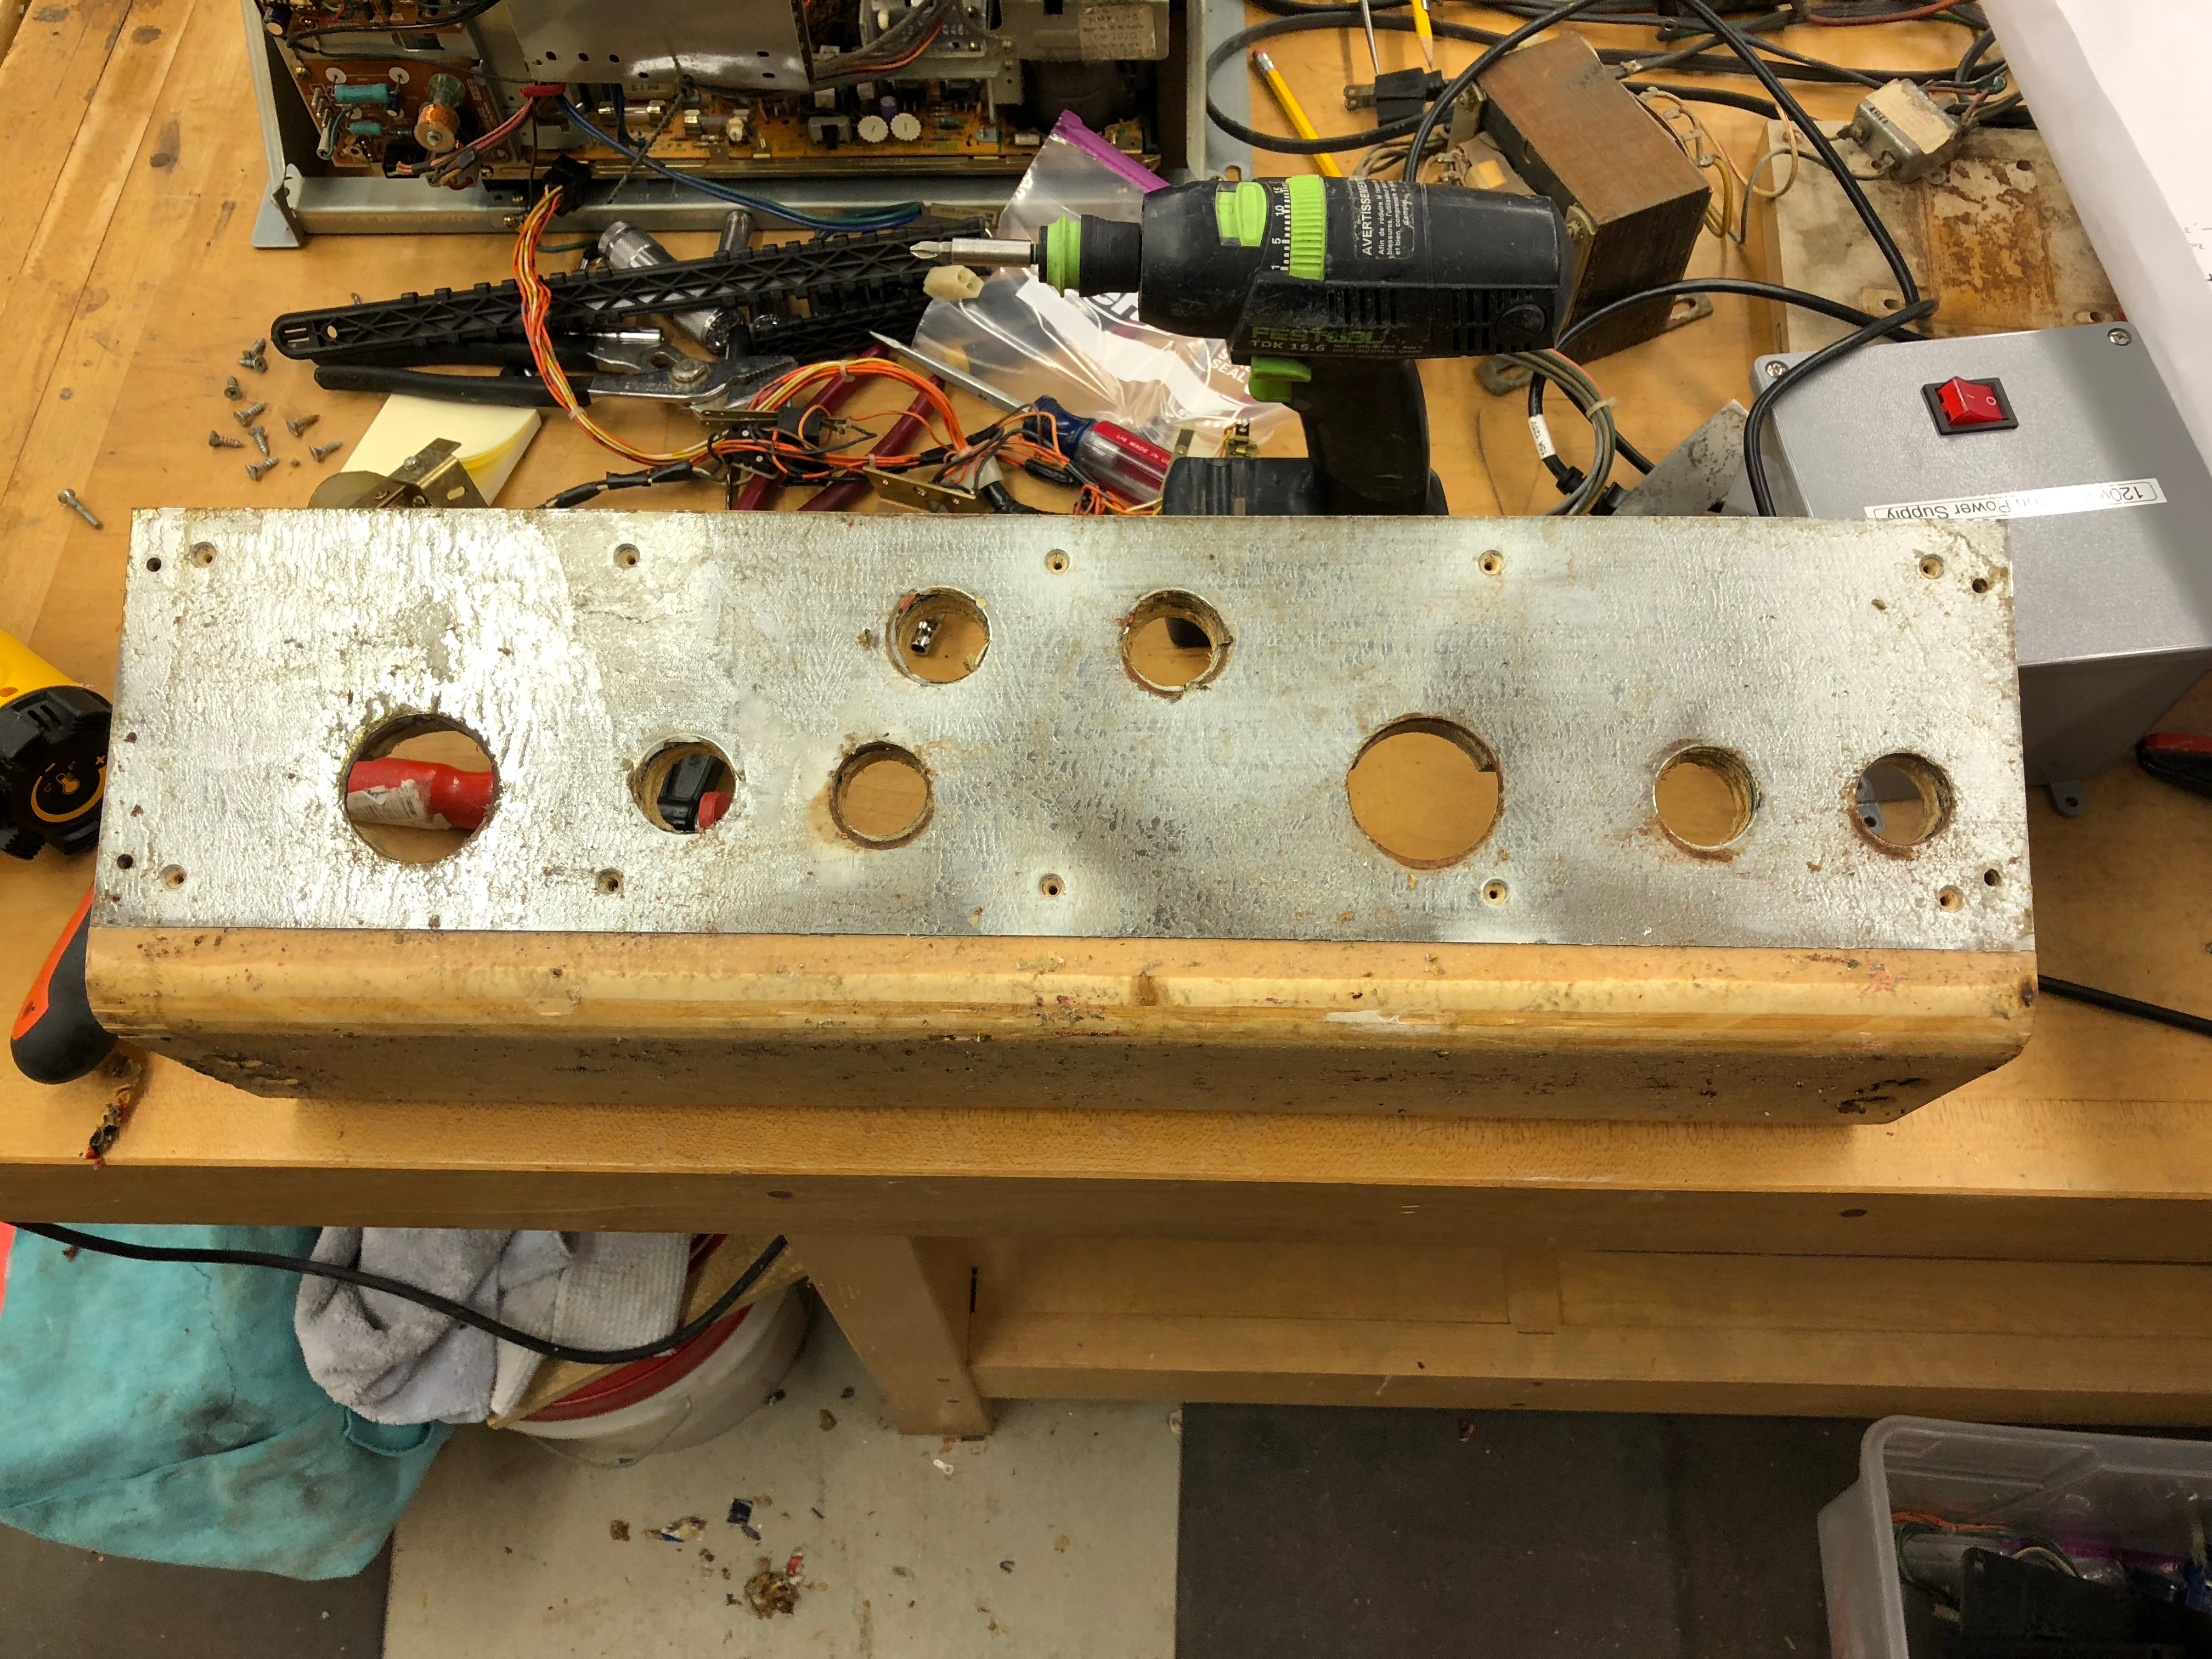
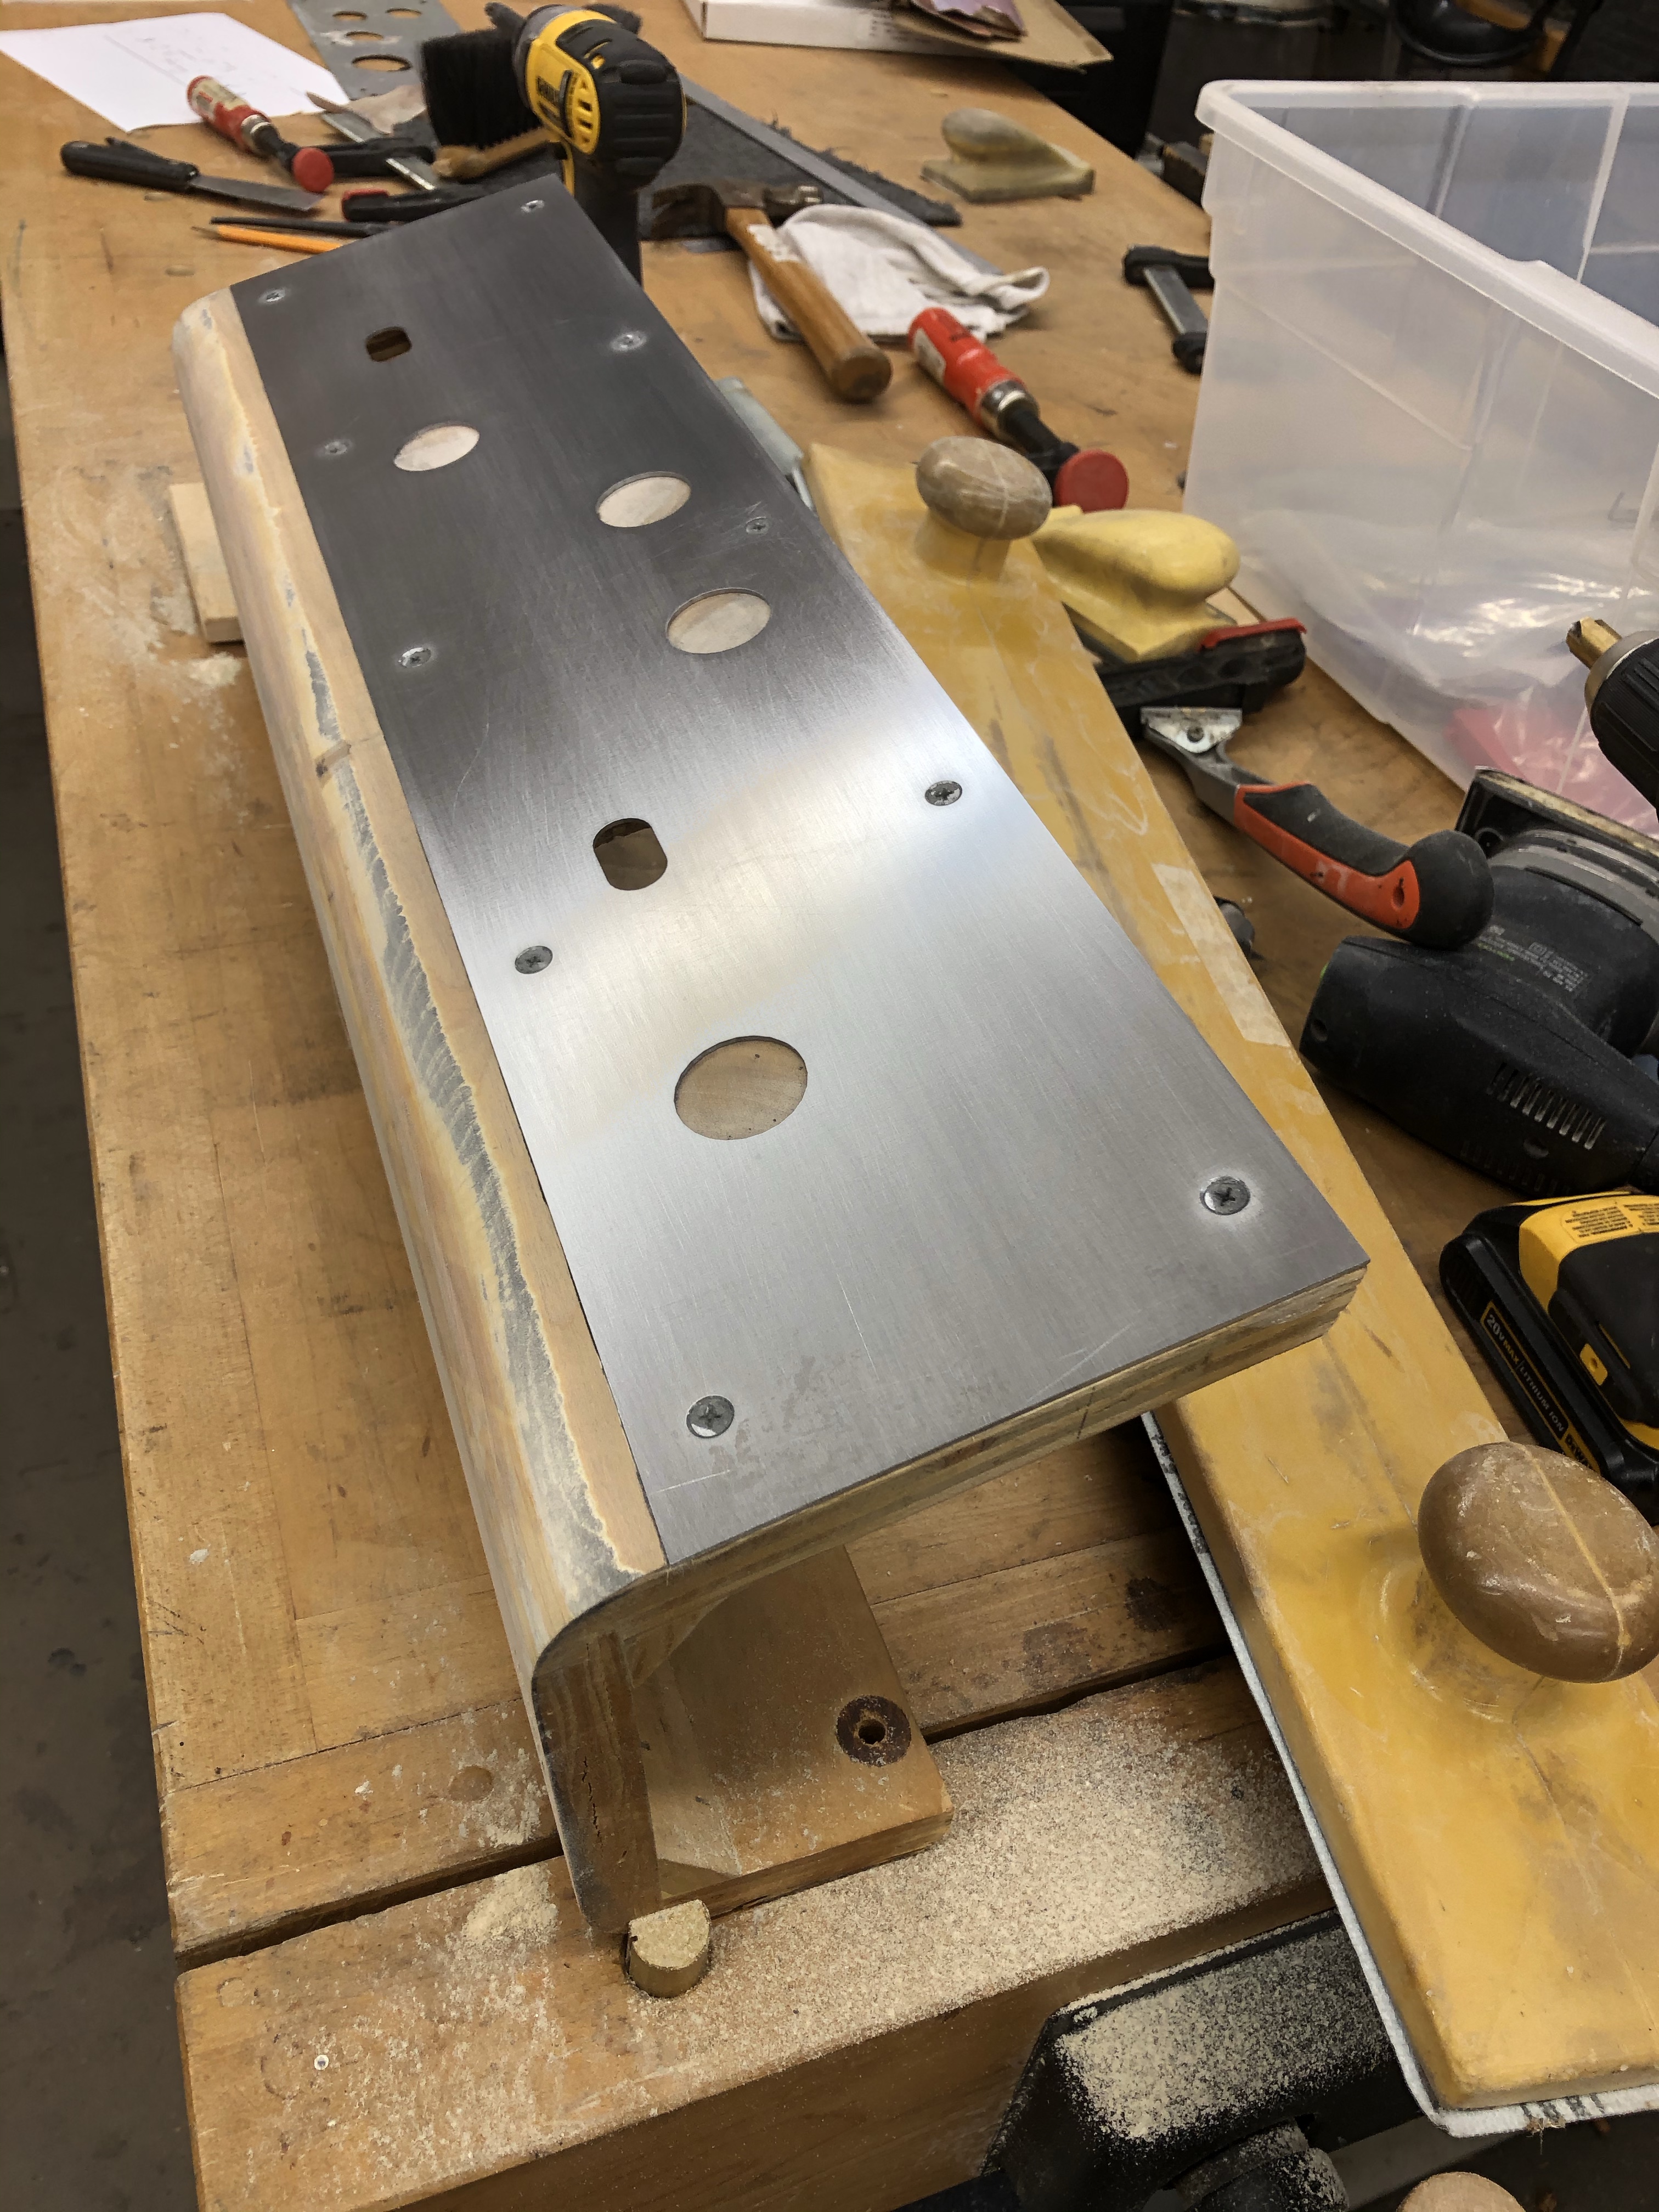
Joust’s panel has a 16G steel plate that is rabbeted into the top of the plywood. Four of these holes are original Joust holes – the rest are an abomination!

The good news is that all of the info I need to make a replacement panel I can get from this one. If I decide to repair this one – the 2 way joystick mounts are still in place. I’d have to plug and re-drill the 6 button holes to make them usable for the original style buttons.
At minimum – I’ll get an exact model of this CP designed in Sketchup. I’ve completed the hole pattern for the steel plate.

I went ahead and generated a full set of plans for the Joust CP.

Downloadable here: Downloads I’ve also ordered a steel replacement plate for the panel. Depending on how things go – I may make a few of these.
My original plan was to just rebuild the control panel. After spending time drawing it in Sketchup and re-looking at the original and trying to keep the original panel since it had a factory date stamp on the inside… I’m going to repair it.
From my panel designs – I was able to create a DXF file that I send to an online laser cutter. The steel replacement panel that came back is nearly perfect! I have to tweak a couple of items and I can reproduce the steel plate at will for reasonable cost.

But what to do with the Swiss cheese I already had. I’ve seen some hacked up repairs to this style of panel – but came up with something that will be pretty nice.

The holes are all 1 3/16″ – I see people trying to match the existing ones – which just means when you redrill for the buttons, you are compromising the plug you just made. Drill it oversize – here is a 1 1/2″ Forstner bit creating a clean hole for the plug.
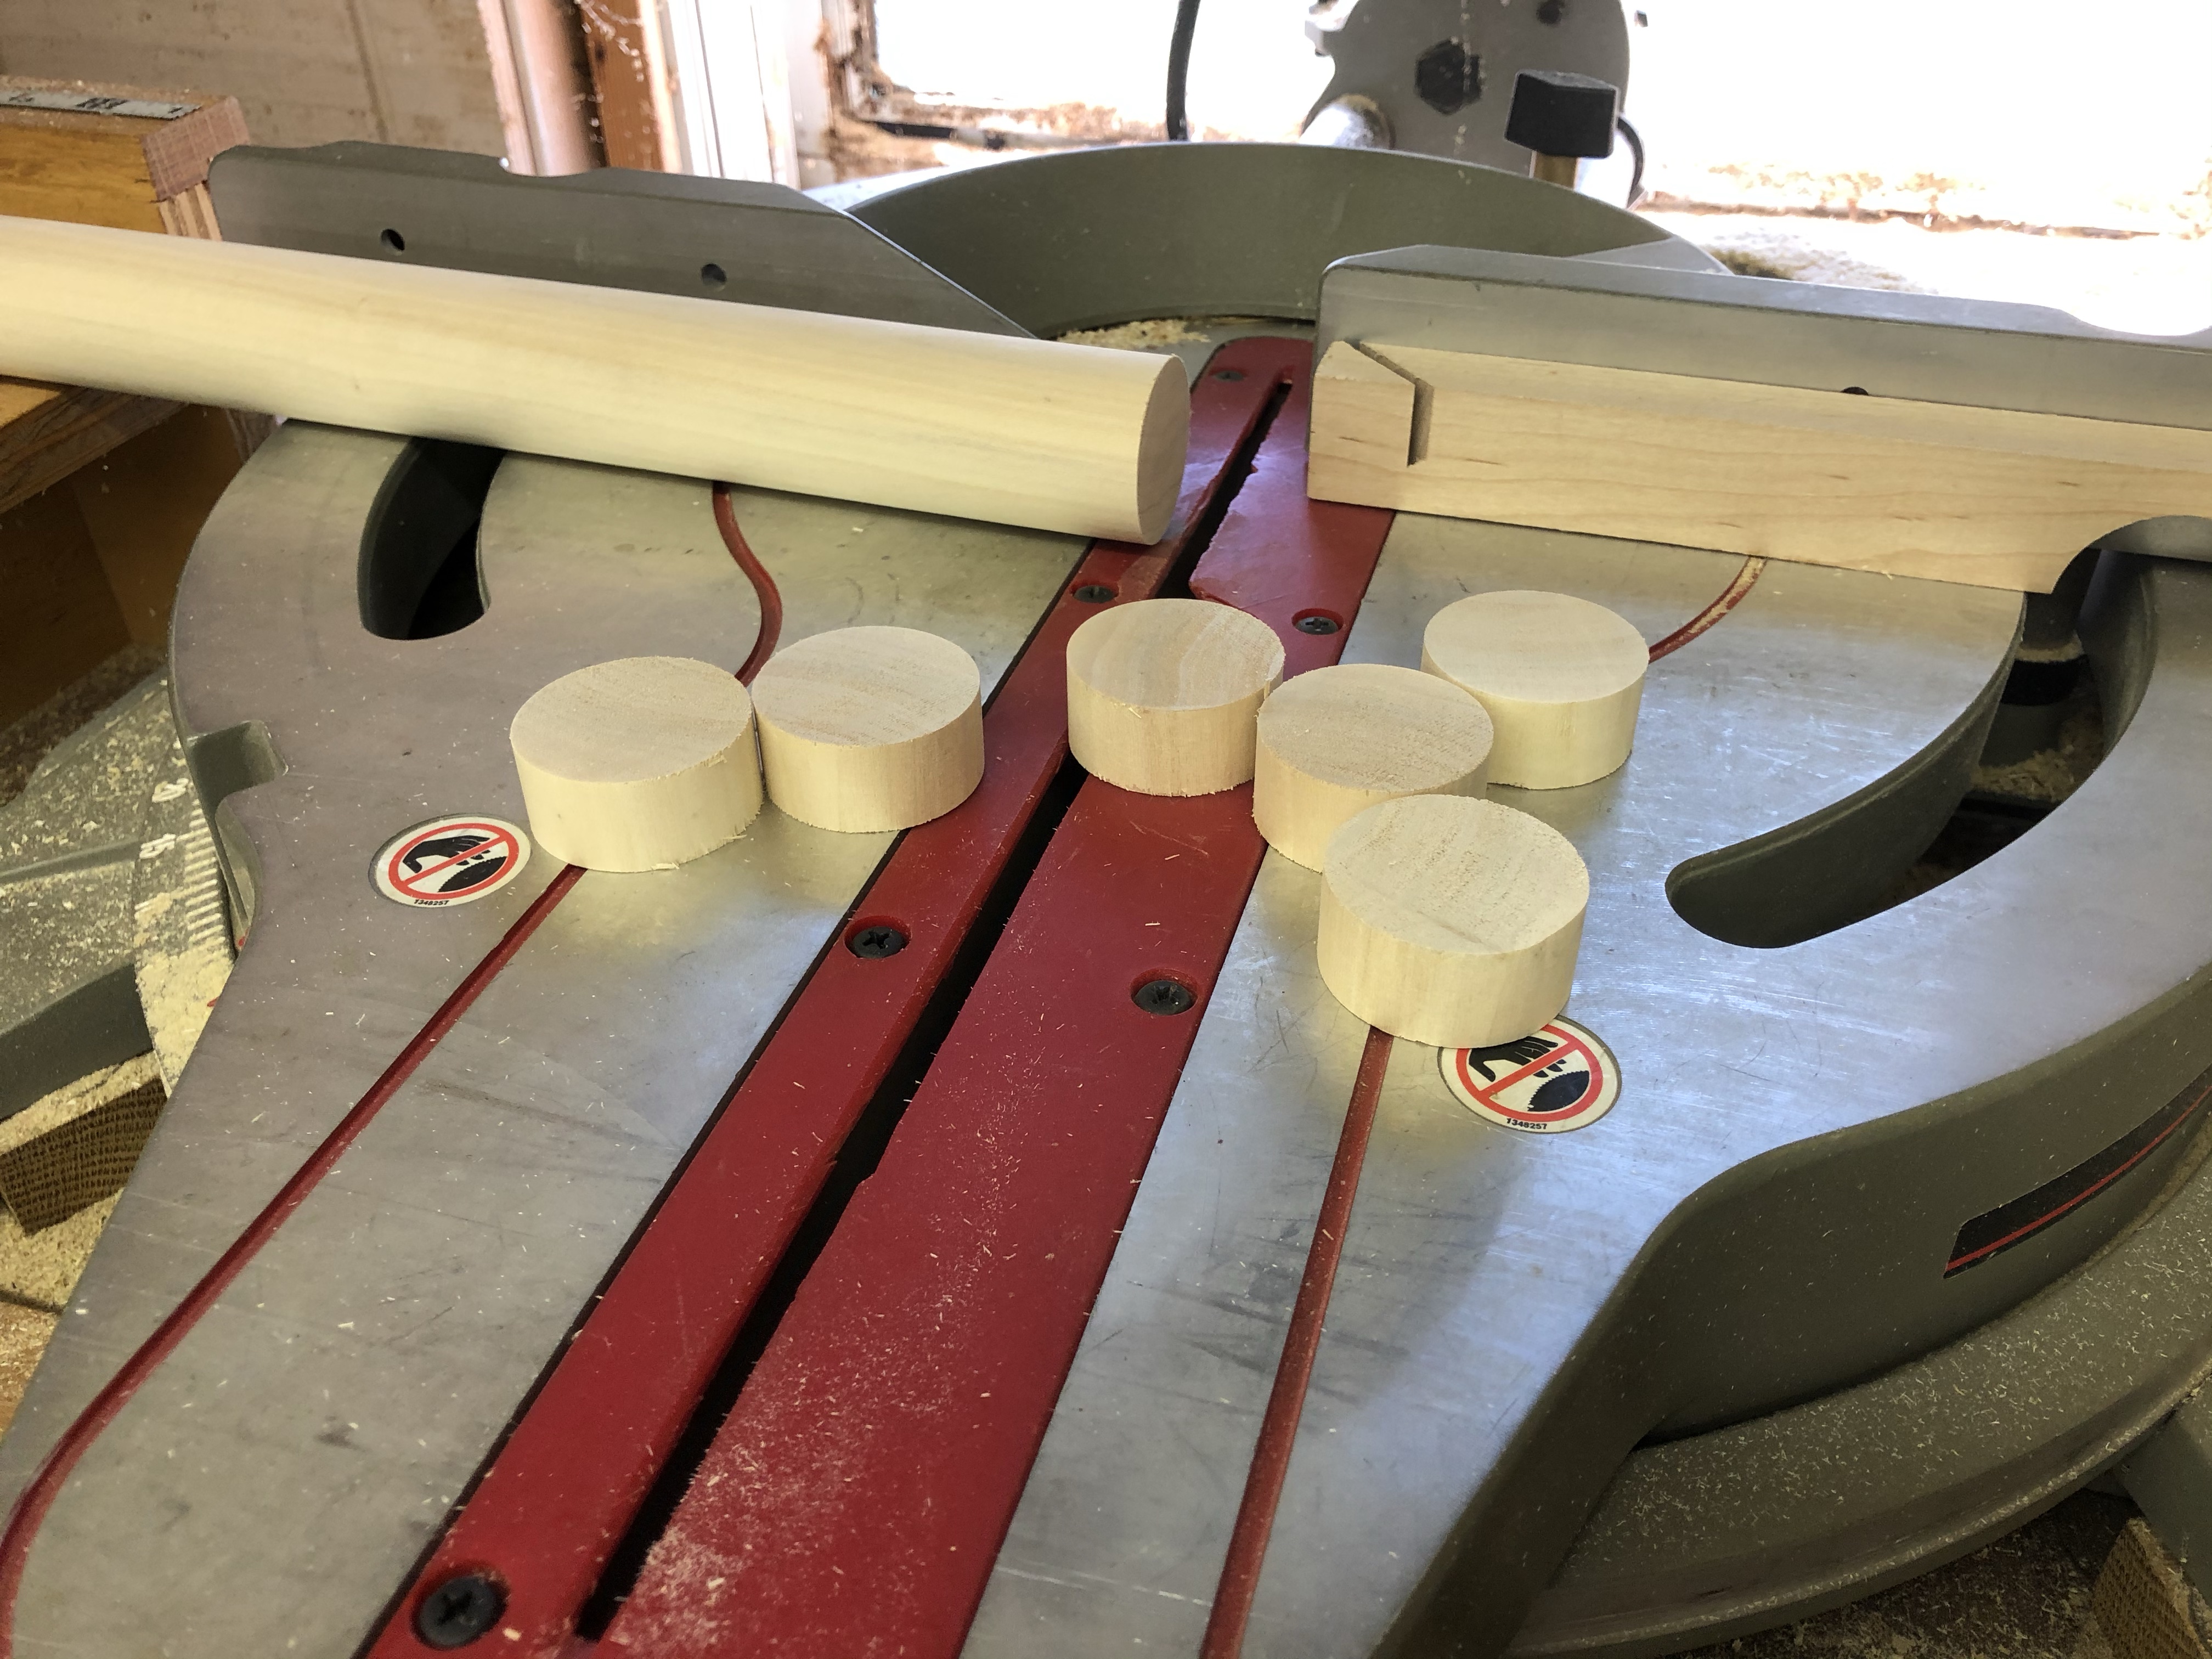
Then head out to your local hardware store and get a 1 1/2″ dowel. Here it is with a stop block set to the thickness of the panel.

Clamp it down to some plastic and epoxy them in place. The joystick openings are supposed to be square. However the mounting plate and blind nuts make the round part not relevant. This will get sanded smooth and cleaned up.
The hard part is getting the adhesive off from the old overlay. I’ve gone through every solvent I have and the best I can do is get it kinda gummy.. Paint stripper and a putty knife have worked the best – I give it a “C-” But nothing else has worked.

Which brings me back to the control panel. I set this aside a while back – but its the last part standing. First I cleaned up and flattened the area that’s below the metal plate now that the swiss cheese has been removed. I also removed the last of the CPO adhesive that is incredibly difficult to get off. But its off.

Another test fit of the plate to make sure it sits flat.

I broke out my longboard from my boatbuilding days. Its just a long flat sanding block. Its useful in that you can’t sand humps into your work. It cuts the high spots while leaving the low spots alone. You can’t do that by hand or with a small sander over a large area. Its most important around the front curves since any high/low areas along that part will result in the CPO having puckers and hollows that may show.

There were a few spots I wasn’t quite sure I liked – so I skimmed on a thin filler coat of thickened epoxy to run over with using the longboard one more time. After this is finished I can attach the sheet metal face, drill holes and wait for the CPO to show up. I may put all of the controls/hardware in place and test it since the CP harness is a mess and needs some repair. It will be easy to remove if needed.
I long boarded the filler one last time with the faceplate in place. The result is a perfectly fair finish with no humps and no possibility of imprinting at the seam. The CPO material is pretty thick, I don’t expect it to show the screws. If I’m even slightly worried they will imprint, they will get a quick skim of Bondo. But they were not filled originally.

This next step will take a little explanation. But essentially I need to drill a 5/8″ hole, centered inside a 1 1/8″ hole, which is delineated by a 1 3/16″ hole – got that? I’m certain there are a dozen ways to do this – but I decided to make a tool to make it stupid simple, no measuring, no thinking, no tools needed other that a drill press. Because I have a lathe – this is simple. Step 1 – I mounted a 1″ dowel in the lathe and drilled a hole in its center using the tail stock and a drill bit (not shown)
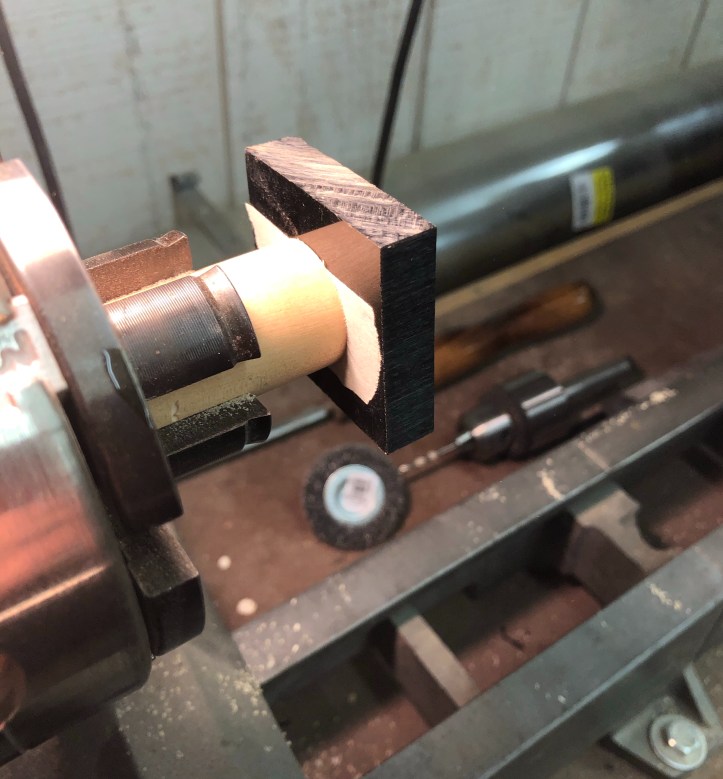
Here is a small square of 1/2″ thick acrylic. I have double stick tape on the back holding it to the dowel and a screw through the front to hold the block to the dowel. It needs to be held tight to turn the square into a circle.

Here is the drill centering tool turned down to 1 1/8″. All those shavings are the square part that is now gone. Now it safe to remove the screw (in fact – its necessary) I have the double stick tape there to hold on this disk.
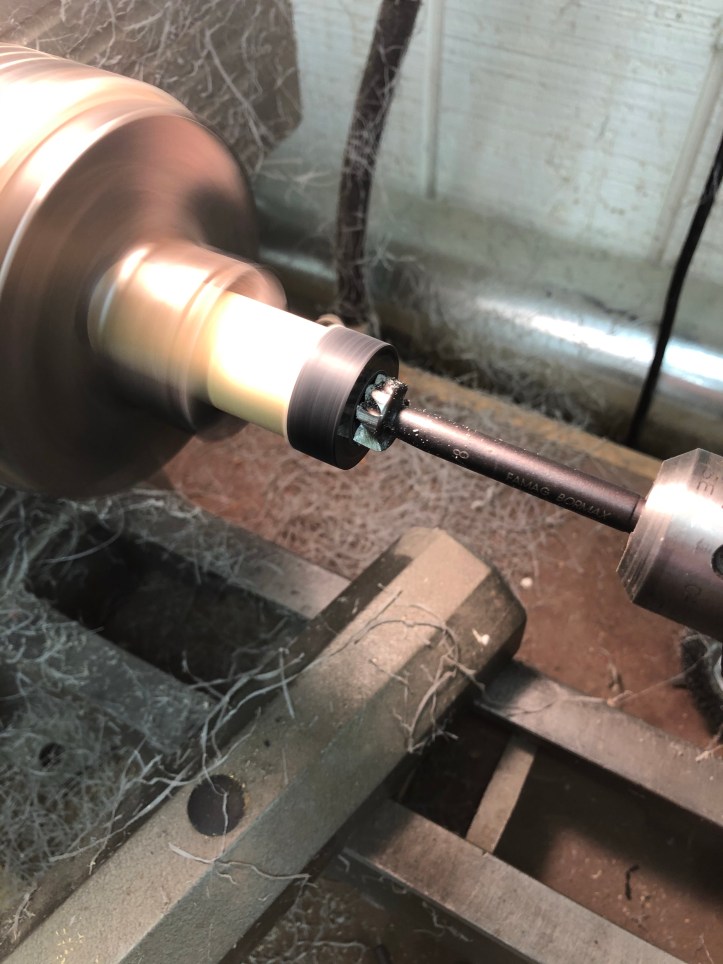
Here is a 5/8″ Forstner bit mounted on the tailstock. The lathe spins the blank and the bit is stationary. I slowly crank it in to drill the hole – perfectly centered in the blank.

All to make this little acrylic donut. All in this took under 20 minutes – but why?

Here is the control panel – steel plate in place. The holes in the steel are exactly where the originals were. All I need to do is drill 1 1/8″ holes with a centered 5/8″ hole for the buttons – right? If you miss by a little on the small hole – the button won’t go in.. or.. you can drill bigger (sloppy) center holes.. or measure and find a center point for each button hole, drill a chaser hole.. There are many ways.. But this way provides (for me) a fast, simple, no measure way to do it.
Clamp the CP to the drill press and drill all of the large holes centered in the metal cutouts 1/4″ deep.

The metal hole is used for alignment and is just slightly larger than the drill bit. Repeat for all the holes.

After all the large holes are done – go back with the centering tool – use the small bit and drill all the way through the panel.

Perfect every time.
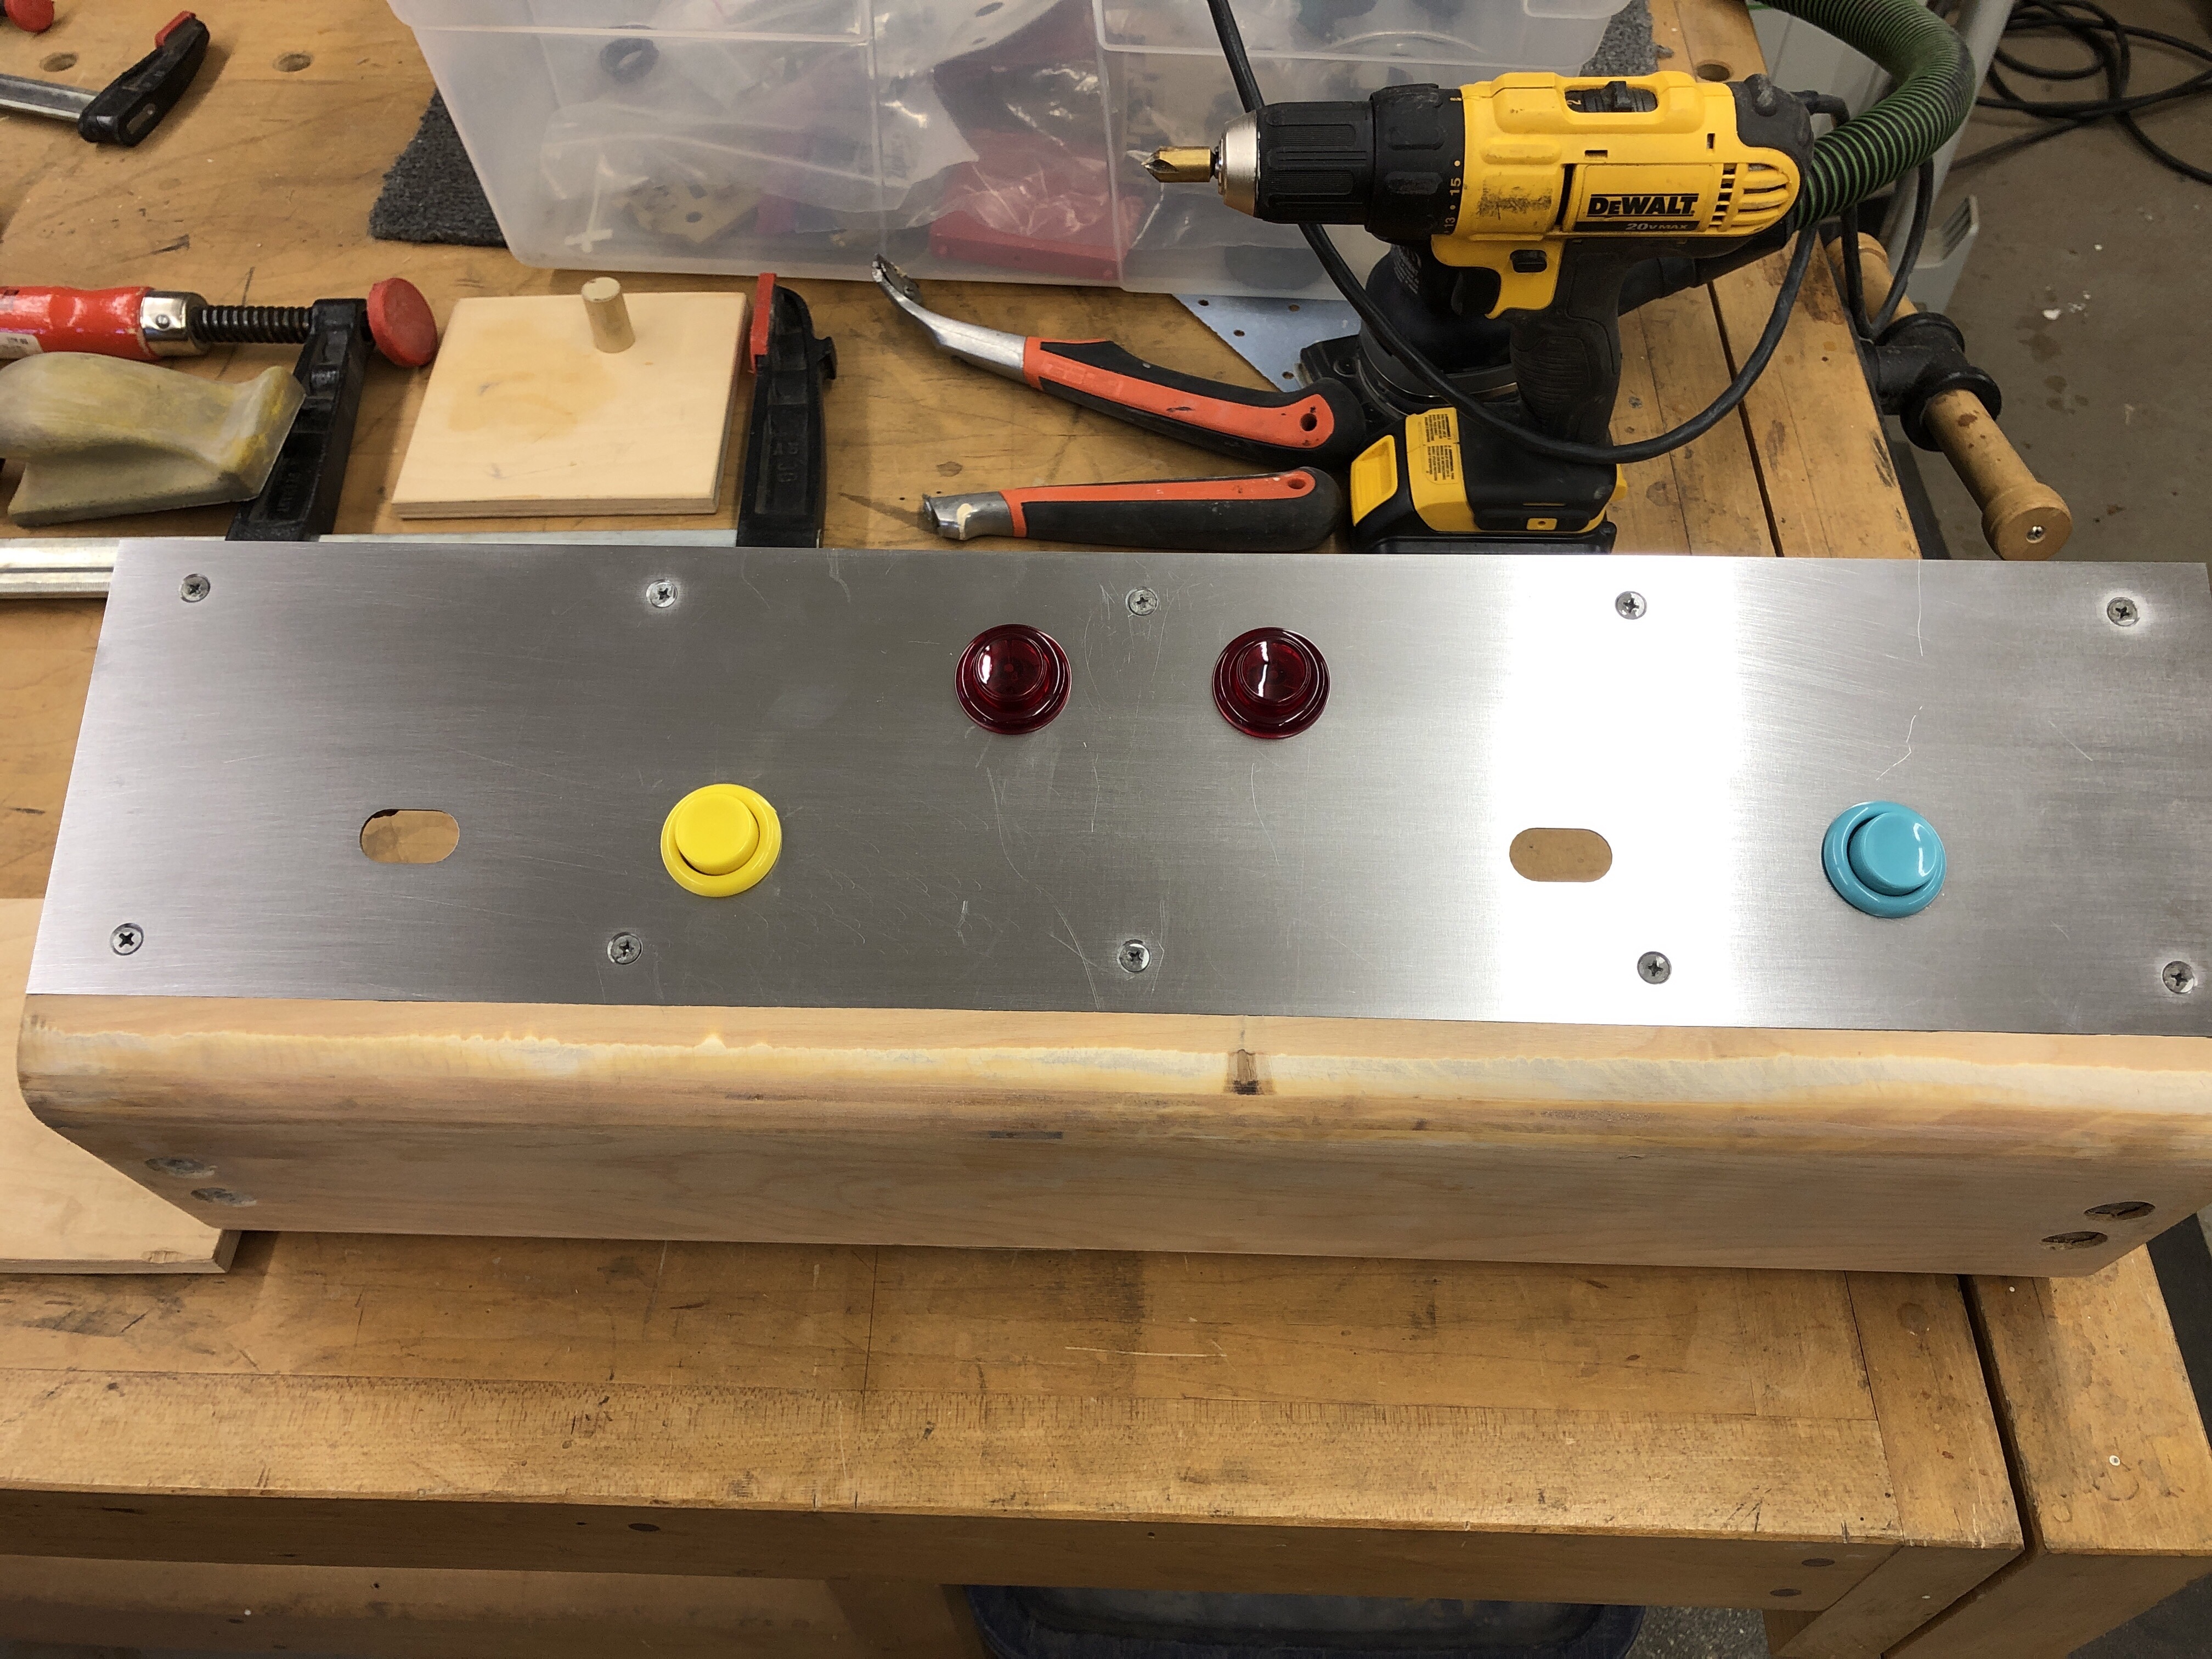
Buttons are getting a test fit. The new ones have a little flashing left over under the rim. They need to be trimmed with a razor blade to sit flush to the surface.

My harness was a disaster. More crappy black tape, Player 2 start is a micro switch and all around ratty wiring from the original panel hackery. The diagram was helpful – but it was more difficult that I thought to get a picture of a real CP inside of a Joust. I finally found a restoration video that had a clear view that I screen captured and printed as a reference.

Got all of the wire resorted. Had to add a few wires that are not color matched to the original (unfortunately). Waiting on a Player 2 – Start leaf switch that I didn’t realize I needed. I also need to get some of the braided ground strap that goes all over Williams cabinets for the CP. There is supposed to be some in there.

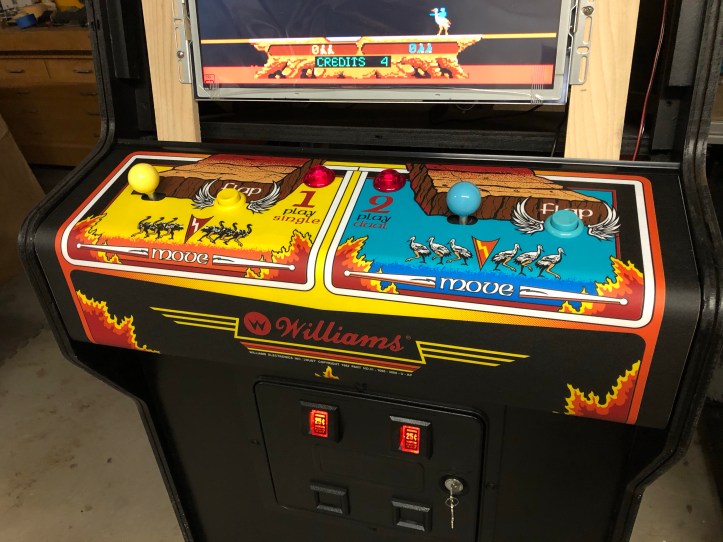
The good news is it works great! The sticks have a little play in them – but its not unreasonable. My CPO from This Old Game will be here this week so I can finish the Control Panel. May need to wipe it down though.. I’m already getting my greasy hands all over it.

I’ve been working on another restore for the past few weeks but got to a point where I could get back on my Joust. The CPO from This Old Game is absolute top quality. I’ve watched videos and have seen people struggle to put these on. You can make it easy on yourself if you try this way.
First – clean the control panel with naptha or acetone. Something to get any residual oils off the surface.
As seen above – line up the CPO to the exact spot along the top edge and backlight any button holes to make sure they are in the correct spot. Use some wide tape and hold it in place. Double and triple check to make sure you have it in the right spot because you are not likely to get a second chance. I then use spring clamps to make sure nothing shifts. You want to make sure that it wraps all the way around without wandering off course. It should be centered and square all the way around from top to bottom.

With the tape and spring clamps in place, roll back the top edge and peel off the backing material. Cut off the top 1-2 inches of the backing. I use gloves for these ‘sticky’ steps for a couple of reasons. First – you will not leave fingerprints / skin oil on the adhesive backing! It will stick better. Second – you won’t be afraid to grab the CPO where you need to because the gloves won’t cause any issues.

Use a plastic spreader and stick the CPO down working from the center to the edges. You want to make sure there are no bubbles and it lays flat. Try to keep the CPO sides off the control panel so that it is rolling down into position from center to edge. If you work from the center out you have the best chance of not having issues.

Once the top part is done, roll the CPO back and peel down a comfortable amount of backing and cut it off (I do 4-6 inches). Pictured here is the CPO rolled back before sticking it to the lower section of the control panel. You want to slowly use the spreader and press from the center out and continue down the overlay making sure there are no wrinkles or bubbles.

Using the heat gun to warm the CPO will assist in making it pliable for bending around the corner. Set the temp on the gun and test the temperature on your forearm. If its too hot – turn it down! You want hot hair drier temps – not melt your CPO temps.. At this point you can pull and press the CPO with your gloved hand. Center to edge, top to bottom. Follow up with the spreader to make sure it all gets pressed into place.
Last section – peel it off and more of the same. You can pre-warm the CPO while it has the backing on if you find its helping.
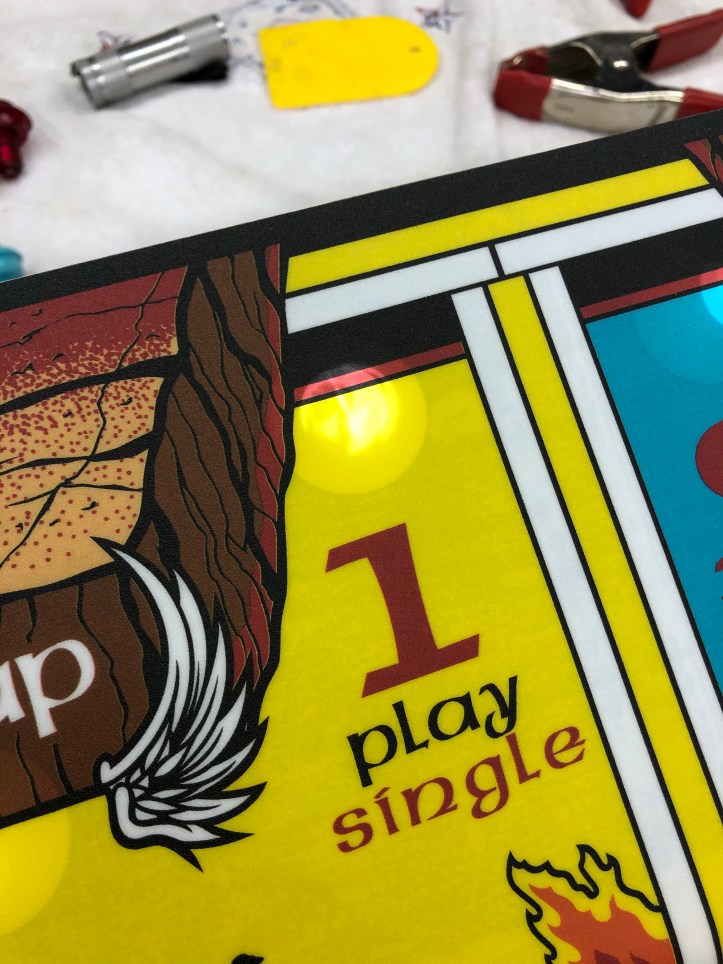
Once its on, backlighting each hole will help you to trim out the buttons. Use a brand new blade in the Exacto.
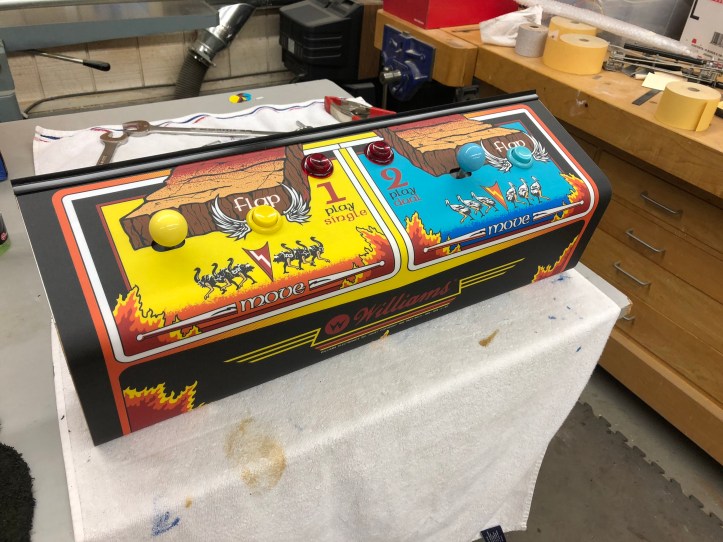
Buttons and trim strip in place.

Nice control panel overlay. Colors are fantastic.

[…] Joust – Control panel […]
So clean! Great work! I have been looking into getting a laser-cut plate for my restoration. My C.P. must have been drilled for 3 other games. It looks terrible.
Thanks – glad you got some good info 😉
Know it’s been a while since you posted this, but it’s exactly what I’ve been looking for. Downloaded and sent you a wee donation, thanks.
Does the control panel have 2 metal strengtheners that go on the inside? Do you know their sizes by any chance?
Also, is this the same design used for Robotron and Stargate, do you know? Do they have metal base plates as well? Would love downloadable drawings for those as well, hint, hint, lol.
Thanks again,
Phil
I’ve seen the CPs with and without the metal brackets. Mine did not have them.. You should be ok.. and thanks again.. very nice of you to support the site.